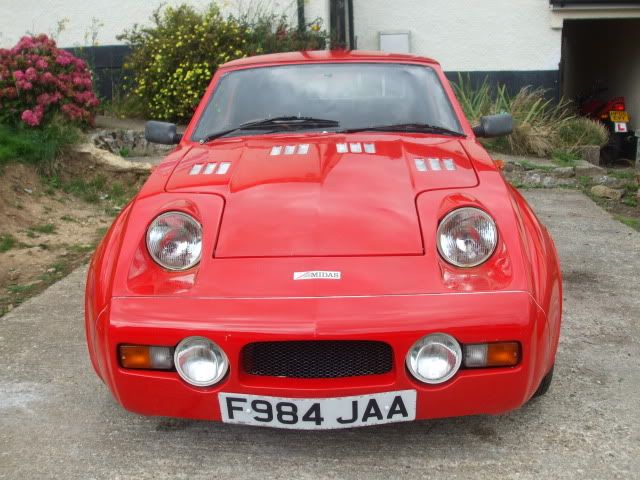
Mk 1 Project Zippy. Looking Like a Car.

If you're taking on the task of rebuilding the whole Midas, please put the project in here.

Moderator: The Midas Forum Staff

Re: Mk 1 Project Zippy (Picture Heavy!)

Postby MrBounce » Sun Oct 19, 2014 4:43 pm

There are numerous ups and downs of having a project car, and I have experienced both ends of the spectrum over this weekend. Let's start with the rubbish. At some point in the 80s Austin Rover thought it'd be a very good idea to slightly change the design of their A+ drop gears. They did it JUST enough to make sure that the two different types didn't mesh together properly. Off I went to see Ted at the East Anglian Mini Centre who kindly swapped the primary gear type I had for the one that fitted my idler gear. He even thanked me for cleaning the other one for him. Cheeky bar steward! Once back home I was able to reset my primary gear end float using the new (and expensive) thrust washer I had to buy. Luckily there was only one thou' difference between the two primary gears so I was able to get 0.004" end float - perfectly within the 0.003-0.006" recommended tolerance. Next on went the flywheel housing, so I taped up the primary gear, fitted the clutch oil seal and gently lowered it onto the engine, having chucked on a gasket with some Hylomar. A little persuasion with the rubber mallet and all was happily bolted up.

Next was the clutch and flywheel. I first of all made sure the engine was at TDC. Then the backplate, clutch plate and flywheel went on, followed by the stepped washer. I locked up the flywheel using an old engine bearing (works a treat) and torqued it up. Then had to take it all off again because I noticed that I hadn't put the split pin in the bottom of the housing. I shouted rude words loudly. A lot. After take 2, I was able to put the clutch pressure plate on having made sure all was lined up, then finished it off with the clutch "wok" and the breather.

There's still some minor stuff to do, but I am extremely happy to say that I have just built my first engine. And I feel AMAZING!!

Expensive thrust washer. Worth it in the long run.

Image

That's better than 12 thou!

Image

All taped up

Image
MrBounce
 
Posts: 661
Joined: Mon May 16, 2011 9:16 pm
Location: Suffolk

Re: Mk 1 Project Zippy (Picture Heavy!)

Postby MrBounce » Sun Oct 19, 2014 4:44 pm

Housing on and clutch oil seal fitted.

Image

Flywheel on, just before taking it off again - split pin was missing!!

Image

Clutch all fitted and ready to go.

Image
MrBounce
 
Posts: 661
Joined: Mon May 16, 2011 9:16 pm
Location: Suffolk

Re: Mk 1 Project Zippy (Picture Heavy!)

Postby MrBounce » Sun Oct 19, 2014 4:44 pm

I built this. An enormous sense of achievement. I feel proud of myself!

Image
MrBounce
 
Posts: 661
Joined: Mon May 16, 2011 9:16 pm
Location: Suffolk

Re: Mk 1 Project Zippy (Picture Heavy!)

Postby b1zbaz » Tue Oct 21, 2014 7:29 am

You should be proud that looks fantastic well done I have a feeling your car is gonna win best in show
b1zbaz
 
Posts: 787
Joined: Mon Jun 28, 2010 8:38 am

Re: Mk 1 Project Zippy (Picture Heavy!)

Postby MrBounce » Sun Oct 26, 2014 5:57 pm

Thank you Baz - that means an awful lot! 8-)

The engine & gearbox combo are now off the stand as I was a little concerned that the bolts being used were under far more strain than they were designed for. Andy came over one evening and I built a little trolley for the engine, then we lifted it down. The alternator mounting bolts had indeed bent - I reckon they would've broken after a while. Note to self: when building a trolley, make sure that the castors you use can take the weight. The trolley now consists of wood, 3 wheels and some broken plastic...

I have practically finished off the heater; Having repainted the casing I have applied new foam to the matrix and the control flap then screwed it all back together. I still need to sort the switch panel but I can't make up my mind whether to re-use the original marking or get my own? I will have a think.
There are still some small bits needing work on the engine; a new oil pressure relief valve & spring went in with a new copper washer, and I have since turned my attention to the oil filter housing and pipe. Of course these were for want of a better phrase "bloody filthy" so I spent about half an hour giving them a good going over in the parts washer. Once dry, they've been primed then given a coat of silver to match the rest of the engine. I have also added the temperature sender to the head and have found the alternator bracket which I have also prepped for paint.

New foam and matrix going in.

Image

Almost done. Needs a wipe down and switch panel sorting.

Image

New oil pressure relief valve & spring in, along with new copper washer. Must touch up that bit I missed!!

Image
MrBounce
 
Posts: 661
Joined: Mon May 16, 2011 9:16 pm
Location: Suffolk

Re: Mk 1 Project Zippy (Picture Heavy!)

Postby MrBounce » Sun Oct 26, 2014 5:58 pm

Engine on trolley. Currently has 3 wheels and a stump. Oops...

Image

Oil filter housing and pipe primed...

Image

...and painted.

Image
MrBounce
 
Posts: 661
Joined: Mon May 16, 2011 9:16 pm
Location: Suffolk

Re: Mk 1 Project Zippy (Picture Heavy!)

Postby MrBounce » Tue Nov 04, 2014 11:21 pm

Just a short update as I haven't done a huge amount these past few days. I have finished off the oil filter housing and pipe and fitted them and also dug out the alternator bracket. I cleaned this (and man was it filthy!) as it had been sitting in a plastic box with a few other old oily bits, then primed and sprayed and bolted it to the block with some new bolts. I also fished out the distributor drive and gave that a good soaking and brushing in the parts washer. Suitably cleaned, it was popped into the block using the tried and tested method of the 5/16" bolt. It's in exactly the right position which apparently means my engine is timed correctly, something I was worried about! The distributor clamp has also been sprayed so this'll be added (along with the distributor itself) once it's dry.

New filter housing & bracket on the engine. Does this count as "bling?"

Image

Distributor drive. In the right position. Am feeling suitably smug!

Image
MrBounce
 
Posts: 661
Joined: Mon May 16, 2011 9:16 pm
Location: Suffolk

Re: Mk 1 Project Zippy (Picture Heavy!)

Postby Rich » Tue Nov 04, 2014 11:44 pm

Nice one, reminds me of the distributor drive I forgot to remove when I went to MegaJolt, I thought I'd destroyed my engine when it started rattling!
User avatar
Rich
 
Posts: 1285
Joined: Wed Dec 03, 2008 1:27 am
Location: Devon

Re: Mk 1 Project Zippy (Picture Heavy!)

Postby Hans Efde » Wed Nov 05, 2014 5:00 pm

A advice is to put a new seal around the distributor shaft as well. I have been looking for an oil leakage for months coming from the front of the engine. It seems my rebuilt engine has a high crankcase pressure and it just keeps on spitting out oil. I can't pinpoint it because it's all over the place but according to my garage it is coming from the distributor shaft. I've sorned my car now for a longer period to sort that and many other issues.
User avatar
Hans Efde
 
Posts: 1732
Joined: Sat Dec 06, 2008 10:11 pm
Location: IJlst, Netherlands

Re: Mk 1 Project Zippy (Picture Heavy!)

Postby MrBounce » Wed Nov 12, 2014 2:14 pm

It's a brand new distributor Hans! :D
MrBounce
 
Posts: 661
Joined: Mon May 16, 2011 9:16 pm
Location: Suffolk

PreviousNext

Return to Complete Midas rebuild

Who is online

Users browsing this forum: No registered users and 11 guests

cron