Mk 1 Project Zippy. Looking Like a Car.

If you're taking on the task of rebuilding the whole Midas, please put the project in here.

Moderator: The Midas Forum Staff

Re: Mk 1 Project Zippy (Picture Heavy!)

Postby MrBounce » Sun May 24, 2015 11:19 am

And the other side, looking slightly less professional.

Image

Original "T-bar" section and dodgy captive nut I had to cut off

Image

New captive nut plate sprayed up in primer.
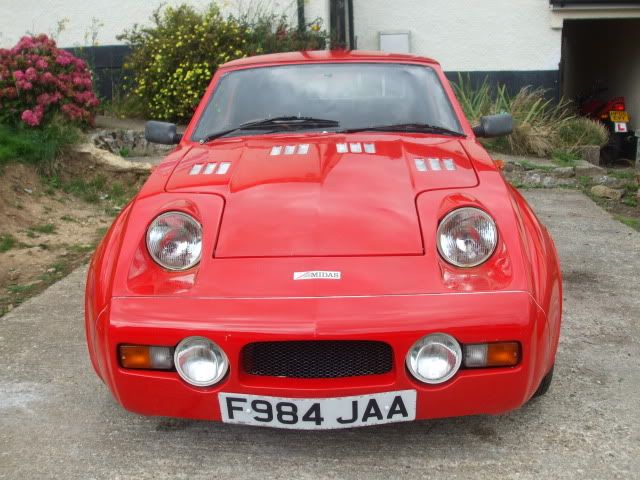
Image
MrBounce
 
Posts: 661
Joined: Mon May 16, 2011 9:16 pm
Location: Suffolk

Re: Mk 1 Project Zippy (Picture Heavy!)

Postby MrBounce » Sat May 30, 2015 8:24 pm

Had a few more minutes in the Manroom so I sorted out missing captive nut on the spare wheel "hump" in the boot. I stuck the steel plate with captive nut on to the hump with epoxy resin, and once that had gone off, I screwed a bolt in covered with tape to stop the threads getting gummed up with resin. I mixed up some fibreglass resin and glassed over it with CSM. I also started to make a new "T-bar" to screw in. I used a bolt roughly the same size as before then cannibalised a top engine steady bar. Unfortunately things went wrong - after a poor attempt to weld it all together, I welded the tip of the welder up and when trying to remove the old tip, it snapped off, leaving the threaded part in the nozzle. Oh joy.

Captive nut plate stuck on with epoxy resin.

Image

Glassed over.

Image

T-bar midway through construction when the welder broke.

Image
MrBounce
 
Posts: 661
Joined: Mon May 16, 2011 9:16 pm
Location: Suffolk

Re: Mk 1 Project Zippy (Picture Heavy!)

Postby MrBounce » Thu Jun 04, 2015 8:31 pm

I have had a delivery. I will just leave this picture here...

Image
MrBounce
 
Posts: 661
Joined: Mon May 16, 2011 9:16 pm
Location: Suffolk

Re: Mk 1 Project Zippy (Picture Heavy!)

Postby MrBounce » Sun Jun 07, 2015 5:48 pm

I got the doors down as I needed to a) clean them, b) sand them and c) repair them if there were any cracks. Stupid question, as this Midas appears to have all the cracks in the world. So it was out with the orbital sander and some bits of 150 grit, and each door was cleaned then sanded. I spotted several cracks in each door and, Dremel in hand once more, I set about dealing with them. I ground out each individual crack, then filled them with P40 fibreglass filler. Once dried and sanded down, I gave each bit a skim of body filler.

I wasn't happy with the paintwork on the shell, so I firstly removed the bonnet. Somehow I had missed a shedload of cracks on the very front. My mate the Dremel came out once again and the process was repeated. I then took a long look at the shell out in the daylight. Apart from being filthy, there were parts of the paintwork which could really do with reworking. As a result I have spent a great deal of time today sanding and flatting back so I can start again. I then pressure washed the shell too. I am determined to start putting things back together very soon so will be working hard on this over the next few weeks.

Halfway through sanding door number 1.

Image

Were there cracks? Don't be stupid - of course there were...

Image

...In fact they were all over the place! I ground them all out.

Image
MrBounce
 
Posts: 661
Joined: Mon May 16, 2011 9:16 pm
Location: Suffolk

Re: Mk 1 Project Zippy (Picture Heavy!)

Postby MrBounce » Sun Jun 07, 2015 5:48 pm

...then I filled them with P40.

Image

How did I miss this load of cracks???

Image

Skim of filler over the top to finish off.

Image
MrBounce
 
Posts: 661
Joined: Mon May 16, 2011 9:16 pm
Location: Suffolk

Re: Mk 1 Project Zippy (Picture Heavy!)

Postby MrBounce » Sun Jun 07, 2015 5:48 pm

Shell now not looking quite so "finished"...

Image
MrBounce
 
Posts: 661
Joined: Mon May 16, 2011 9:16 pm
Location: Suffolk

Re: Mk 1 Project Zippy (Picture Heavy!)

Postby MrBounce » Sun Jun 21, 2015 10:39 pm

It's been a frustrating couple of weeks, mainly with having very little time to get into the garage. What time I have had has been taken up with sorting stuff that hasn't been car related. Not helpful. When I have managed to get out there, I have mainly been doing filling, sanding and priming - slightly different from just sanding so I do at least feel like I am getting somewhere. The nose is now almost 100% smooth as are the bonnet curves (accidentally "chunked" by my over-enthusiastic use of the orbital sander) and the bulkhead is looking ok too. There are certain bits which will never be great (such as the battery tray) but most of these places will be covered by items such as lights, washer bottles and the battery, so it's not too bad. There are still a couple of places that will need a little more attention, but I am getting there.

Door hinge area on door - now with no cracks!

Image

Bonnet curve mid-sand after filling.

Image

Nose area looking a LOT better than before.

Image
MrBounce
 
Posts: 661
Joined: Mon May 16, 2011 9:16 pm
Location: Suffolk

Re: Mk 1 Project Zippy (Picture Heavy!)

Postby MrBounce » Sun Jun 21, 2015 10:39 pm

Bulkhead "buttress" - needs a small amount of work on the right hand edge.

Image
MrBounce
 
Posts: 661
Joined: Mon May 16, 2011 9:16 pm
Location: Suffolk

Re: Mk 1 Project Zippy (Picture Heavy!)

Postby Rich » Sun Jun 21, 2015 11:09 pm

Looking good!
User avatar
Rich
 
Posts: 1285
Joined: Wed Dec 03, 2008 1:27 am
Location: Devon

Re: Mk 1 Project Zippy (Picture Heavy!)

Postby MrBounce » Tue Jun 23, 2015 9:42 pm

Had an hour or so tonight so popped back in to do a few more bits. I bought an oil cooler so spent a bit of time cleaning that, then finished off the spare wheel "hump". I hadn't managed to completely cover the plate with the captive nut so out came the fibreglass resin and I cut up some matting to fit. It's now much tidier. Talking of tidying, I also mixed up some filler to use in the small areas where not all was flat. More to follow.

Spare wheel hump now finished. Fibreglass is drying. Paint yet to be applied.

Image

Small smear of filler on the front wing to cover a small indentation.

Image

And likewise on the buttress area.

Image
MrBounce
 
Posts: 661
Joined: Mon May 16, 2011 9:16 pm
Location: Suffolk

PreviousNext

Return to Complete Midas rebuild

Who is online

Users browsing this forum: No registered users and 2 guests

cron