Midas Cars Forum - www.midascarsforum.com
This forum is for Midas and Midtec Bronze enthusiasts. The Midas is a British car designed as a replacement for the Mini Marcos.
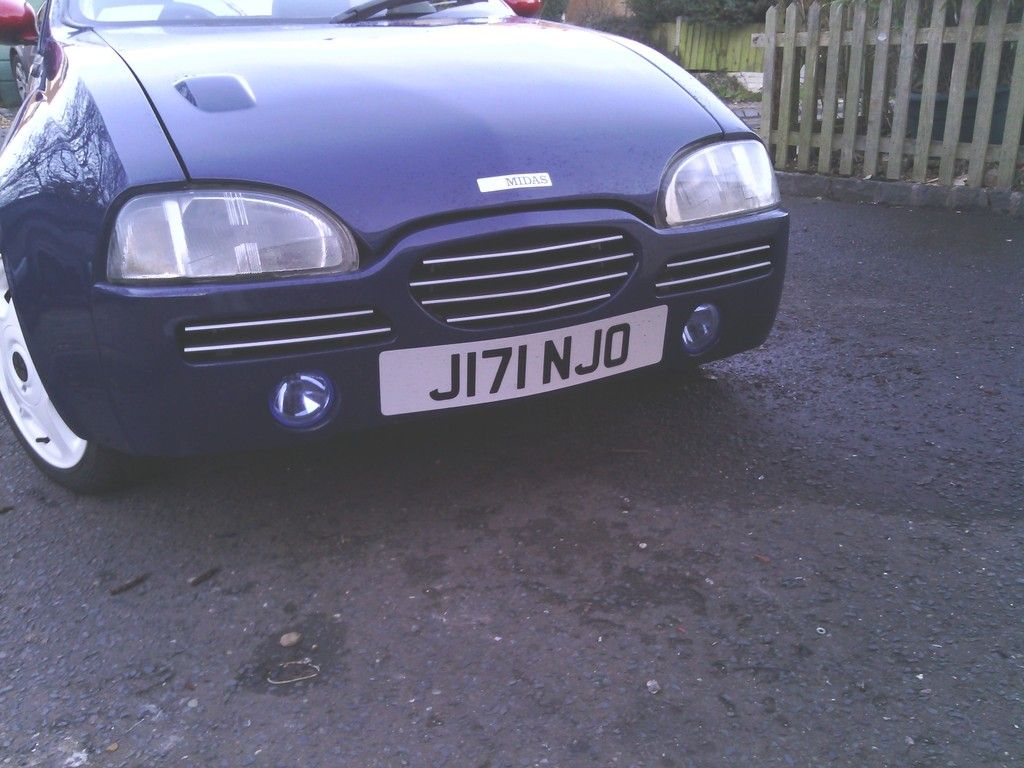
J171 NJO Cortez / 2+2 rebuild and modifications
Moderator: The Midas Forum Staff
Re: J171 NJO Cortez / 2+2 rebuild and modifications
![]() by Jin » Sat Jan 17, 2015 5:23 pm
by Jin » Sat Jan 17, 2015 5:23 pm
Cheers guys, thanks for the comments, your right too, my glass gets looser as it is wound down and flaps all over the place, I can only raise the glass with the doors open, but fear not I have a solution in plan ready to install 
https://easywider.co.uk/ universal flexible wheel arch extensions
- Jin
- Posts: 454
- Joined: Fri Aug 01, 2014 10:33 pm
Re: J171 NJO Cortez / 2+2 rebuild and modifications
![]() by wolfie » Sun Jan 18, 2015 1:10 am
by wolfie » Sun Jan 18, 2015 1:10 am
http://www.ebay.co.uk/itm/Vauxhall-Cors ... 5d4d73a4fb
This is what I'm thinking of to sort the window issue. The glass actually bolts to the glass so shouldn't judder in the channel. I'm sure I can find them cheaper but jst wanted to show my idea
This is what I'm thinking of to sort the window issue. The glass actually bolts to the glass so shouldn't judder in the channel. I'm sure I can find them cheaper but jst wanted to show my idea
- wolfie
- Posts: 303
- Joined: Wed Mar 11, 2009 11:38 pm
Re: J171 NJO Cortez / 2+2 rebuild and modifications
![]() by Jin » Sun Jan 18, 2015 9:10 am
by Jin » Sun Jan 18, 2015 9:10 am
Oh I see, they both move together, that should help smooth things out.
My idea is to do away with the bulb type seal section that goes round the glass and make a flocked guide piece for the rear and a foam compression seal round the top at the roof /A pillar, then put the electric windows on remote control as per the Quantum so I can close and seal from outside
My idea is to do away with the bulb type seal section that goes round the glass and make a flocked guide piece for the rear and a foam compression seal round the top at the roof /A pillar, then put the electric windows on remote control as per the Quantum so I can close and seal from outside
https://easywider.co.uk/ universal flexible wheel arch extensions
- Jin
- Posts: 454
- Joined: Fri Aug 01, 2014 10:33 pm
Re: J171 NJO Cortez / 2+2 rebuild and modifications
![]() by Jin » Thu Feb 05, 2015 12:56 am
by Jin » Thu Feb 05, 2015 12:56 am
https://easywider.co.uk/ universal flexible wheel arch extensions
- Jin
- Posts: 454
- Joined: Fri Aug 01, 2014 10:33 pm
Re: J171 NJO Cortez / 2+2 rebuild and modifications
![]() by Jin » Sun Mar 08, 2015 1:27 am
by Jin » Sun Mar 08, 2015 1:27 am
Jeeze, has it really been a month since i updated this?
the irony is i work on the car each day yet seem to start many jobs and dont get round to finishing them due to either distraction or funds, but here is a collection of jobs i have finished
mirrors and boot trim
After 1 or 2 negative comments on the R25 mirrors looking way too big, and if I’m honest they had a point,

yet they look like small mirrors on a rover 25 I decided to change them, I looked about but all mirrors I considered were the same size as the R25 ones including those from a Peugeot 107 which you would think would be small, I even considered auxiliary 4x4 mirrors but doubt they would be legal, then I happened upon a chance encounter of 2 rover 75s parked close to each other, one pre facelift one post facelift, the facelift uses the mirrors off the R25 / 45 etc. the pre facelift uses similar shape but much smaller units, so a pair was ordered and the same process done, prime and paint and i decided to step away from white trim highlights and go for a more conventional but modern gloss black. fortunately I only had to perform minimal modification to get them to fit the brackets I made for the R25 units so that was easy – much improvement-pics in a mo.
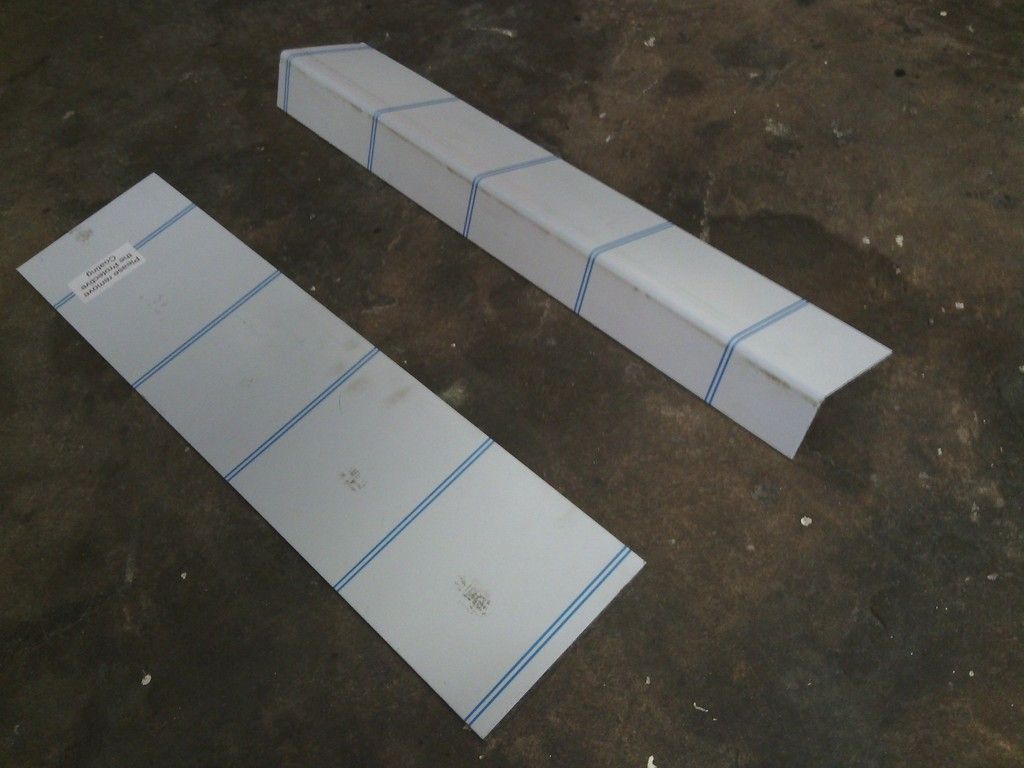
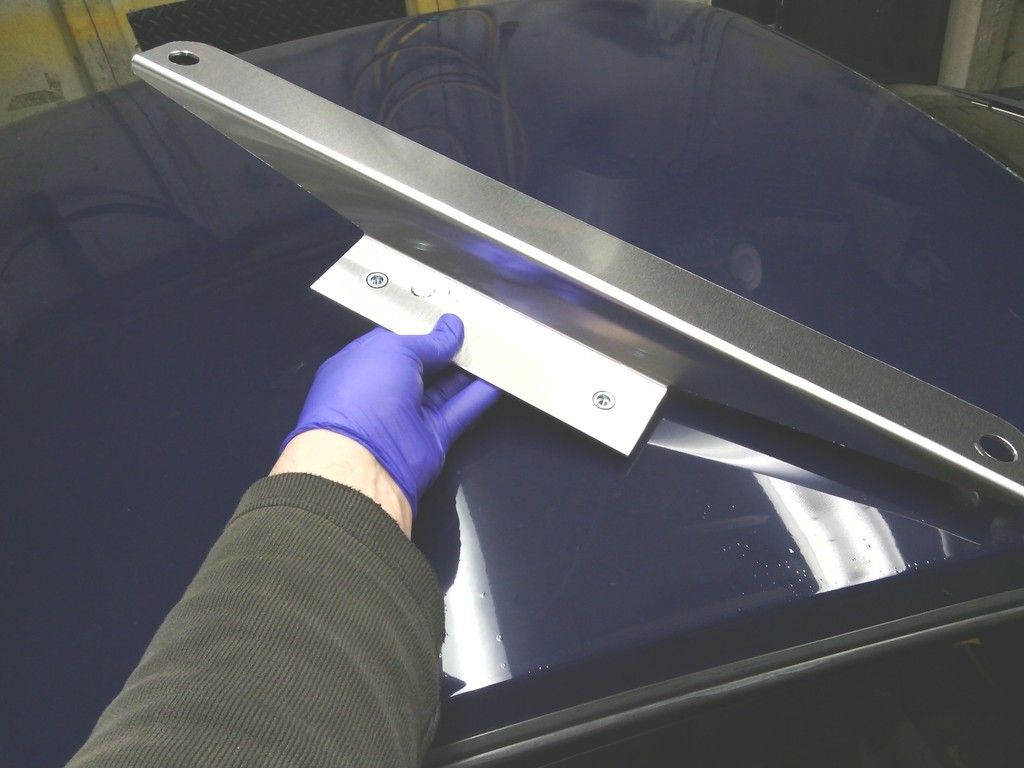
While on the gloss black theme, I was going to spray the boot / number plate trim black to tie in with the mirrors, but a closer inspection saw it to be rather ropey - the number plate lights were held in with wood screws? and the plastic slightly faded and cracked

, so i decided to try out the rover 100 type facelifted trim, its slightly smoother and folows the contour of the actual bootlid better,

painted up


fitted

tided it up a tad
next on the list (and it was a must) interior lighting.
for some reason the car has gone 20 years with no attempt at interior lighting,
although not essential, i do like to be able to locate the barley sugars of an evening slightly easier.
i was and still am toying with doing something creative with EL panels at some time but the cost is a bit scary so for now i discovered the MGF has cortesy lights built into the rear view mirror, so i got my hands on one which also helped since the origional mirror dropped off into the murkey depths of the footwell some time ago

and all wired up,
much better now and the rear view is beter too.

theres loads more part done including a total overhaul of the engine bay and a start on the interior - more to come
the irony is i work on the car each day yet seem to start many jobs and dont get round to finishing them due to either distraction or funds, but here is a collection of jobs i have finished
mirrors and boot trim
After 1 or 2 negative comments on the R25 mirrors looking way too big, and if I’m honest they had a point,

yet they look like small mirrors on a rover 25 I decided to change them, I looked about but all mirrors I considered were the same size as the R25 ones including those from a Peugeot 107 which you would think would be small, I even considered auxiliary 4x4 mirrors but doubt they would be legal, then I happened upon a chance encounter of 2 rover 75s parked close to each other, one pre facelift one post facelift, the facelift uses the mirrors off the R25 / 45 etc. the pre facelift uses similar shape but much smaller units, so a pair was ordered and the same process done, prime and paint and i decided to step away from white trim highlights and go for a more conventional but modern gloss black. fortunately I only had to perform minimal modification to get them to fit the brackets I made for the R25 units so that was easy – much improvement-pics in a mo.
While on the gloss black theme, I was going to spray the boot / number plate trim black to tie in with the mirrors, but a closer inspection saw it to be rather ropey - the number plate lights were held in with wood screws? and the plastic slightly faded and cracked

, so i decided to try out the rover 100 type facelifted trim, its slightly smoother and folows the contour of the actual bootlid better,

painted up


fitted


tided it up a tad


next on the list (and it was a must) interior lighting.
for some reason the car has gone 20 years with no attempt at interior lighting,
although not essential, i do like to be able to locate the barley sugars of an evening slightly easier.
i was and still am toying with doing something creative with EL panels at some time but the cost is a bit scary so for now i discovered the MGF has cortesy lights built into the rear view mirror, so i got my hands on one which also helped since the origional mirror dropped off into the murkey depths of the footwell some time ago

and all wired up,
much better now and the rear view is beter too.

theres loads more part done including a total overhaul of the engine bay and a start on the interior - more to come
https://easywider.co.uk/ universal flexible wheel arch extensions
- Jin
- Posts: 454
- Joined: Fri Aug 01, 2014 10:33 pm
Re: J171 NJO Cortez / 2+2 rebuild and modifications
![]() by kelvink » Sun Mar 08, 2015 11:14 am
by kelvink » Sun Mar 08, 2015 11:14 am
Much better sized door mirrors there. Rear view mirror looks to be worth investigating too for my Gold Coupe.
-

kelvink - Posts: 636
- Joined: Wed Jun 20, 2012 8:12 am
- Location: Dorset
Re: J171 NJO Cortez / 2+2 rebuild and modifications
![]() by DavidL » Sun Mar 08, 2015 11:52 am
by DavidL » Sun Mar 08, 2015 11:52 am
The new mirrors do look a bit smaller, but I think having them black instead of white makes them seem smaller anyway. I'm quite taken by that interior mirror, too.
-

DavidL - Posts: 865
- Joined: Tue Mar 01, 2011 10:15 pm
- Location: Tayport, Fife
Re: J171 NJO Cortez / 2+2 rebuild and modifications
![]() by Jin » Mon Mar 09, 2015 8:35 am
by Jin » Mon Mar 09, 2015 8:35 am
Thanks guys, the mirror is fantastic and meant I didn't have to drill the roof to fit a conventional light .
They are still available new and the part number is CTB 100100
They are still available new and the part number is CTB 100100
https://easywider.co.uk/ universal flexible wheel arch extensions
- Jin
- Posts: 454
- Joined: Fri Aug 01, 2014 10:33 pm
Re: J171 NJO Cortez / 2+2 rebuild and modifications
![]() by Jin » Wed Apr 01, 2015 12:02 am
by Jin » Wed Apr 01, 2015 12:02 am
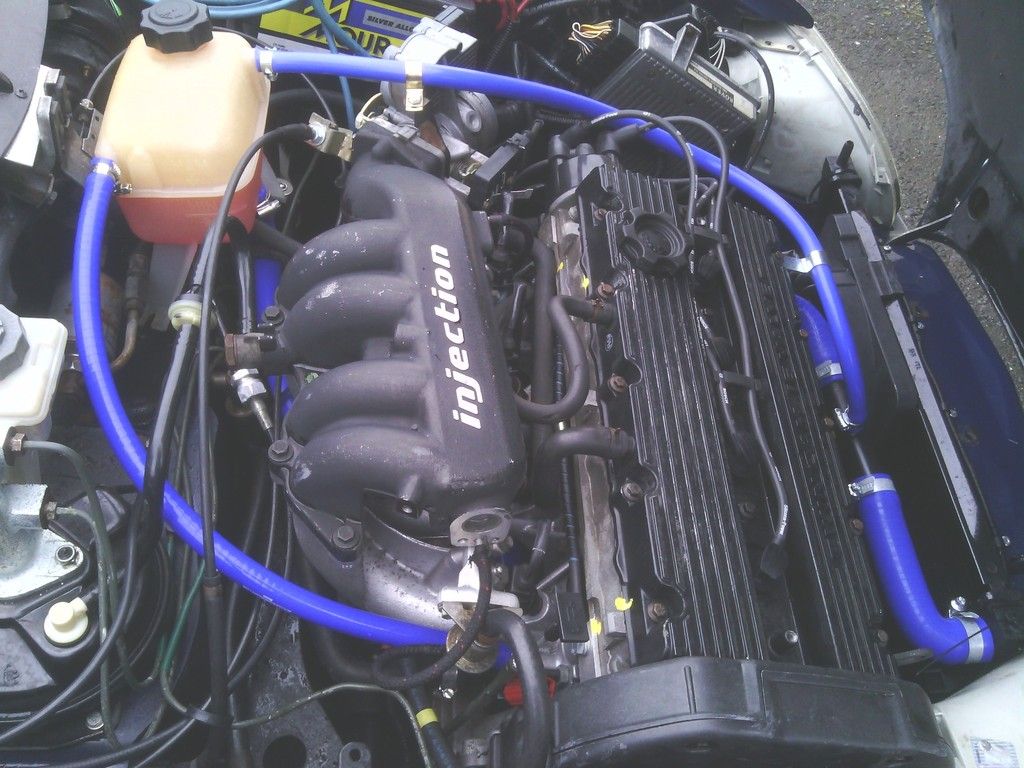
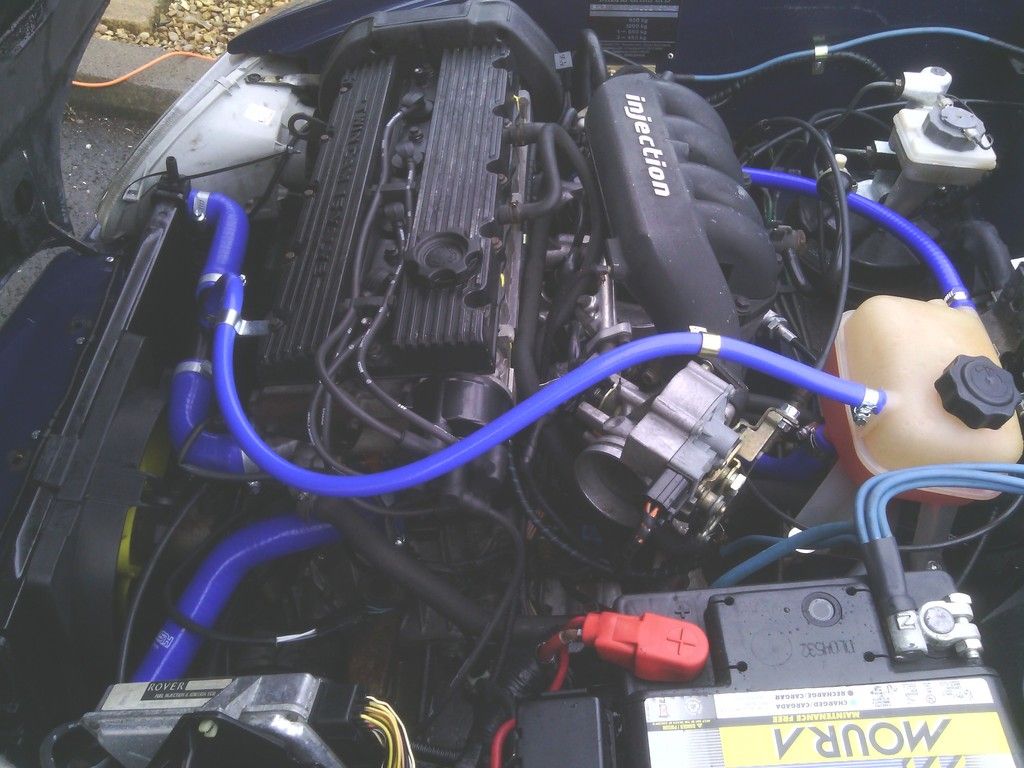
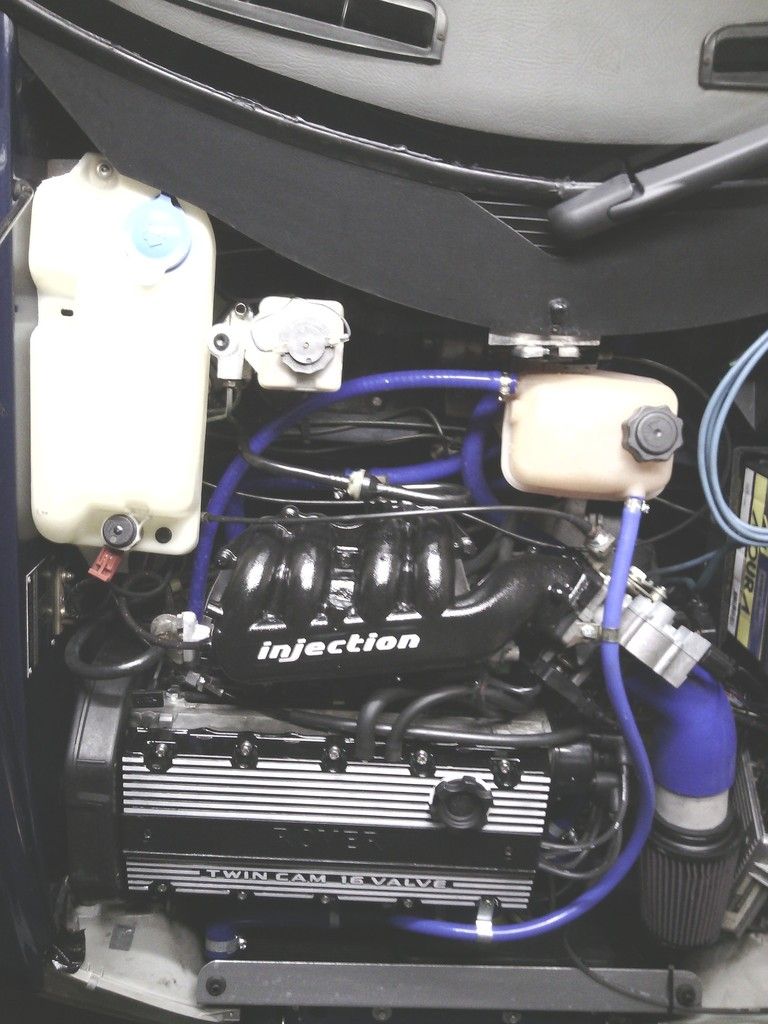
Engine bay freshen up
One thing I liked about my Quantum was the engine bay was so clean you could eat your dinner off it, I’d not set out to do that but it was a consequence of rebuilding the car from the ground up – and I liked it.
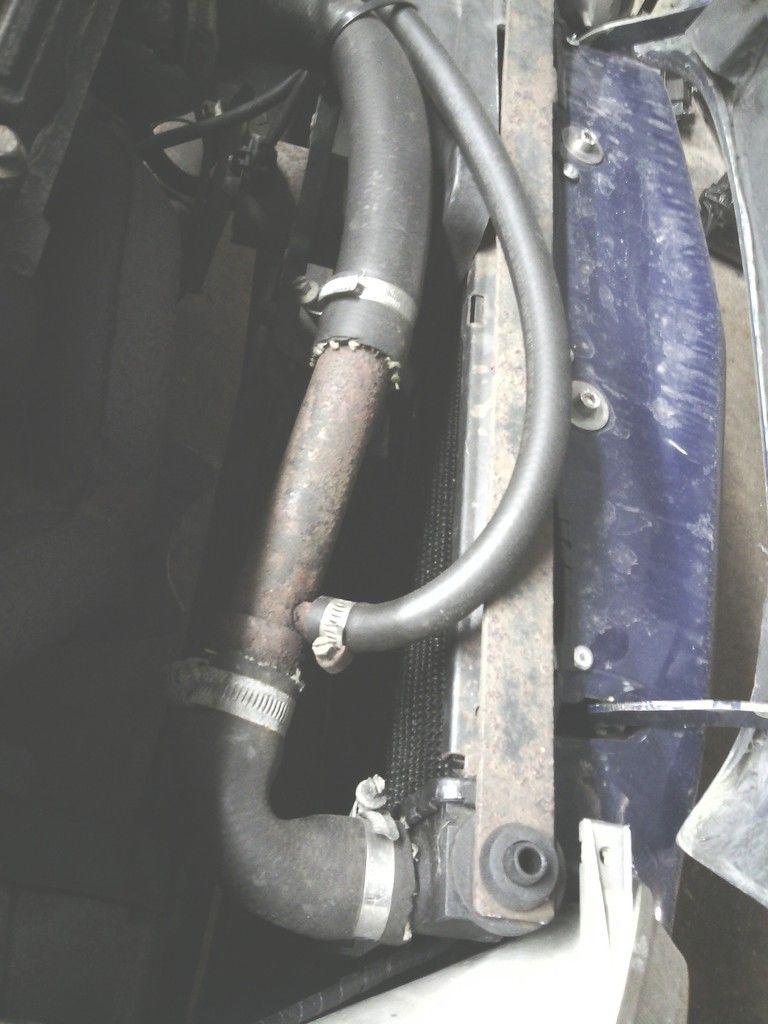
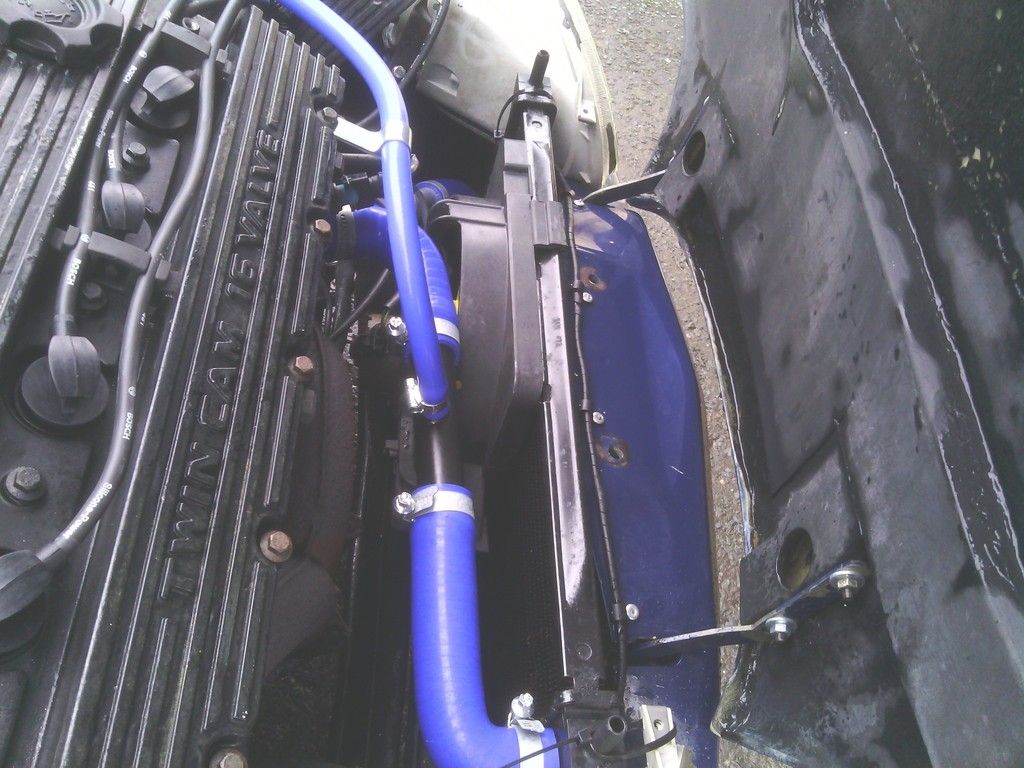
Although I’m not swapping the engine in the Midas just yet I don’t see why I can make the engine bay a more pleasant place to be in the mean time, the rad hoses were well past their best and constantly seeping anyway so now seemed a good time.
First job was to pressure wash the entire engine bay and engine, I’ve not used TFR before but the Swarfega Powerwash brand worked fantastic, I could not believe the amount of crap that got washed off, with the car raised I did underneath too, years of crud got washed away leaving all that was left behind to look as new as could be expected
Onto the rad hoses,
All the rubber and metal pipes were degrading rapidly and tweaking up the jubilee clips became a regular part of life,
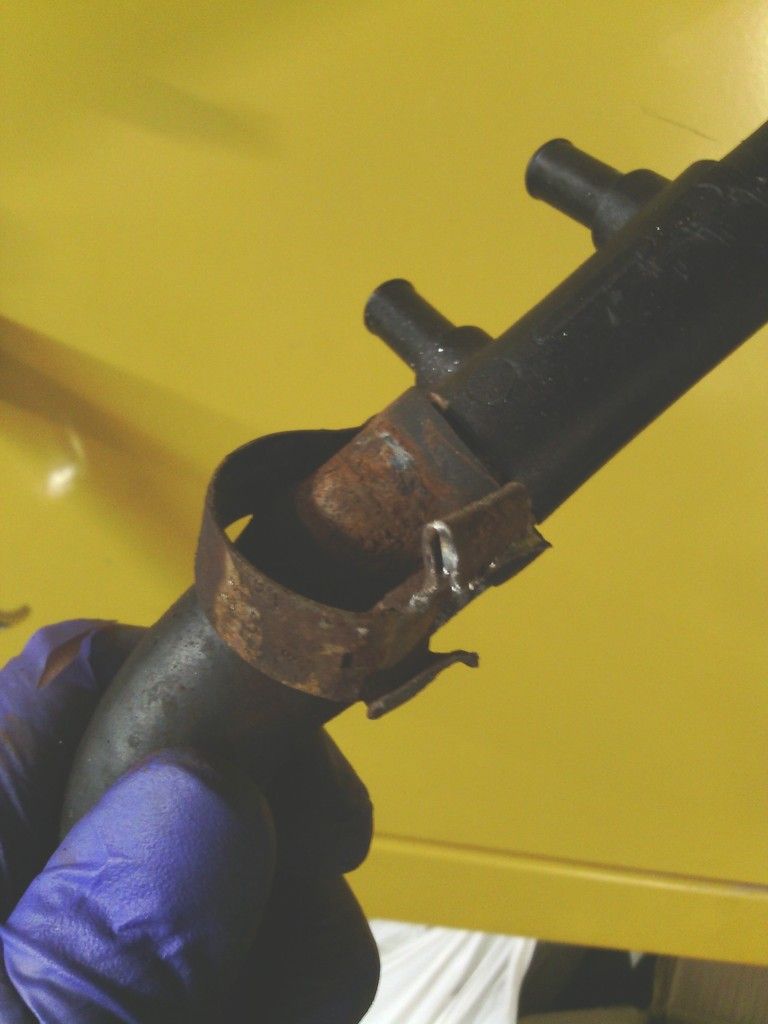
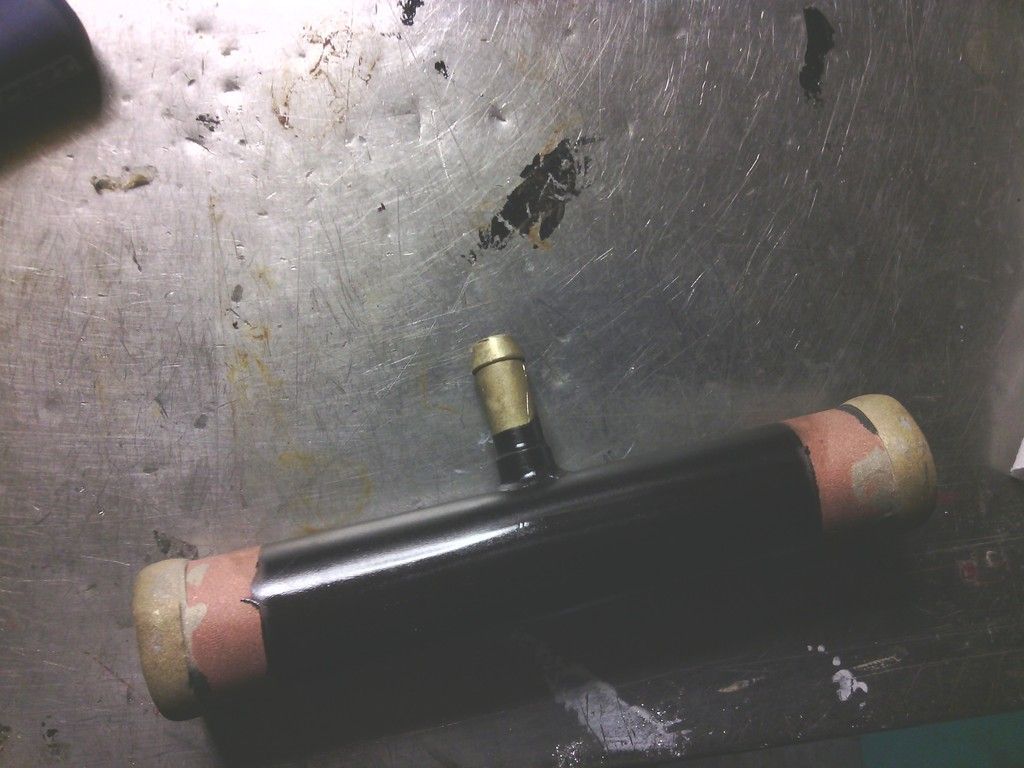
so I made a new top hose from copper pipe and a brass tail
And bought a new old stock rear metal pipe that runs from the stat round the back of the block,
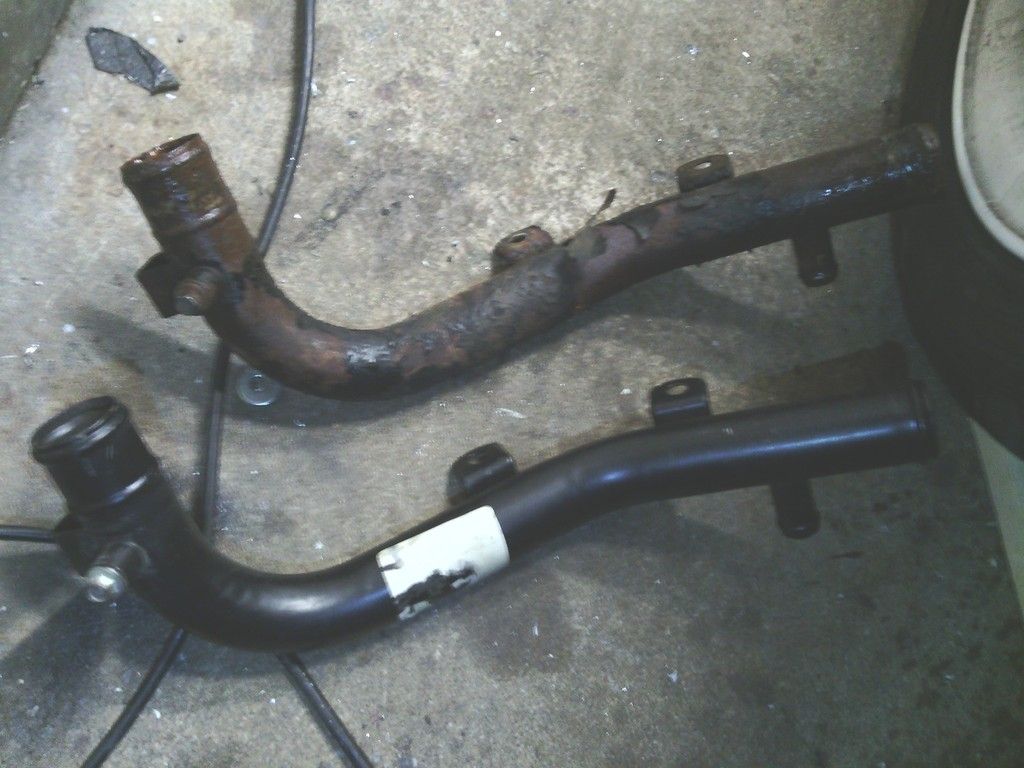
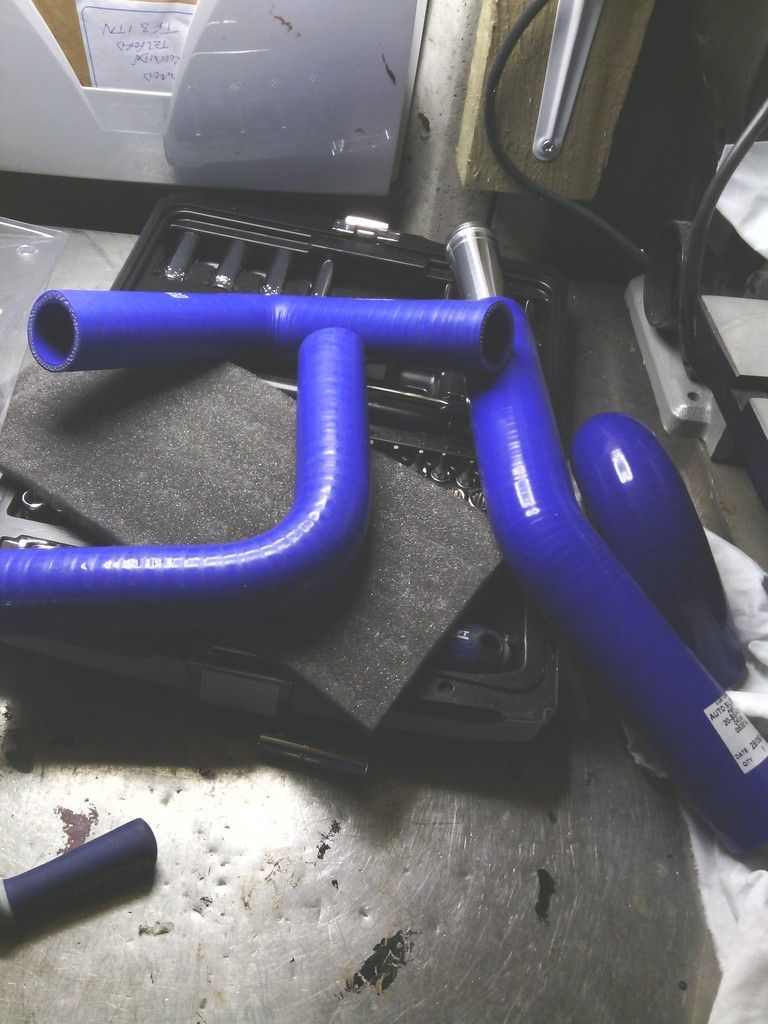
all rubber pipes were measured up and silicone hoses ordered for their replacement,
The day came to do the job and all was going well until I got to the rear metal pipe from the stat, its 2 x 8mm bolts were rather tight, the one nearest the flywheel came out eventually once cracked but the one mid way round the back of the block was so tight I couldn’t budge it, I could only get at it from the cam belt side with a 1/4dr ratchet too which didn’t help, once id exhausted myself to the point of passing out trying to budge it I had a brain wave that would either see it freed off or sheared, at this point I didn’t care which
I could see (but not reach) the ratchet handle from between the inlet manifold ports, so I looped some of my strongest cable ties together in a chain and fed it down and round the ratchet handle, then with a length of wood resting on the rocker cover looped through the end of the cable ties I could use is to lever up the cable tie chain against the ratchet handle and by pulling from below with my other hand it cracked off – bingo!
But each turn was just as tight as the pervious until it had freed enough to do away with the wood lever and use my right hand instead, so using both hands above and below I could move the ratchet enough to rotate the seized bolt enough to slowly unwind it progress was very tedious but progress non the less, feeling a bit smug with myself for finding a solution to the problem I got a good rhythm going on the still very tight bolt and all was going well until WHACK!, the cable tie chain slipped off the ratchet handle and the resulting pull force with my right hand was transferred to my jaw, I’ve never been hit so hard in my life and did feel somewhat shaken.
After a brief rest and pep talk to myself I carried on somewhat more carefully than before, thinking to myself just how long does this bolt need to be? All going well then…..
Another punch, in the eye this time.
At this point I had to give myself a bit of a talking to,
This is my hobby, I’m supposed to enjoy it, and here I am late at night standing in a cold garage repeatedly punching myself in the face and almost bringing myself to tears – why oh why did I not follow a much safer pursuit such as sky diving or deep sea shark fishing?
Anyhoo with the worlds tightest M8 bolt finally out the head I could refit my new pipe and plumb it all in,
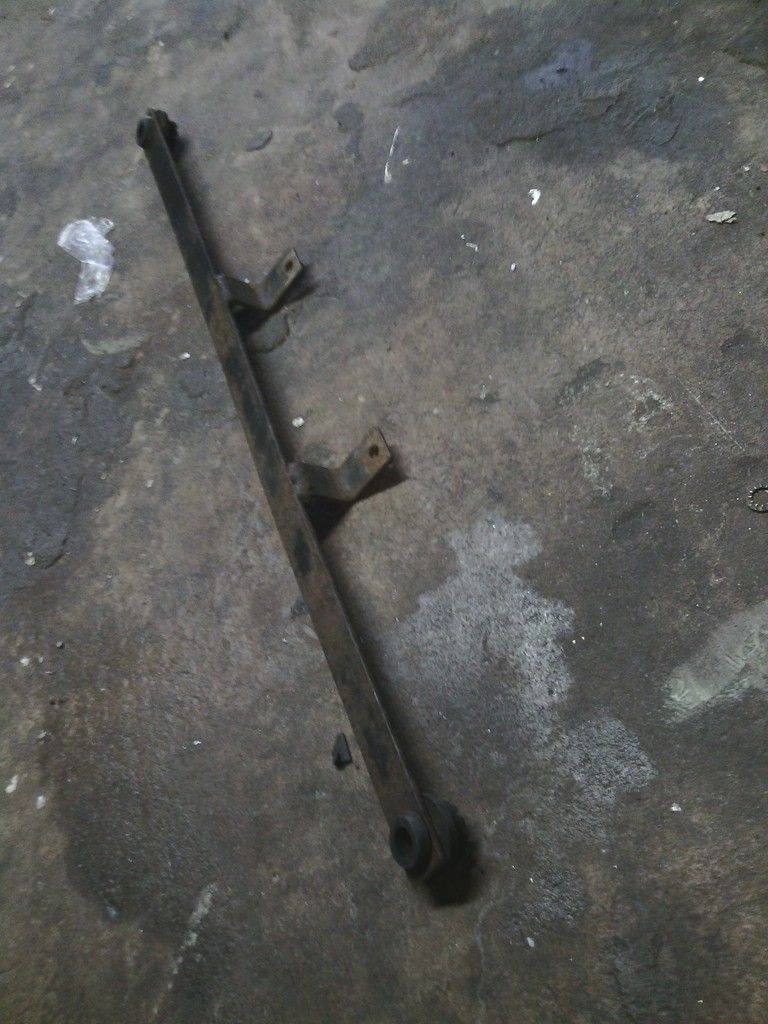
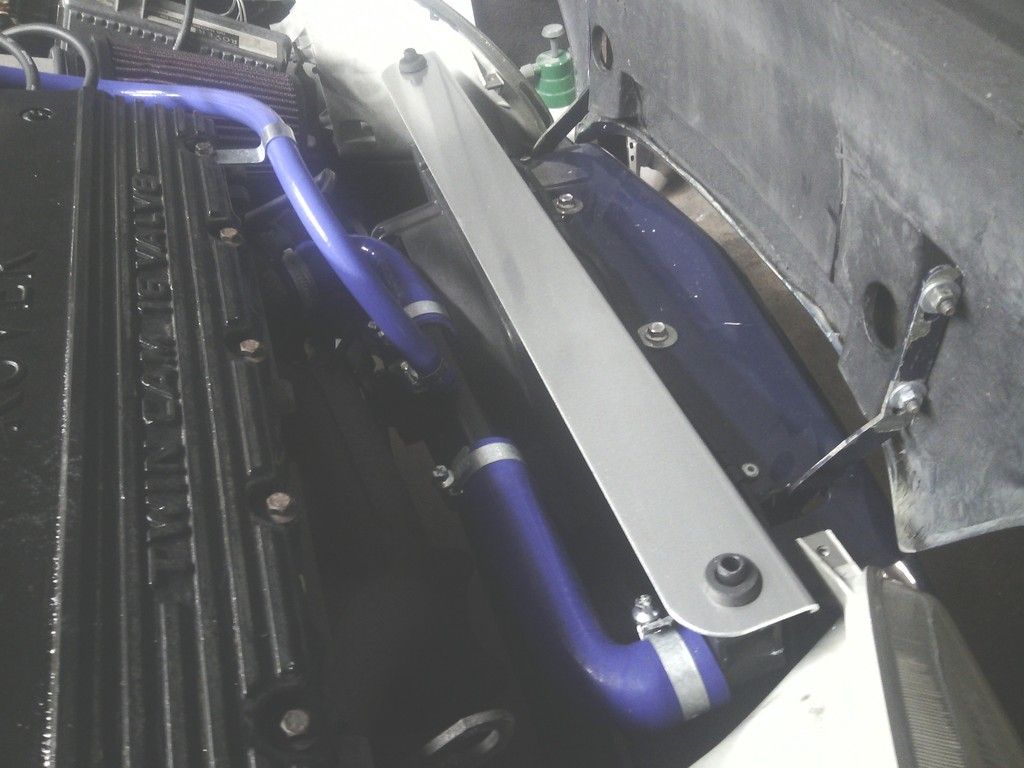
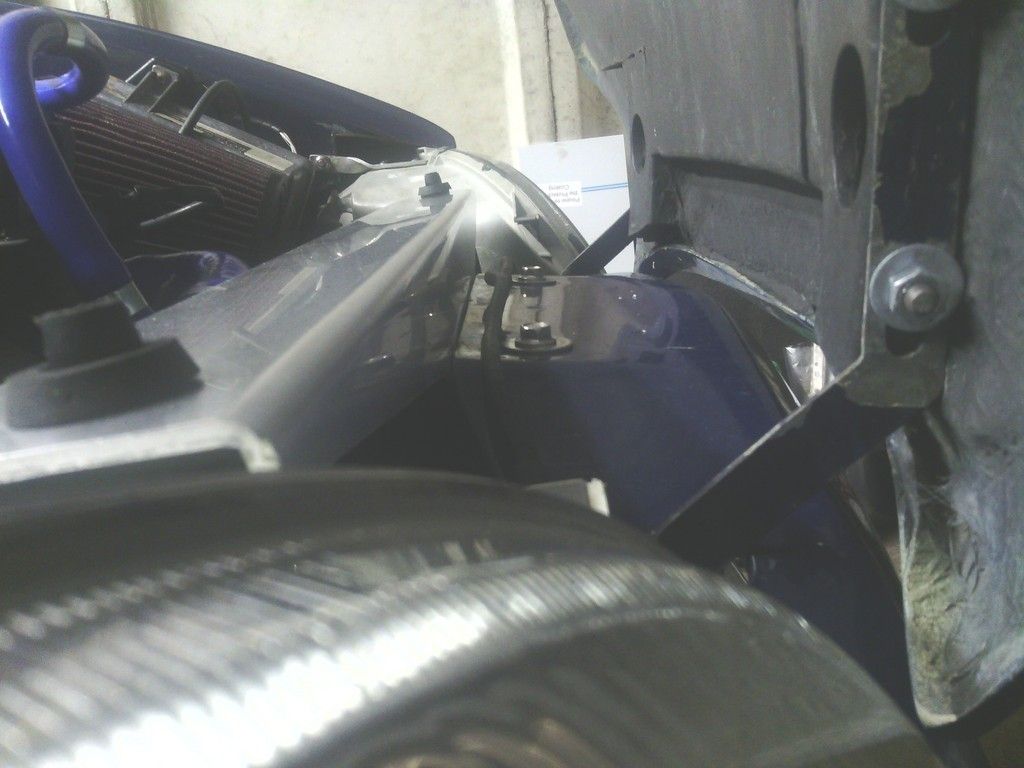
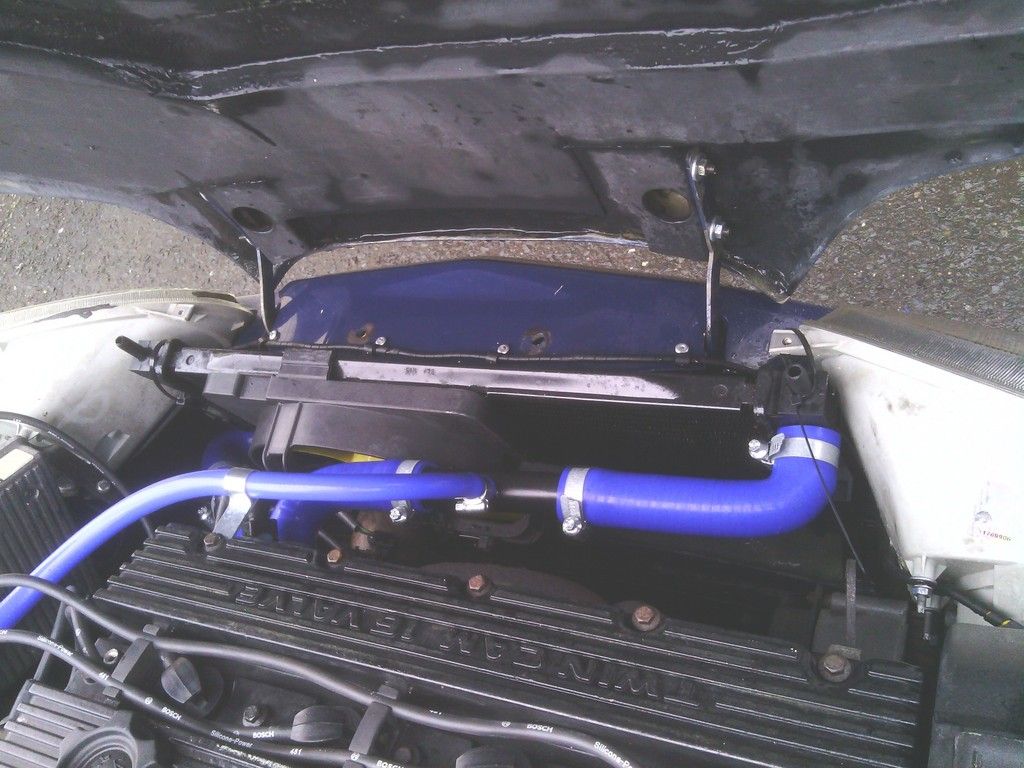
Next on the list was the rad mount, or lack of
The original rad location was too low down to fit he sexy spot lights I got from Neil when buying the car – the bottom hose was in the way – not too much of an issue as I wold have to raise the height of the rad anyway since there was no bottom mounts for the rad, it just sort of flapped about, you can see the impression the bottom rad legs had made in the fiberglass aftr years of not being properly supported.
So some 25mmx25mm ally box was used to make proper mounts
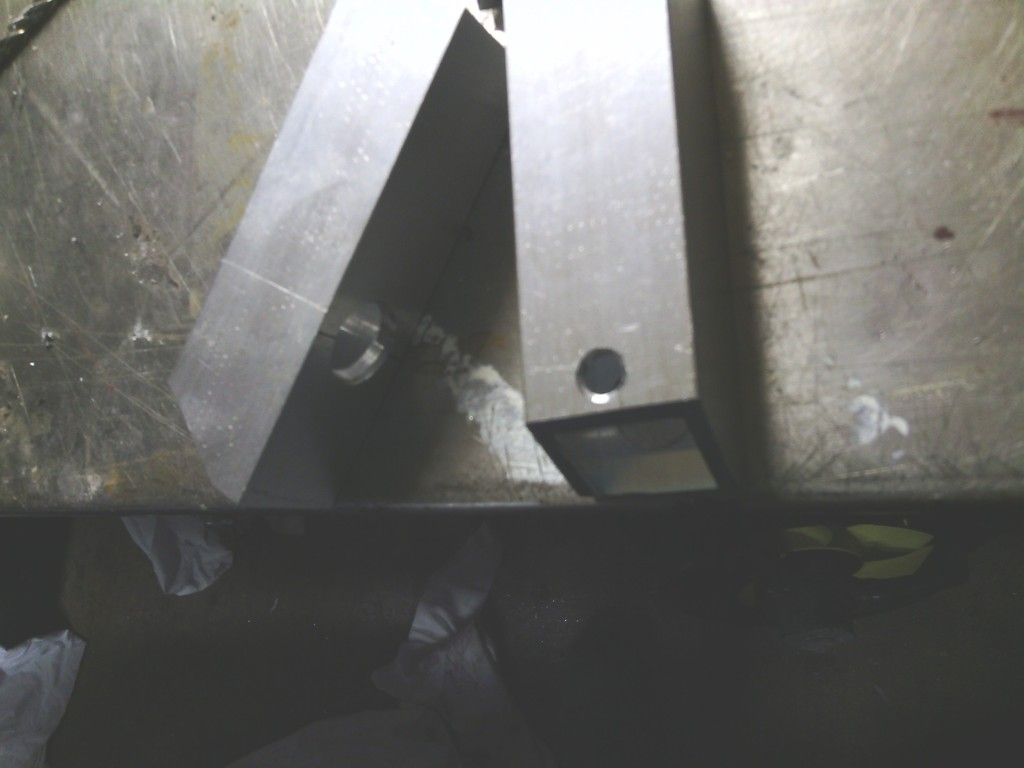
And now the rad sits higher to clear the bottom hose and the rad locates secure in the bumper too – nice
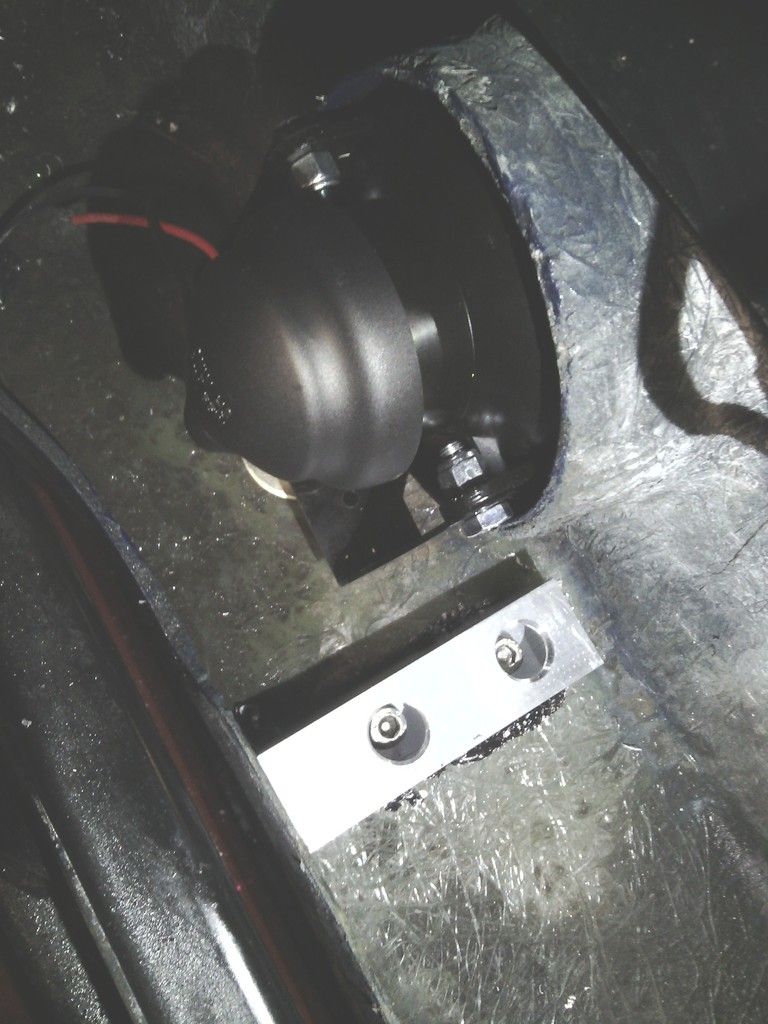
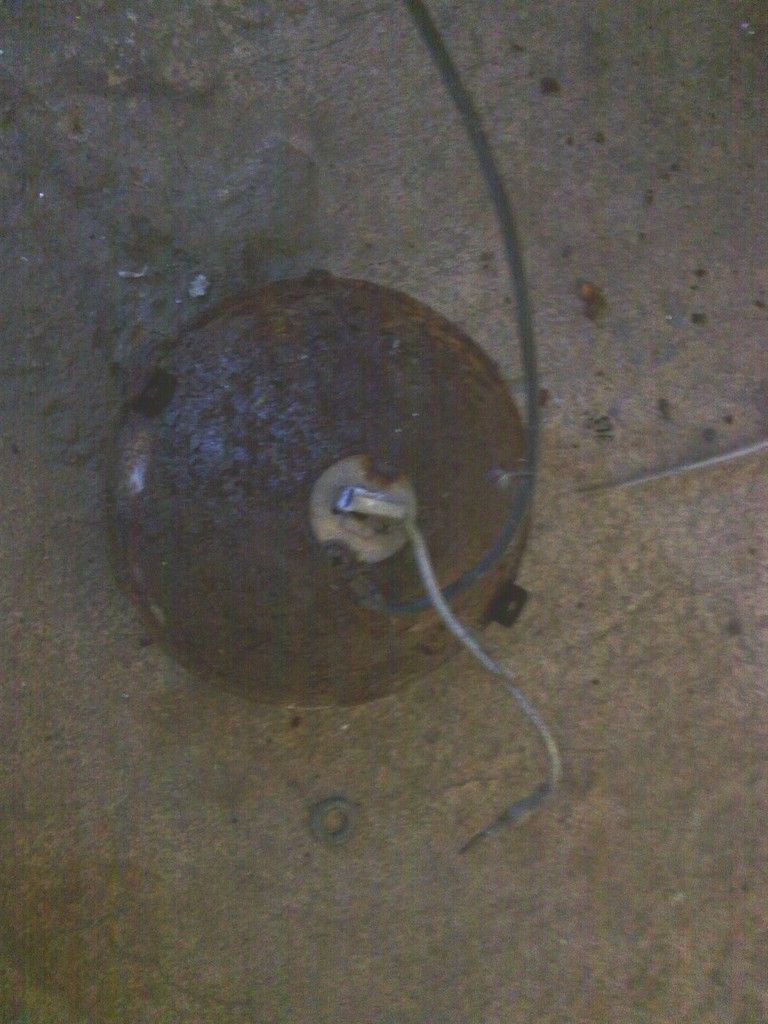
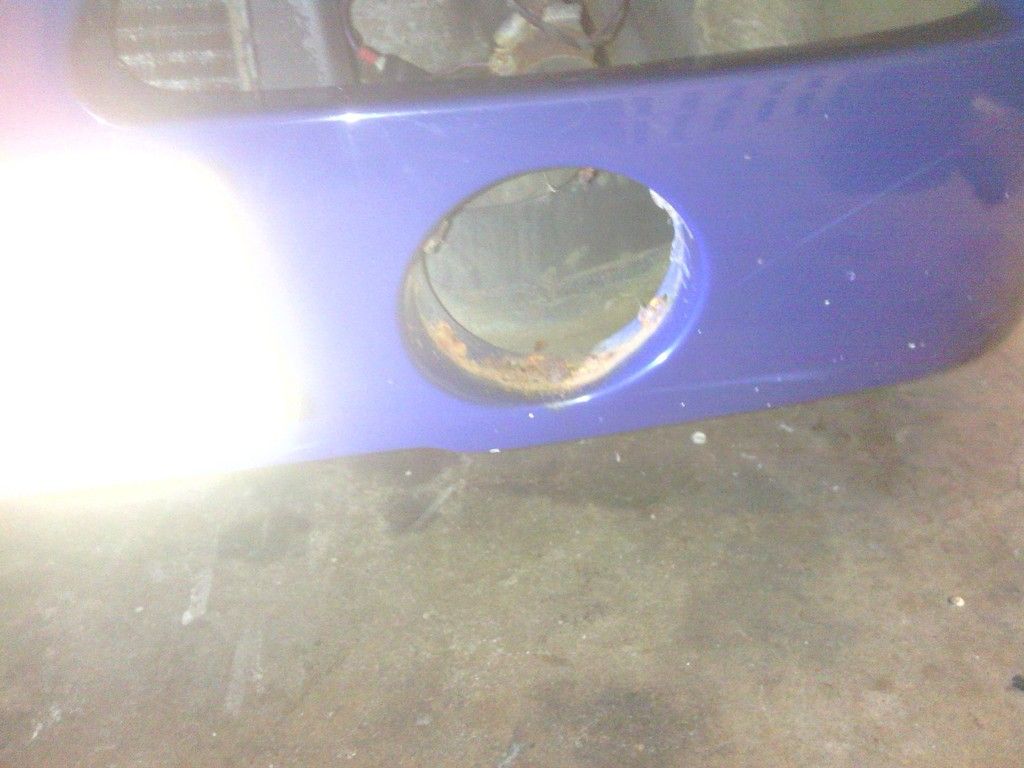
While down there I properly fitted the fog lights by making proper brackets out of stainless and aluminium – the old ones were just bonded in

With the rad mounted at the base and slightly higher too, the top mount didn’t fit, just as well as it looked rubbish.
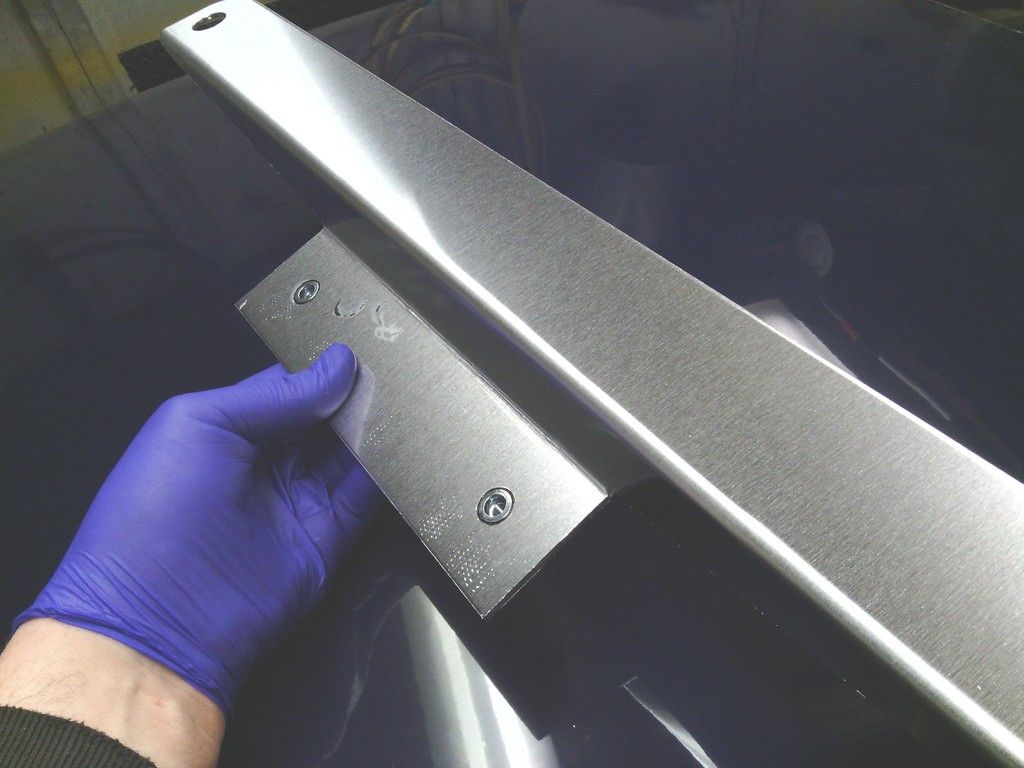
A nice bit of 3mm ally sheet was ordered
And bent to fit, after some fabrication and some riv-nuts all was well with the world once again
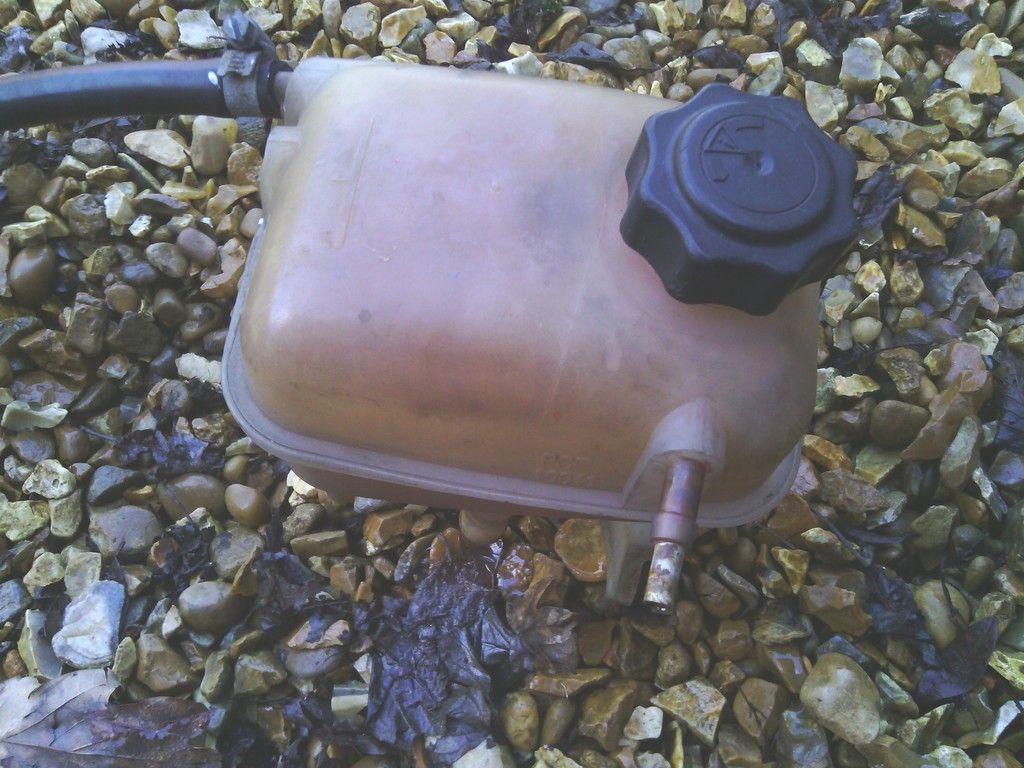
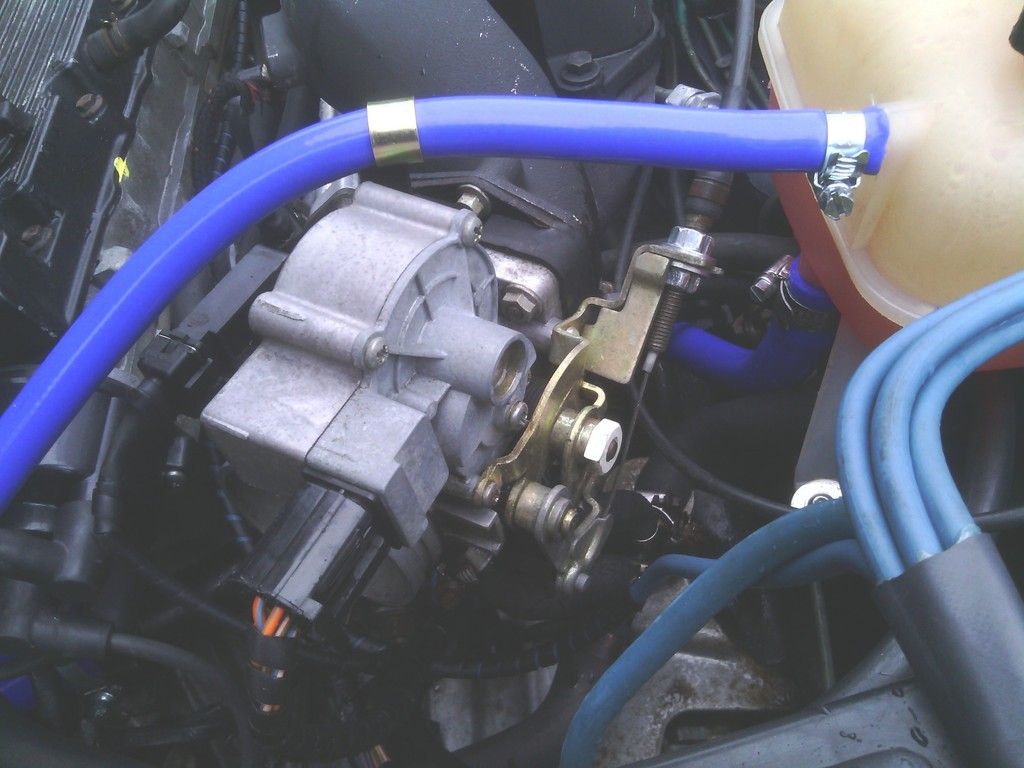
The reservoir bottle got the old bleach and rice trick and it came up like new
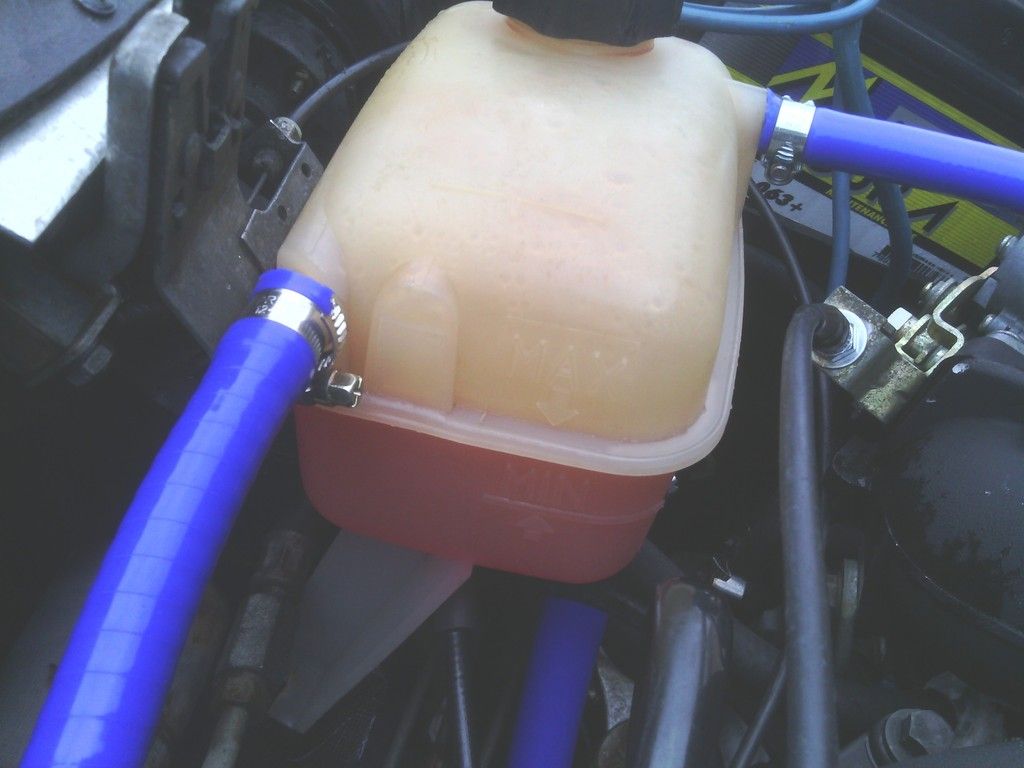
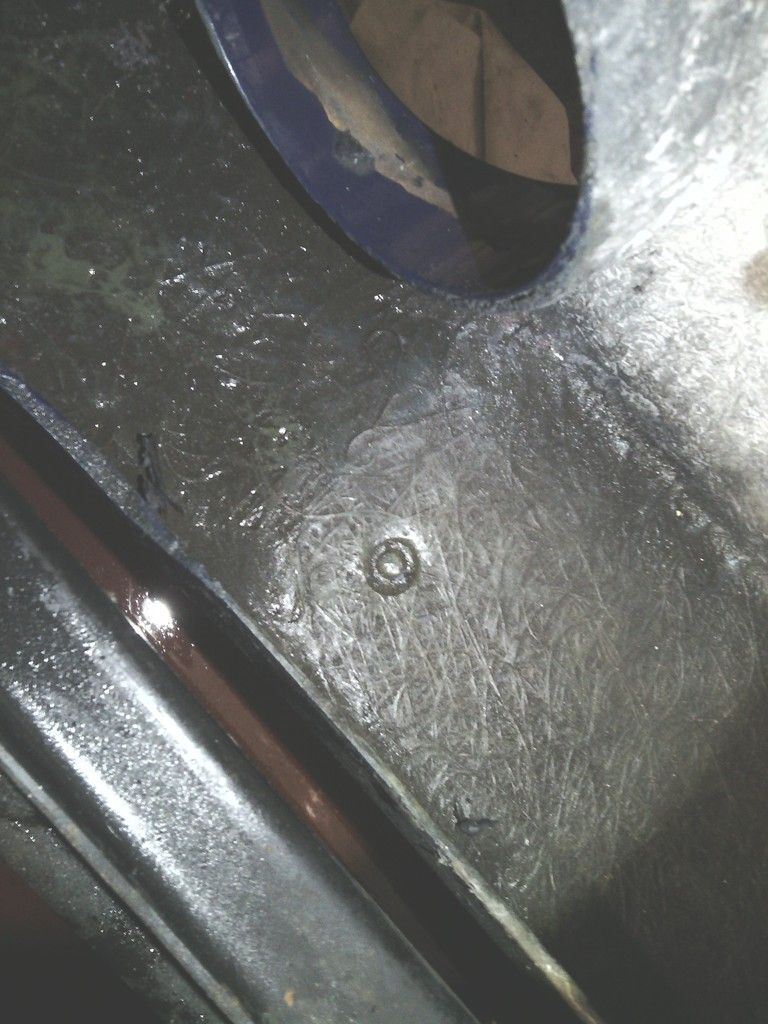
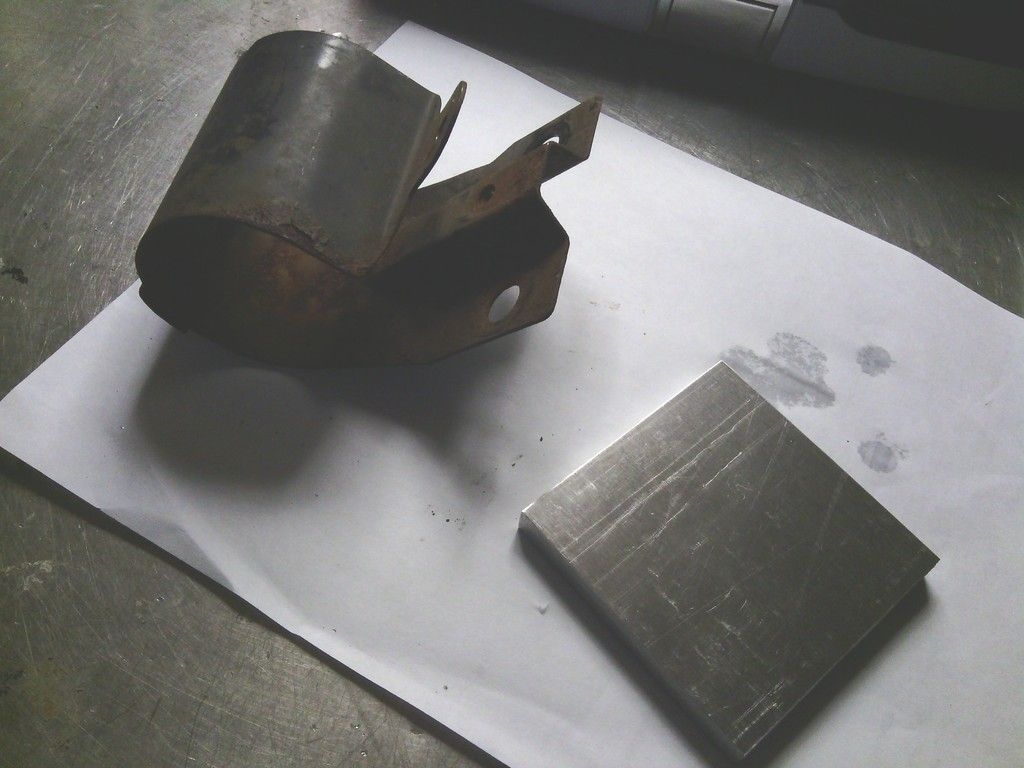
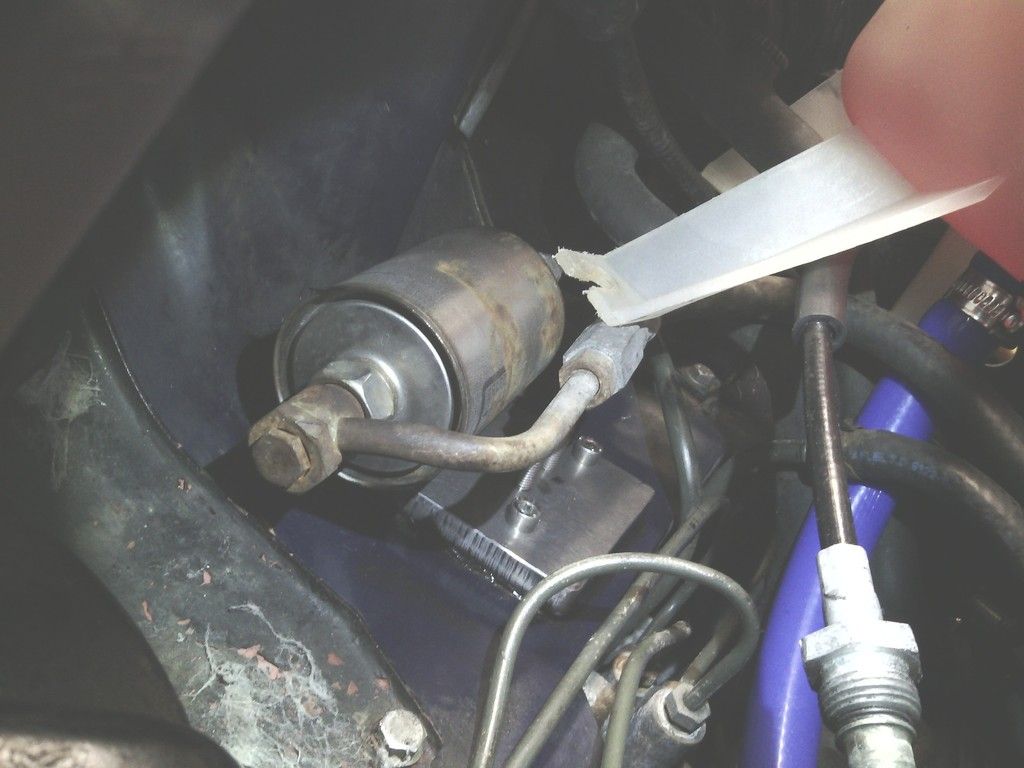
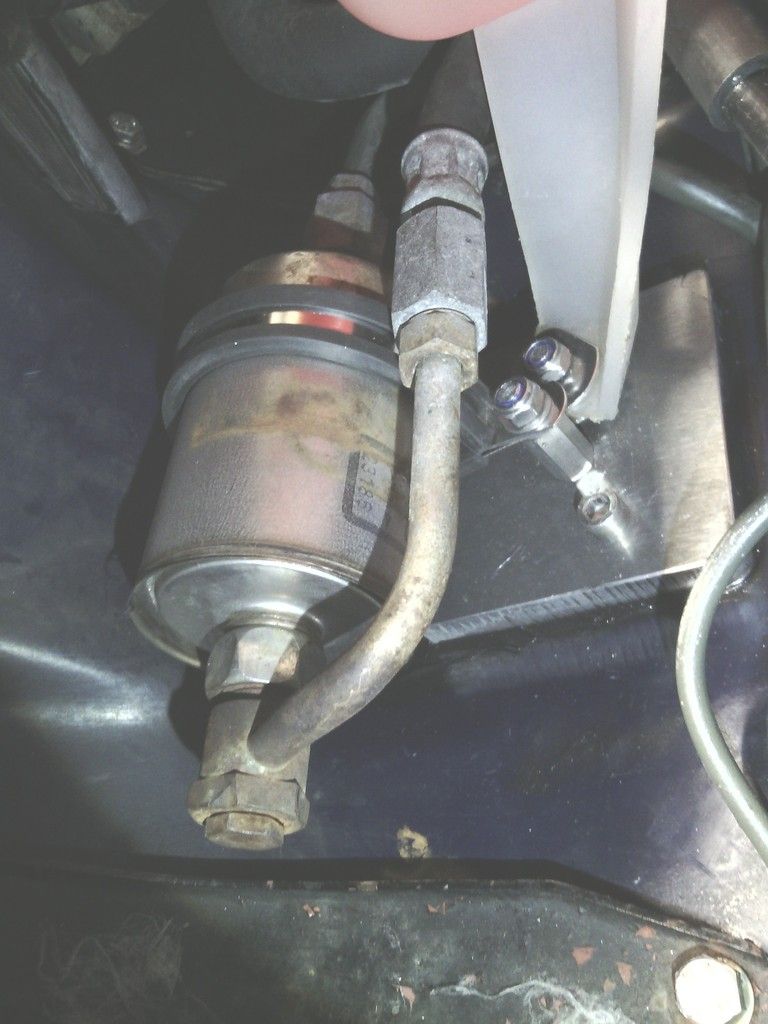
And while in the area the mount for it and the fuel filter looked proper shonky too, the mounting bolts were rusted solid yet loose at the same time so water just poured in,
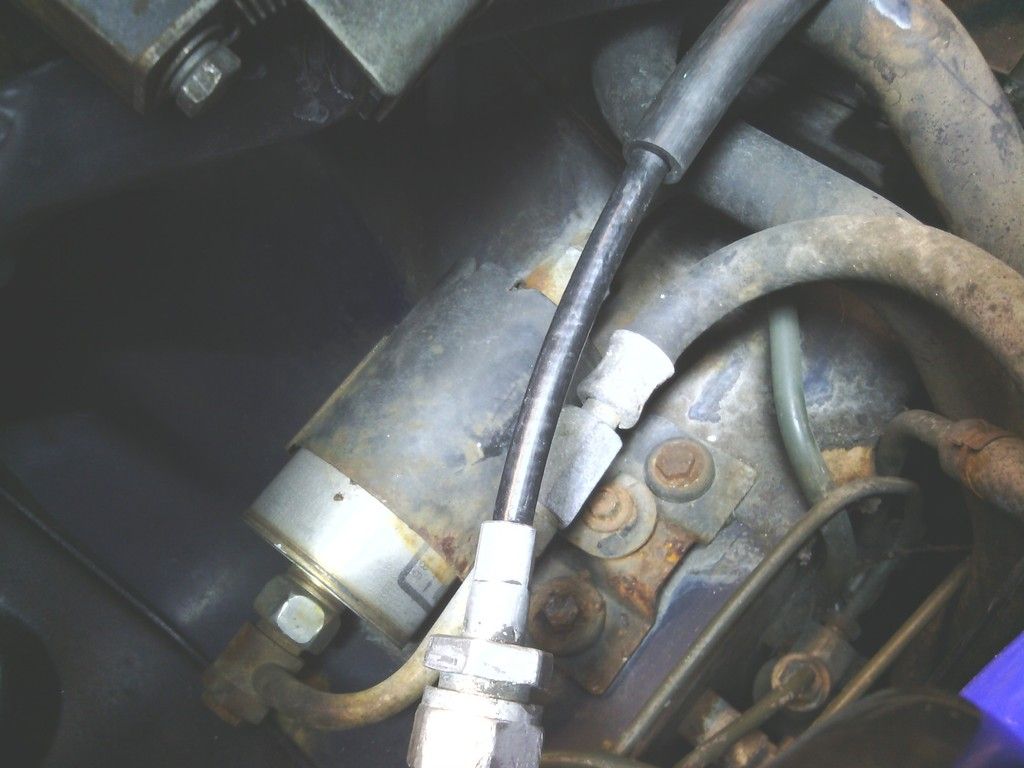
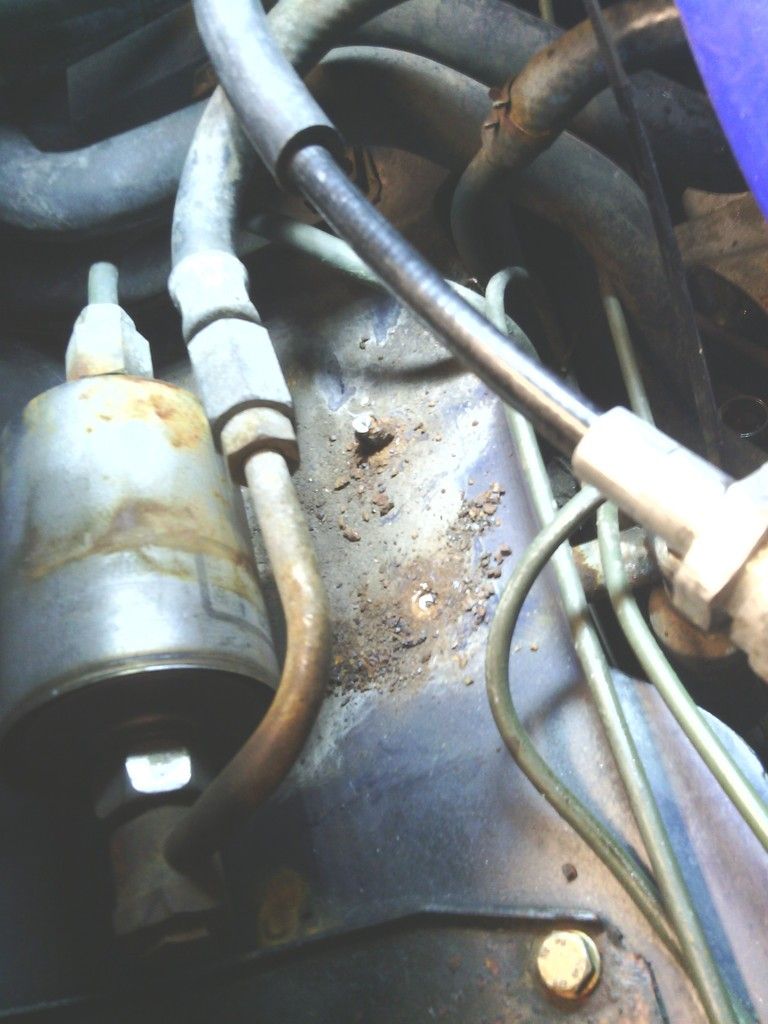
A new base was made from 10mm thick aluminium, this was drilled and tapped with M6 stainless studs and bolts, this whole assembly was bonded on to the bulkhead with polyurethane to seal up the holes and the studs were thread locked in to seal them also,
A new stainless P clip for the filter was ordered and all bolted up the finished job looks much better, it would have been a nightmare to change the fuel filter with the old bracket since I had to drill the mounting bolts out.
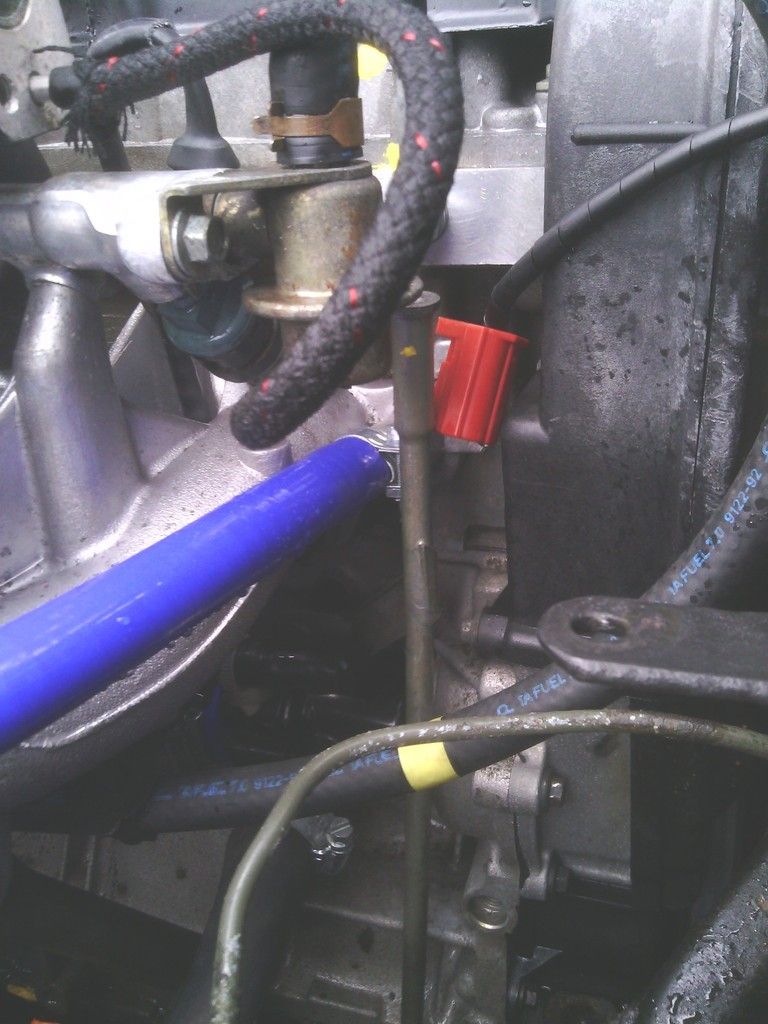
then the remaining hoses were fitted
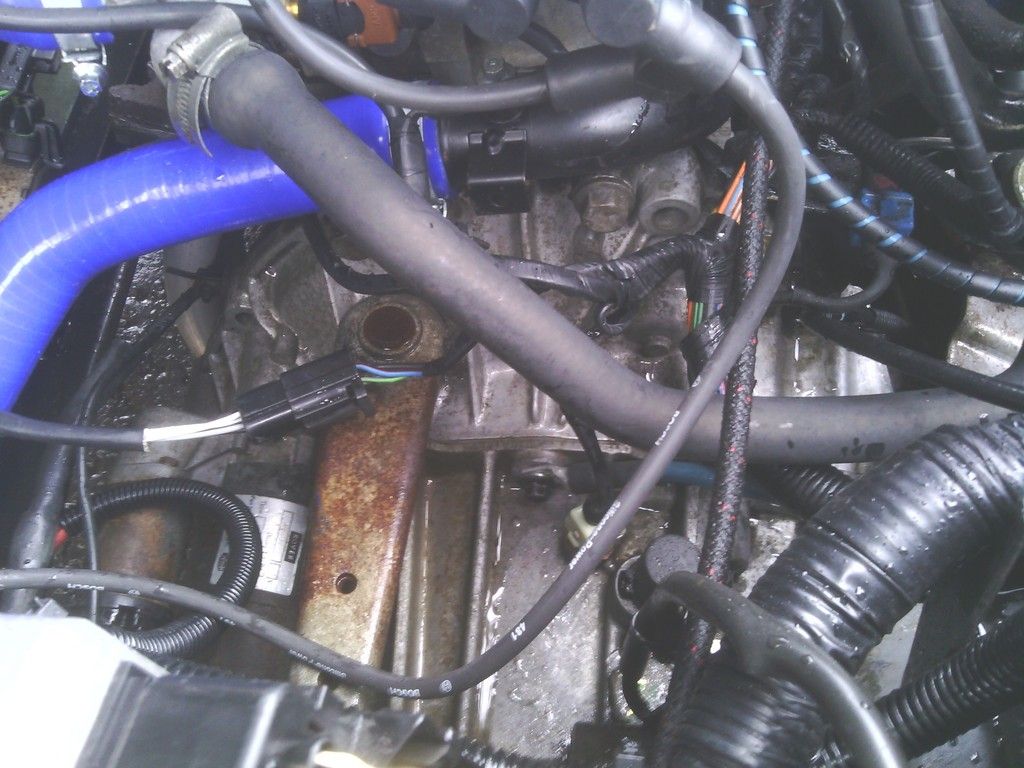
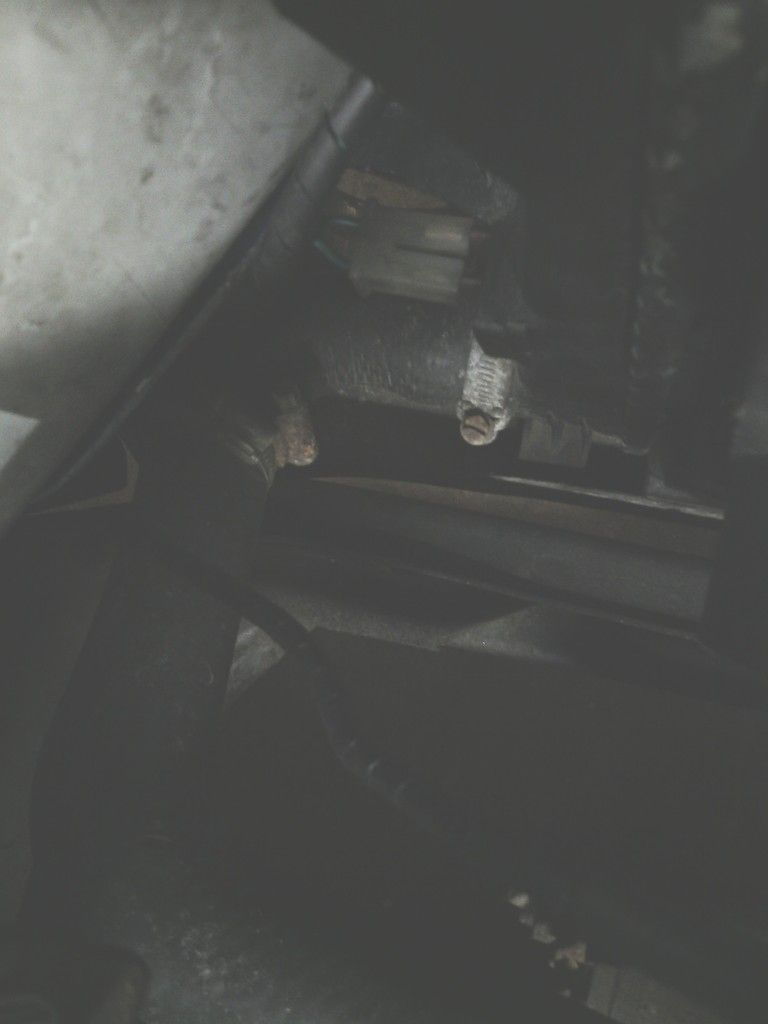
The wiring loom didn’t inspire confidence either so I set about checking and replacing where needed, the whole ECU loom was picked apart and tested, most of it checked out ok
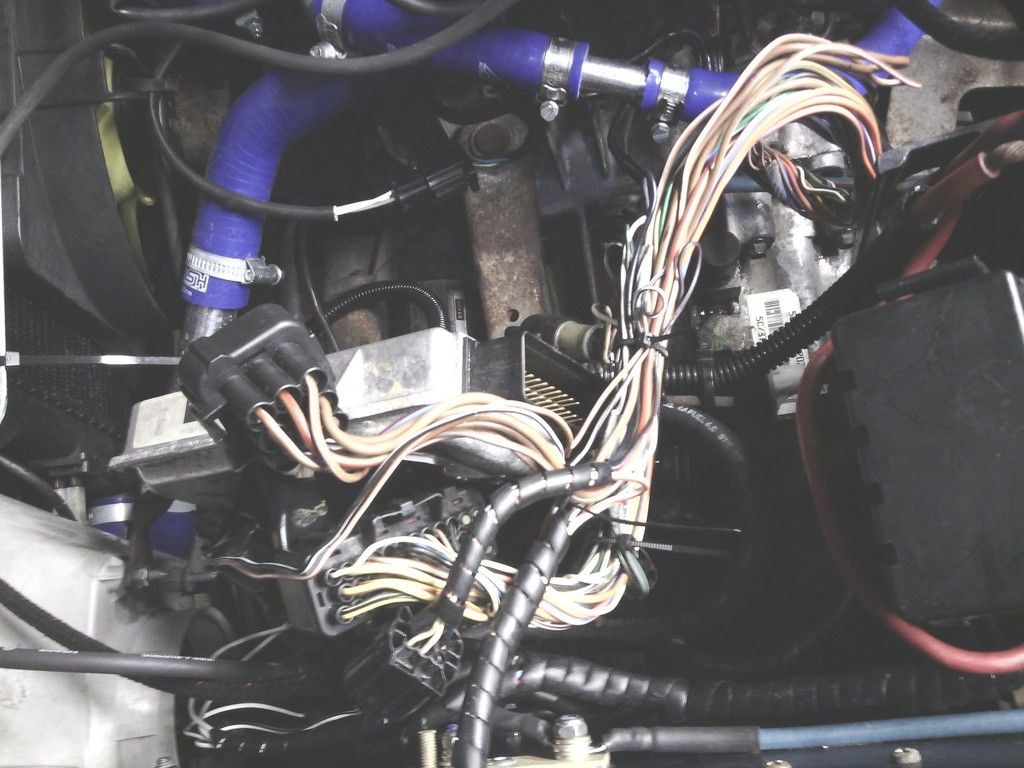
I found where the fuel cut off switch used to be
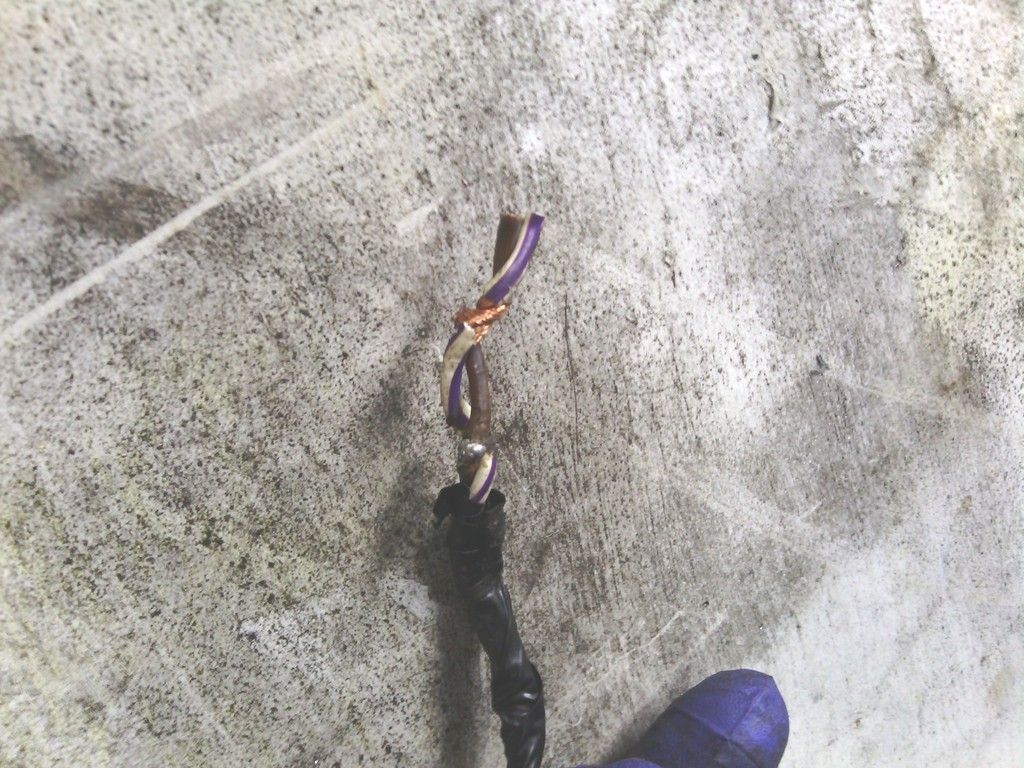
Twist n tape! – wiring repairs obviously not a strong point on this car….
Once that was taken care of I replaced all the engine management sensors for brand new since prevention is better than cure, it cost a bit but it was the right decision especially when looking at the crank sensor
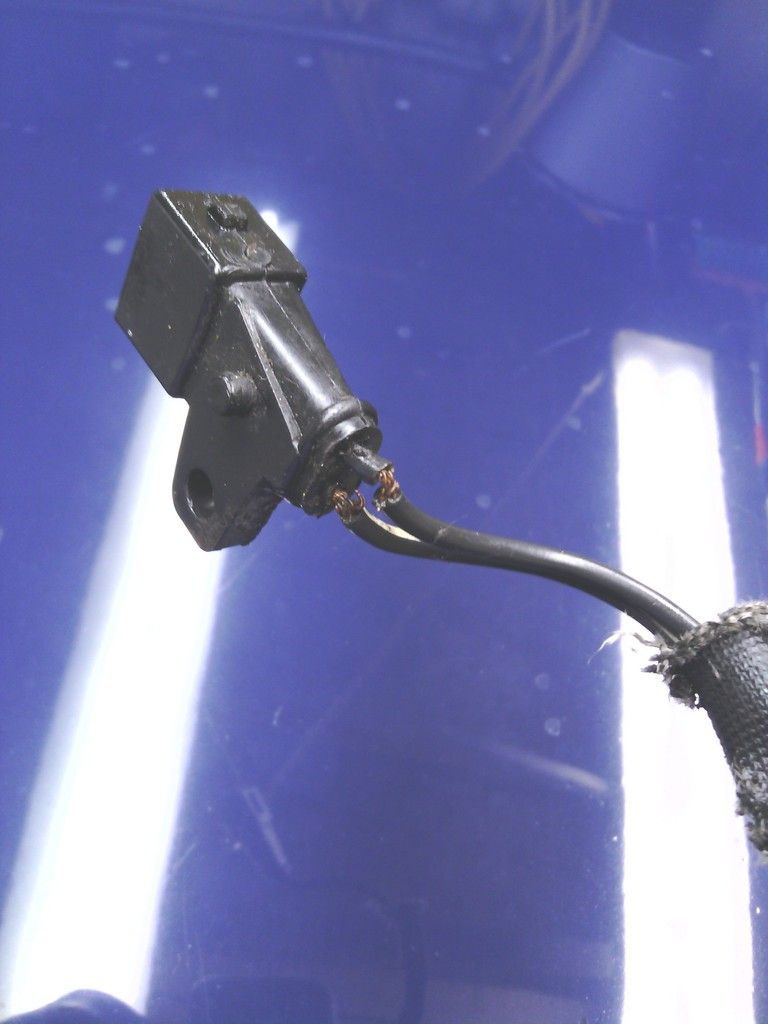
About 2 strands left per cable and once this breaks the engine dies.
All this tidying up got me on a roll, the engine bay was comming on but it lacked a certain something
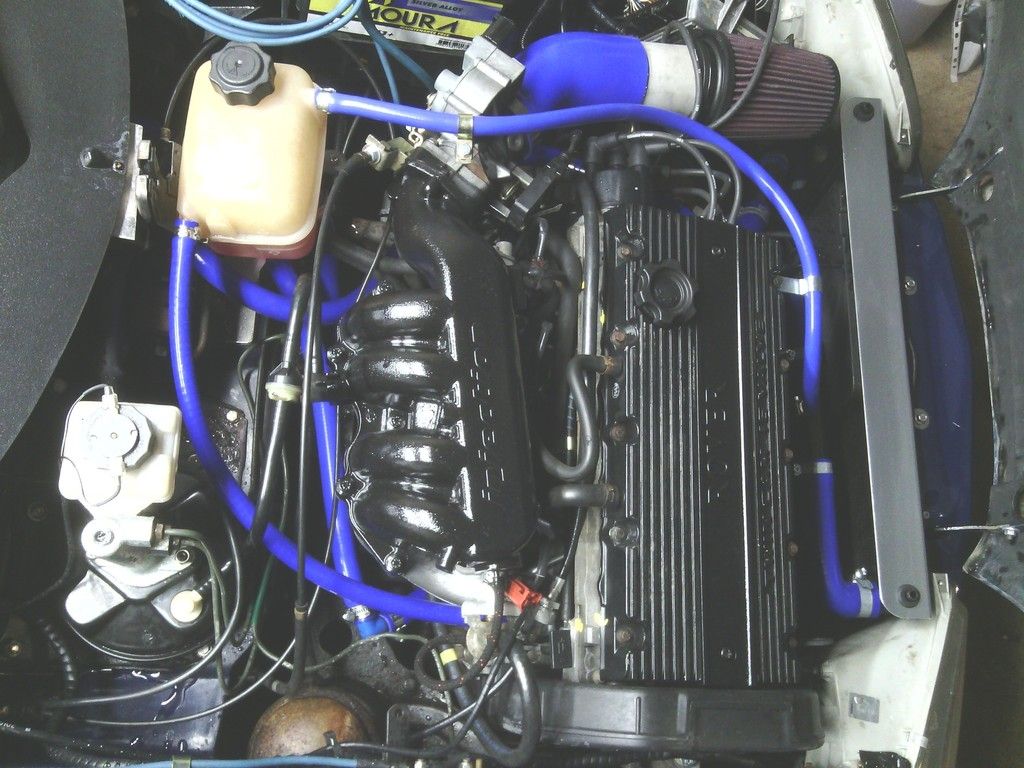
so I ordered a replacement rocker cover off a Freelander and set about reworking it (handy all K series are identical externally) I shot blasted it
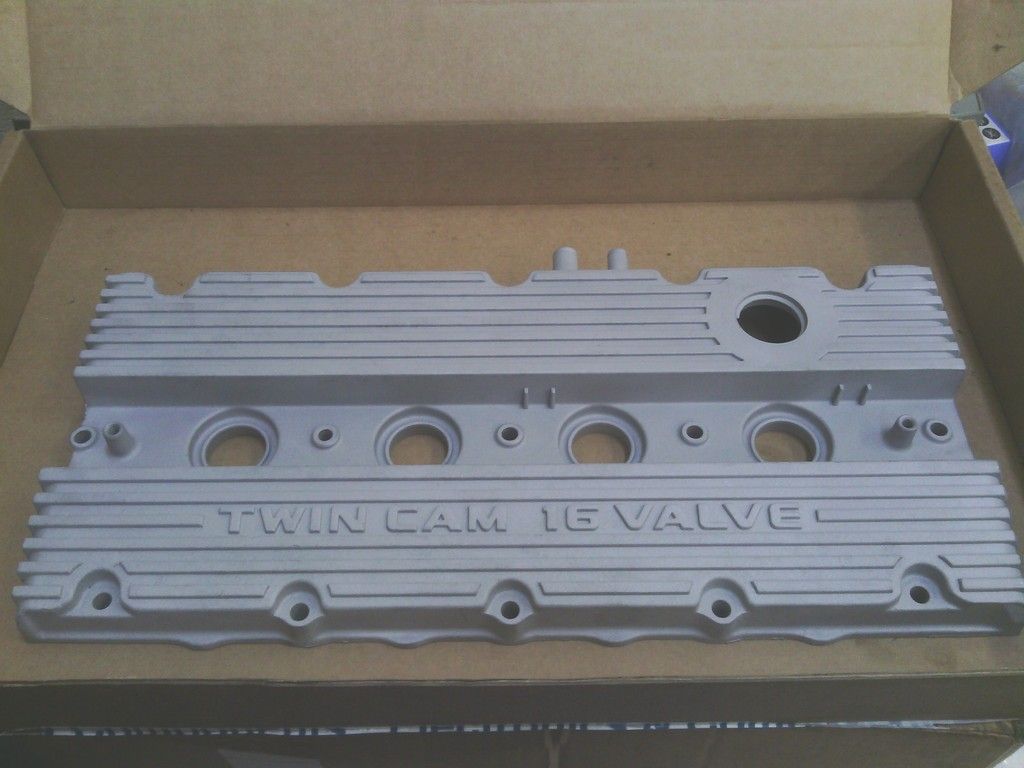
Painted it gloss black
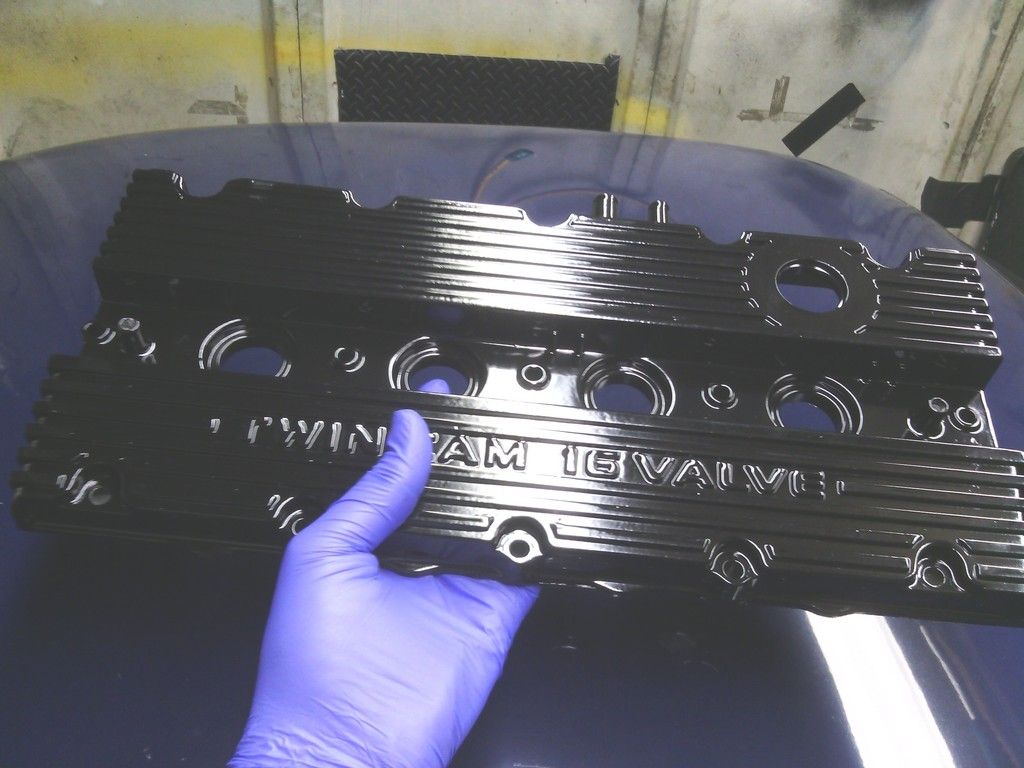
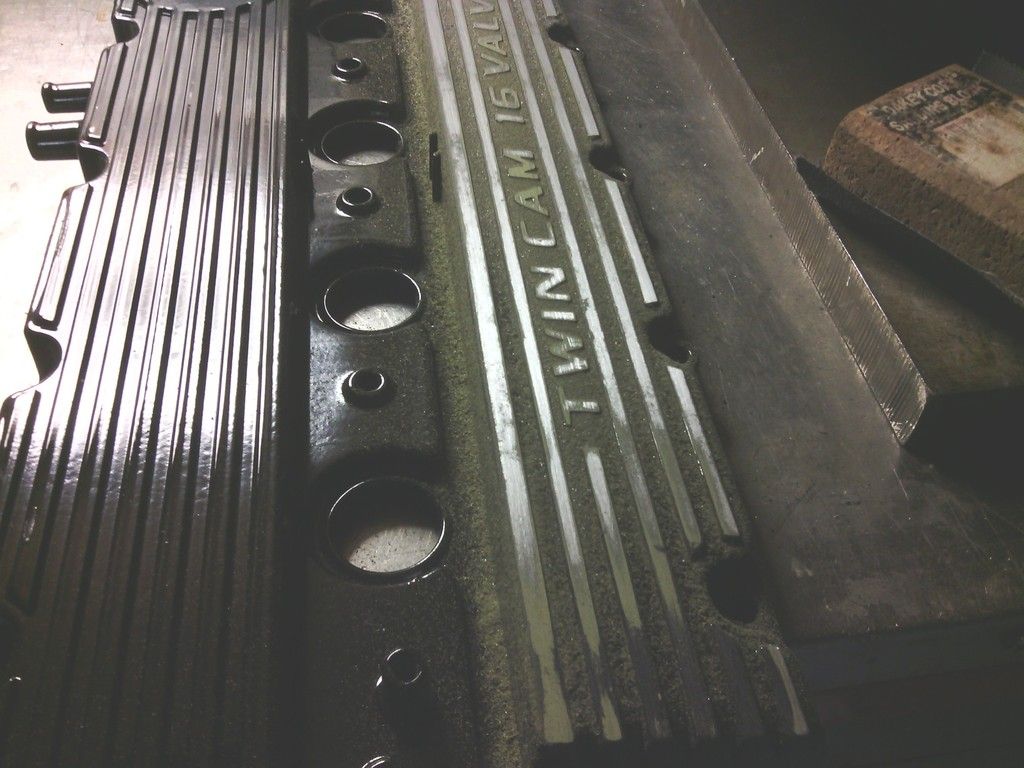
Then sanded off the raised lettering to reveal the “twin cam 16 valve” writing, it took some doing since not all the letters are the same height so a fair amount of aluminium had to be sanded back to keep it all even, the finished result looks fantastic
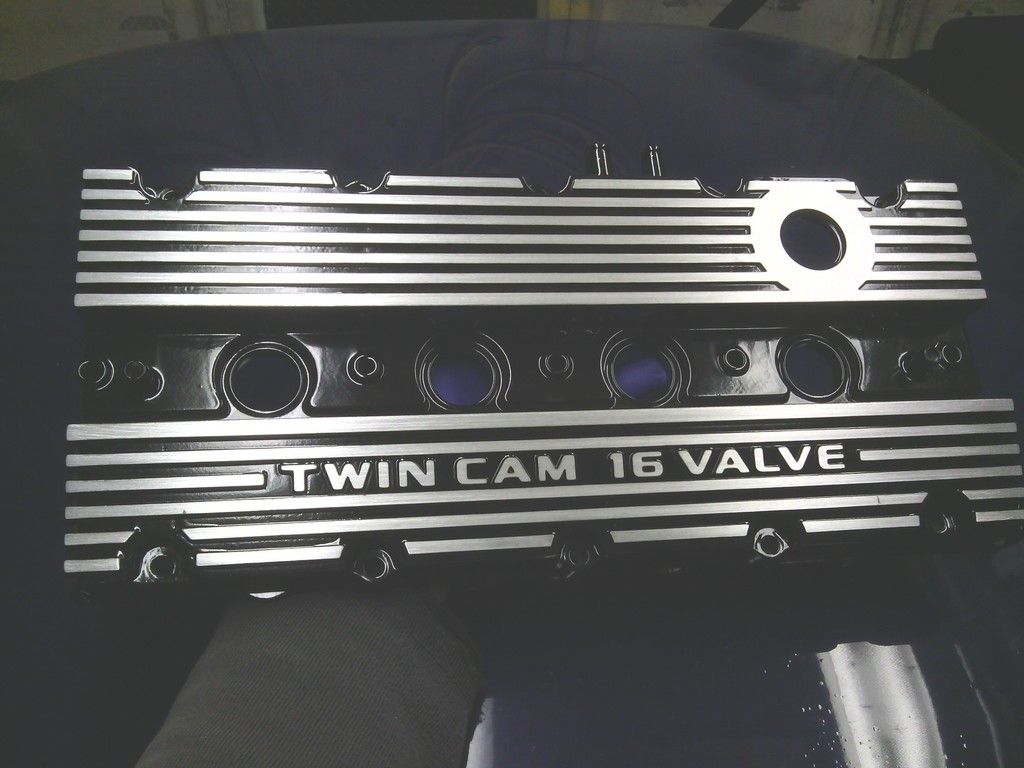

And I did the inlet manifold the same too
While I can the rocker cover off I could see the cam shafts were in exceptional condition with no signs of wear whatsoever so that made me feel slightly better for giving myself a black eye earlier in the week and a compression check revealed the engine to be even and very healthy across all cylinders, that will do for now..
Only jobs left to do under the bonnet now is to do away with the rattly bonnet stay in place of a pair of variable pressure gas struts, and to also solve the mystery of the bodged fuel pump wiring, jobs for another day…
One thing I liked about my Quantum was the engine bay was so clean you could eat your dinner off it, I’d not set out to do that but it was a consequence of rebuilding the car from the ground up – and I liked it.
Although I’m not swapping the engine in the Midas just yet I don’t see why I can make the engine bay a more pleasant place to be in the mean time, the rad hoses were well past their best and constantly seeping anyway so now seemed a good time.
First job was to pressure wash the entire engine bay and engine, I’ve not used TFR before but the Swarfega Powerwash brand worked fantastic, I could not believe the amount of crap that got washed off, with the car raised I did underneath too, years of crud got washed away leaving all that was left behind to look as new as could be expected
Onto the rad hoses,
All the rubber and metal pipes were degrading rapidly and tweaking up the jubilee clips became a regular part of life,


so I made a new top hose from copper pipe and a brass tail

And bought a new old stock rear metal pipe that runs from the stat round the back of the block,

all rubber pipes were measured up and silicone hoses ordered for their replacement,

The day came to do the job and all was going well until I got to the rear metal pipe from the stat, its 2 x 8mm bolts were rather tight, the one nearest the flywheel came out eventually once cracked but the one mid way round the back of the block was so tight I couldn’t budge it, I could only get at it from the cam belt side with a 1/4dr ratchet too which didn’t help, once id exhausted myself to the point of passing out trying to budge it I had a brain wave that would either see it freed off or sheared, at this point I didn’t care which
I could see (but not reach) the ratchet handle from between the inlet manifold ports, so I looped some of my strongest cable ties together in a chain and fed it down and round the ratchet handle, then with a length of wood resting on the rocker cover looped through the end of the cable ties I could use is to lever up the cable tie chain against the ratchet handle and by pulling from below with my other hand it cracked off – bingo!
But each turn was just as tight as the pervious until it had freed enough to do away with the wood lever and use my right hand instead, so using both hands above and below I could move the ratchet enough to rotate the seized bolt enough to slowly unwind it progress was very tedious but progress non the less, feeling a bit smug with myself for finding a solution to the problem I got a good rhythm going on the still very tight bolt and all was going well until WHACK!, the cable tie chain slipped off the ratchet handle and the resulting pull force with my right hand was transferred to my jaw, I’ve never been hit so hard in my life and did feel somewhat shaken.
After a brief rest and pep talk to myself I carried on somewhat more carefully than before, thinking to myself just how long does this bolt need to be? All going well then…..
Another punch, in the eye this time.
At this point I had to give myself a bit of a talking to,
This is my hobby, I’m supposed to enjoy it, and here I am late at night standing in a cold garage repeatedly punching myself in the face and almost bringing myself to tears – why oh why did I not follow a much safer pursuit such as sky diving or deep sea shark fishing?
Anyhoo with the worlds tightest M8 bolt finally out the head I could refit my new pipe and plumb it all in,
Next on the list was the rad mount, or lack of
The original rad location was too low down to fit he sexy spot lights I got from Neil when buying the car – the bottom hose was in the way – not too much of an issue as I wold have to raise the height of the rad anyway since there was no bottom mounts for the rad, it just sort of flapped about, you can see the impression the bottom rad legs had made in the fiberglass aftr years of not being properly supported.

So some 25mmx25mm ally box was used to make proper mounts


And now the rad sits higher to clear the bottom hose and the rad locates secure in the bumper too – nice
While down there I properly fitted the fog lights by making proper brackets out of stainless and aluminium – the old ones were just bonded in


With the rad mounted at the base and slightly higher too, the top mount didn’t fit, just as well as it looked rubbish.

A nice bit of 3mm ally sheet was ordered

And bent to fit, after some fabrication and some riv-nuts all was well with the world once again


The reservoir bottle got the old bleach and rice trick and it came up like new


And while in the area the mount for it and the fuel filter looked proper shonky too, the mounting bolts were rusted solid yet loose at the same time so water just poured in,


A new base was made from 10mm thick aluminium, this was drilled and tapped with M6 stainless studs and bolts, this whole assembly was bonded on to the bulkhead with polyurethane to seal up the holes and the studs were thread locked in to seal them also,

A new stainless P clip for the filter was ordered and all bolted up the finished job looks much better, it would have been a nightmare to change the fuel filter with the old bracket since I had to drill the mounting bolts out.


then the remaining hoses were fitted


The wiring loom didn’t inspire confidence either so I set about checking and replacing where needed, the whole ECU loom was picked apart and tested, most of it checked out ok

I found where the fuel cut off switch used to be

Twist n tape! – wiring repairs obviously not a strong point on this car….
Once that was taken care of I replaced all the engine management sensors for brand new since prevention is better than cure, it cost a bit but it was the right decision especially when looking at the crank sensor

About 2 strands left per cable and once this breaks the engine dies.
All this tidying up got me on a roll, the engine bay was comming on but it lacked a certain something

so I ordered a replacement rocker cover off a Freelander and set about reworking it (handy all K series are identical externally) I shot blasted it

Painted it gloss black

Then sanded off the raised lettering to reveal the “twin cam 16 valve” writing, it took some doing since not all the letters are the same height so a fair amount of aluminium had to be sanded back to keep it all even, the finished result looks fantastic


And I did the inlet manifold the same too
While I can the rocker cover off I could see the cam shafts were in exceptional condition with no signs of wear whatsoever so that made me feel slightly better for giving myself a black eye earlier in the week and a compression check revealed the engine to be even and very healthy across all cylinders, that will do for now..
Only jobs left to do under the bonnet now is to do away with the rattly bonnet stay in place of a pair of variable pressure gas struts, and to also solve the mystery of the bodged fuel pump wiring, jobs for another day…

https://easywider.co.uk/ universal flexible wheel arch extensions
- Jin
- Posts: 454
- Joined: Fri Aug 01, 2014 10:33 pm
Re: J171 NJO Cortez / 2+2 rebuild and modifications
![]() by benofbrum » Wed Apr 01, 2015 11:44 pm
by benofbrum » Wed Apr 01, 2015 11:44 pm
Fuel pump wiring mystery solved. It was a garage repair for a non working pump. They did not want to delve into the ECU to find the fault, so just put in another feed.
Some really nice work under the bonnet, and the spot lights go well.
Some really nice work under the bonnet, and the spot lights go well.
- benofbrum
- Posts: 255
- Joined: Tue Feb 07, 2012 11:58 pm
Return to Complete Midas rebuild
Who is online
Users browsing this forum: No registered users and 10 guests