Hi, the gunk in my header tank is the colour of pale mustard, which is exactly what emulsified oil looks like, I've cleaned the the tank 3 times now in the last couple of months but a slight coating comes back, the oil is clean and it runs sweet, but either way there should be no way oil can end up in the coolant without it being a real problem.
If your residue is darker it could be rust scale from the block /head?
Being a k series and since they tend to dump water in the oil I'm not leaving it to chance
Is your oil clear? Do you see any bubbles rising in the header tank? Does it loose oil / water
Midas Cars Forum - www.midascarsforum.com
This forum is for Midas and Midtec Bronze enthusiasts. The Midas is a British car designed as a replacement for the Mini Marcos.
J171 NJO Cortez / 2+2 rebuild and modifications
Moderator: The Midas Forum Staff
Re: J171 NJO Cortez / 2+2 rebuild and modifications
![]() by Jin » Fri May 08, 2015 4:23 pm
by Jin » Fri May 08, 2015 4:23 pm
https://easywider.co.uk/ universal flexible wheel arch extensions
- Jin
- Posts: 454
- Joined: Fri Aug 01, 2014 10:33 pm
Re: J171 NJO Cortez / 2+2 rebuild and modifications
![]() by Hans Efde » Fri May 08, 2015 5:02 pm
by Hans Efde » Fri May 08, 2015 5:02 pm
It's darker, indeed more rust like. I have no bubbles in the tank and the oil is clear. I would expect whitish residue on the filler cap but it is clean. I have to add a lot of oil, but no water. I have an oil smell in my clothes after a drive but no white or blue smoke from the exhaust. It's puzzling. I'll do a compression check and also adjust the valves. I used the recommendation from my builder but according to the Vizzard manual it should be more.
-

Hans Efde - Posts: 1732
- Joined: Sat Dec 06, 2008 10:11 pm
- Location: IJlst, Netherlands
Re: J171 NJO Cortez / 2+2 rebuild and modifications
![]() by Jin » Fri May 08, 2015 8:24 pm
by Jin » Fri May 08, 2015 8:24 pm
Oil smell on your clothes?
That's the scent of a real car enthusiast,
Add a dash of 2 stroke to your jeans and your in heaven
That's the scent of a real car enthusiast,
Add a dash of 2 stroke to your jeans and your in heaven
https://easywider.co.uk/ universal flexible wheel arch extensions
- Jin
- Posts: 454
- Joined: Fri Aug 01, 2014 10:33 pm
Re: J171 NJO Cortez / 2+2 rebuild and modifications
![]() by Jin » Sun May 31, 2015 8:41 pm
by Jin » Sun May 31, 2015 8:41 pm
Head gasket
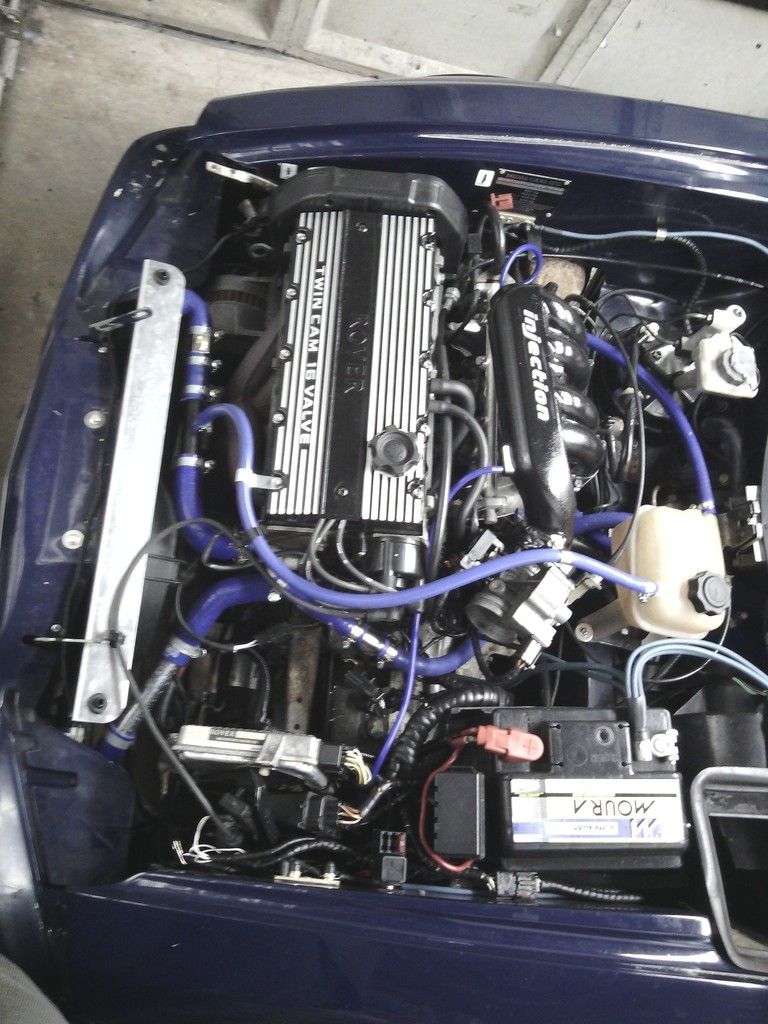
As some of you may have been aware, I had concerns over the head gasket due to finding a film of oil in the header tank, nothing major, about half a teaspoon over a month but it was there and the inevitable was probably going to happen anyway and there would be more mess and damage to deal with if it totally failed on the move (as happened with our rover 25 some years back) so I took the plunge and booked it in to mg rover mobile mechanics who did a fantastic job of the cam belt and water pump last October, for just £300 its had a new MLS head gasket – new cam belt (again) new tensioner (again) new bolts and oil + filter and coolant, all in it took 2 of them over 5 hours and they do this every day hence the reason I didn’t tackle it myself, the engine bay is too tight
Partial strip down
Head off
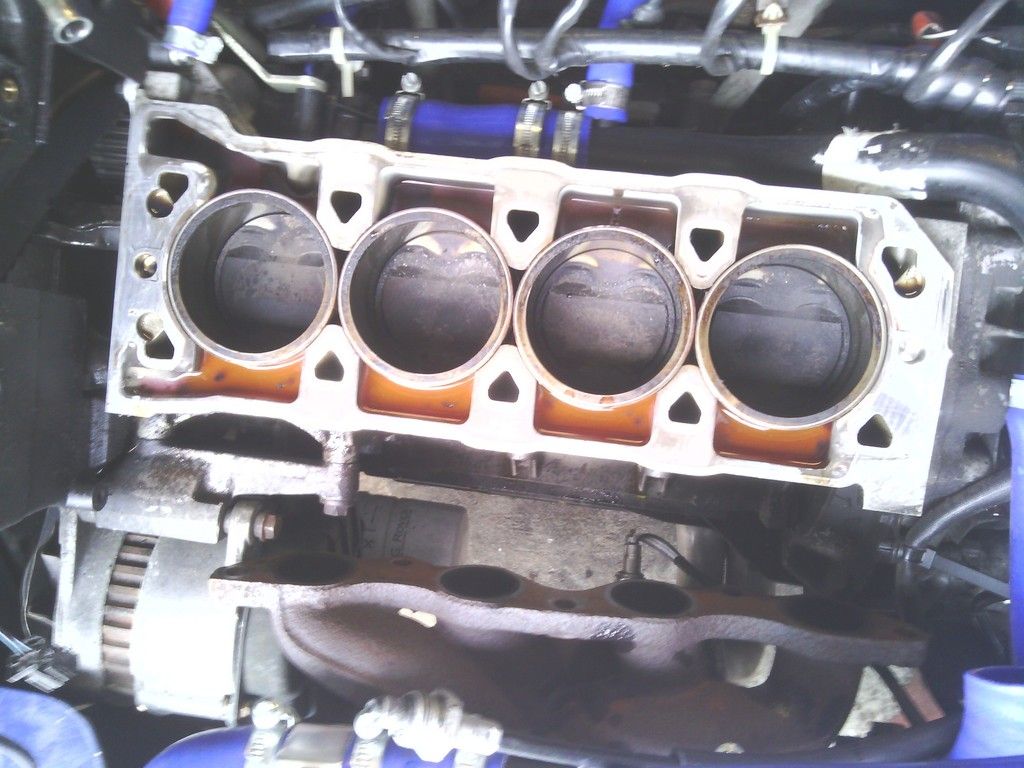
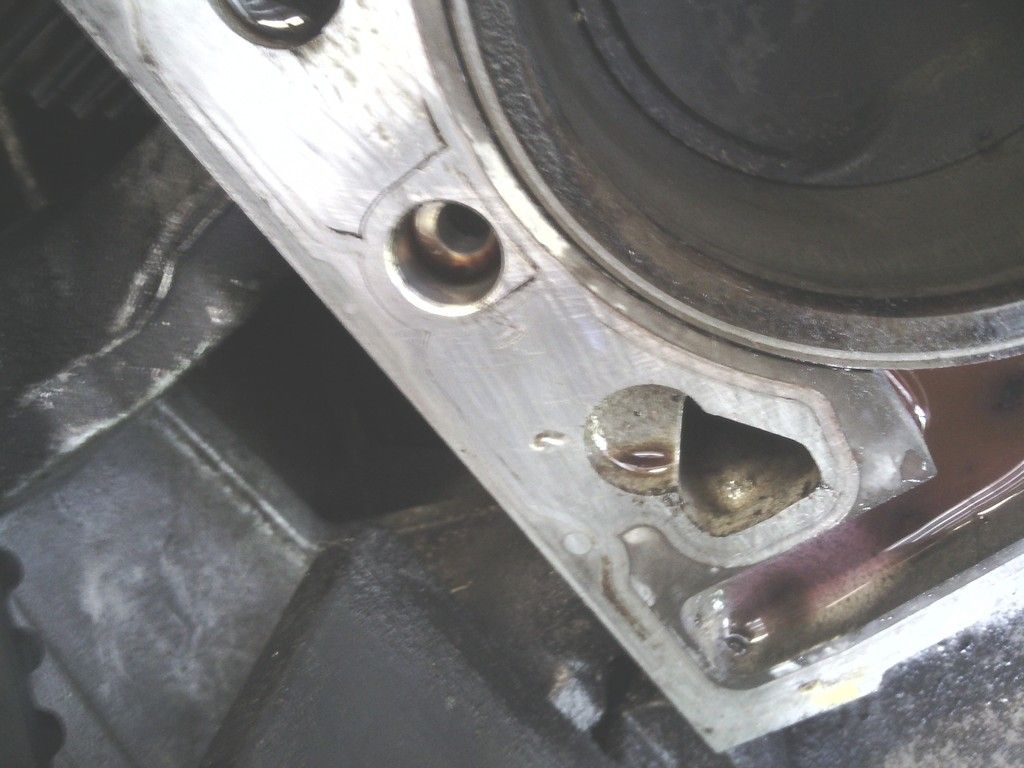
There was a burr on the block and head suggesting at some point the engine had been apart before and some debris got trapped upon reassembly, an oil stone sorted them out though,
No obvious cause for failure was found but then again the symptoms were slight, the silicone beading on the old head gasket was showing signs of delaminating which was most likely the cause, but the MLS gasket is fix and forget so happy motoring from now on, we also talked in depth of future engine upgrades so some updaters here are due soon.
To aid reassembly I bought a temp probe take off adapter and filed a slot onto a brass blanking plug to help with bleeding air out the system,
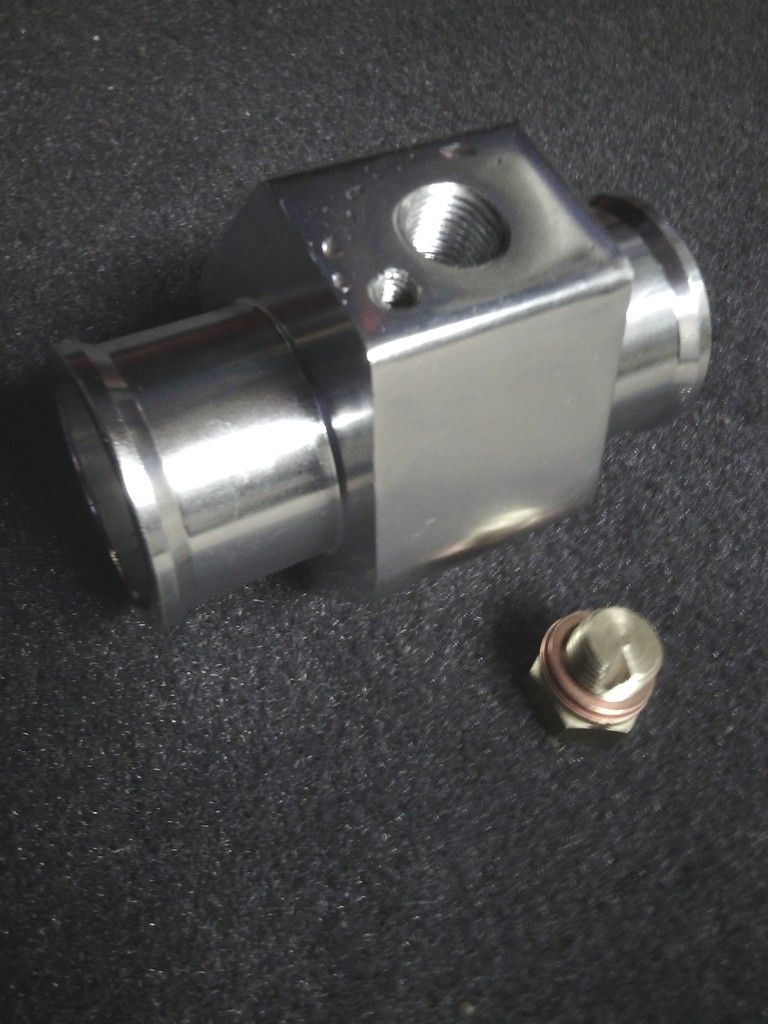
This was added into the top rad hose
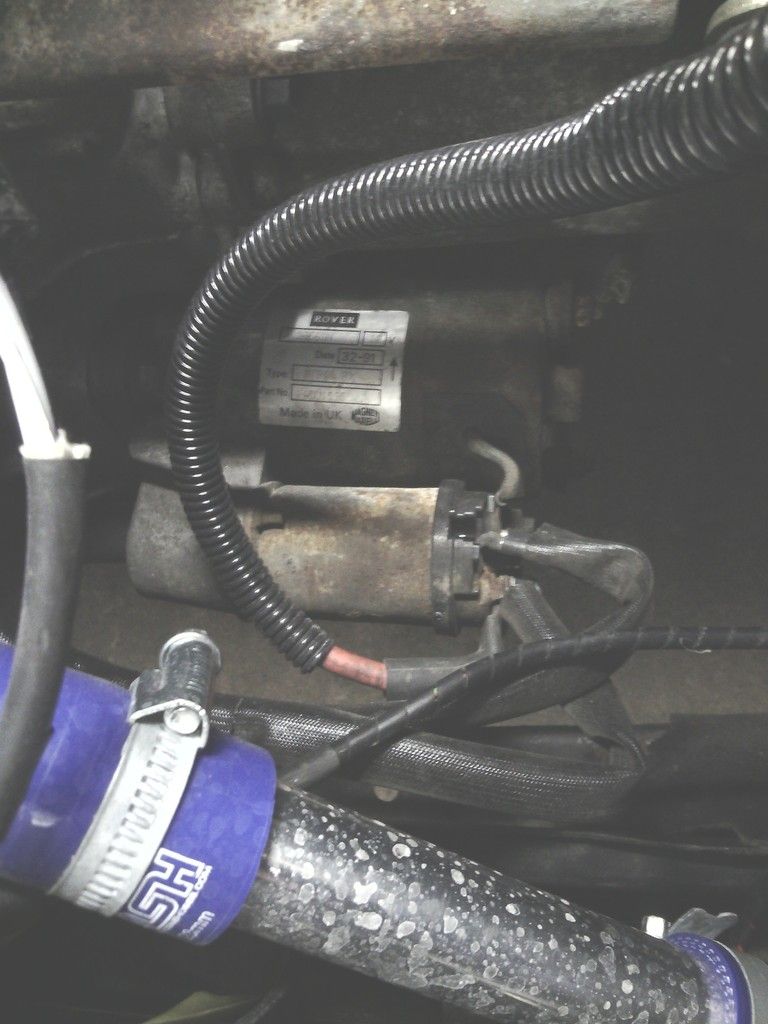
and the finishing touch was my ebay bargain brand new starter motor for the princely sum of £8 delivered!!!
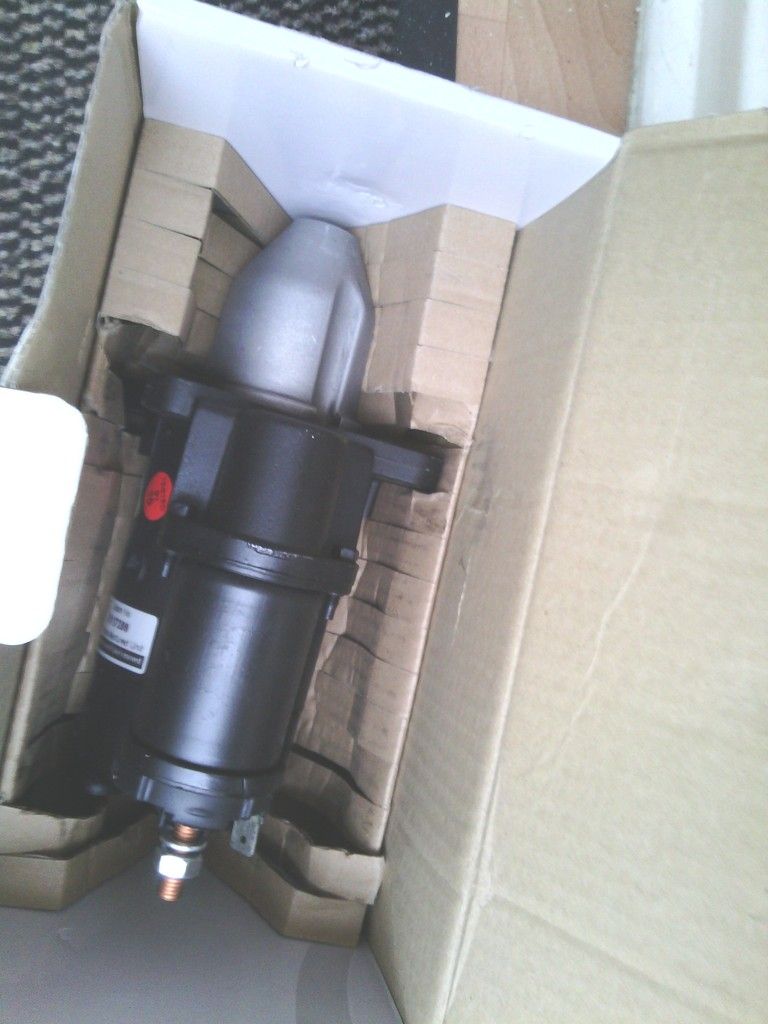
Old
New

Not that there was anything too wring with the old but a new one is – well – newer
Lastly, upon reassembly of the headlights I decided to replace the old bolts with new shiny ones when I realised that there was no washer behind the old bolt head but a piece of old hacksaw blade????
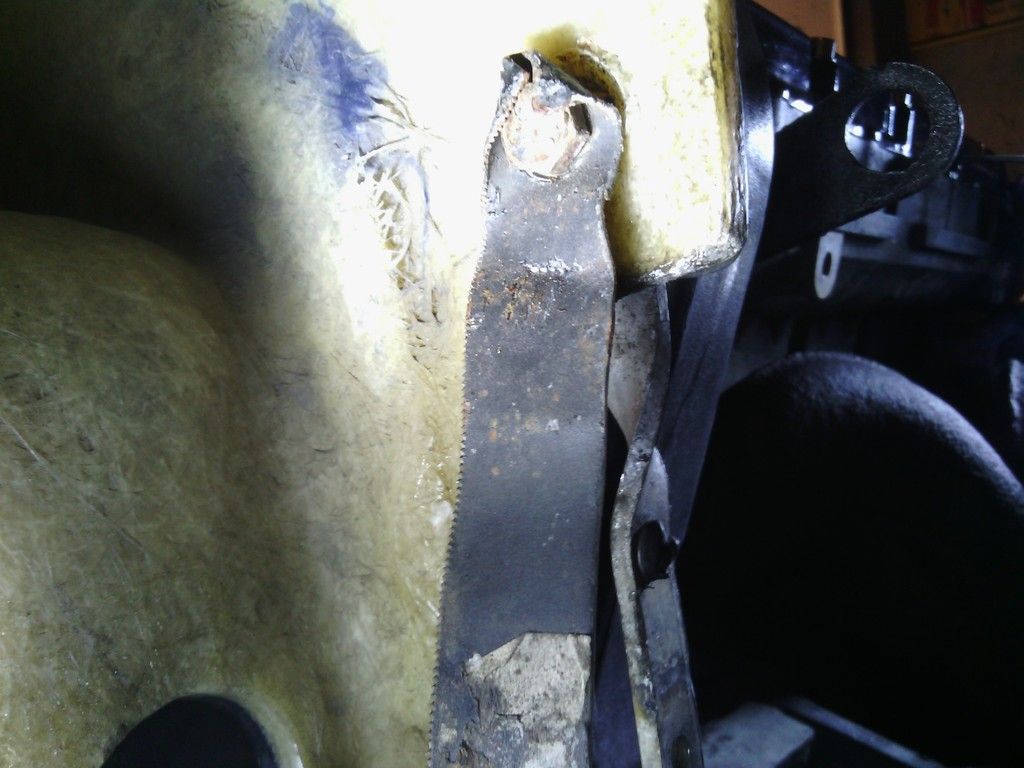
Unconventional to say the least
As some of you may have been aware, I had concerns over the head gasket due to finding a film of oil in the header tank, nothing major, about half a teaspoon over a month but it was there and the inevitable was probably going to happen anyway and there would be more mess and damage to deal with if it totally failed on the move (as happened with our rover 25 some years back) so I took the plunge and booked it in to mg rover mobile mechanics who did a fantastic job of the cam belt and water pump last October, for just £300 its had a new MLS head gasket – new cam belt (again) new tensioner (again) new bolts and oil + filter and coolant, all in it took 2 of them over 5 hours and they do this every day hence the reason I didn’t tackle it myself, the engine bay is too tight
Partial strip down

Head off

There was a burr on the block and head suggesting at some point the engine had been apart before and some debris got trapped upon reassembly, an oil stone sorted them out though,

No obvious cause for failure was found but then again the symptoms were slight, the silicone beading on the old head gasket was showing signs of delaminating which was most likely the cause, but the MLS gasket is fix and forget so happy motoring from now on, we also talked in depth of future engine upgrades so some updaters here are due soon.
To aid reassembly I bought a temp probe take off adapter and filed a slot onto a brass blanking plug to help with bleeding air out the system,

This was added into the top rad hose
and the finishing touch was my ebay bargain brand new starter motor for the princely sum of £8 delivered!!!

Old

New

Not that there was anything too wring with the old but a new one is – well – newer
Lastly, upon reassembly of the headlights I decided to replace the old bolts with new shiny ones when I realised that there was no washer behind the old bolt head but a piece of old hacksaw blade????

Unconventional to say the least
https://easywider.co.uk/ universal flexible wheel arch extensions
- Jin
- Posts: 454
- Joined: Fri Aug 01, 2014 10:33 pm
Re: J171 NJO Cortez / 2+2 rebuild and modifications
![]() by DavidL » Sun May 31, 2015 9:56 pm
by DavidL » Sun May 31, 2015 9:56 pm
Jin wrote:Lastly, upon reassembly of the headlights I decided to replace the old bolts with new shiny ones when I realised that there was no washer behind the old bolt head but a piece of old hacksaw blade????
Unconventional to say the least
That certainly looks like a hacksaw blade, but I don't think you'd be able to bend a decent hacksaw blade around the bolt head like that - surely it would snap.
So, what looks like a hacksaw blade - but isn't?
-

DavidL - Posts: 865
- Joined: Tue Mar 01, 2011 10:15 pm
- Location: Tayport, Fife
Re: J171 NJO Cortez / 2+2 rebuild and modifications
![]() by Jin » Sun May 31, 2015 10:48 pm
by Jin » Sun May 31, 2015 10:48 pm
poundland hacksaw blade
i have personnal experiance of their spanners made from cheese
i have personnal experiance of their spanners made from cheese
https://easywider.co.uk/ universal flexible wheel arch extensions
- Jin
- Posts: 454
- Joined: Fri Aug 01, 2014 10:33 pm
Re: J171 NJO Cortez / 2+2 rebuild and modifications
![]() by Jin » Sun May 31, 2015 10:52 pm
by Jin » Sun May 31, 2015 10:52 pm
The reason for lack of consistent updates isn’t because I’ve not been busy, but because I’ve been too busy to sit down for a moment and write up my shenanigans,
I started on the interior a while back, most of what I’ve done is documented here but because in reality the finished job will take ages I thought I’d break it up as I go
Phase 1
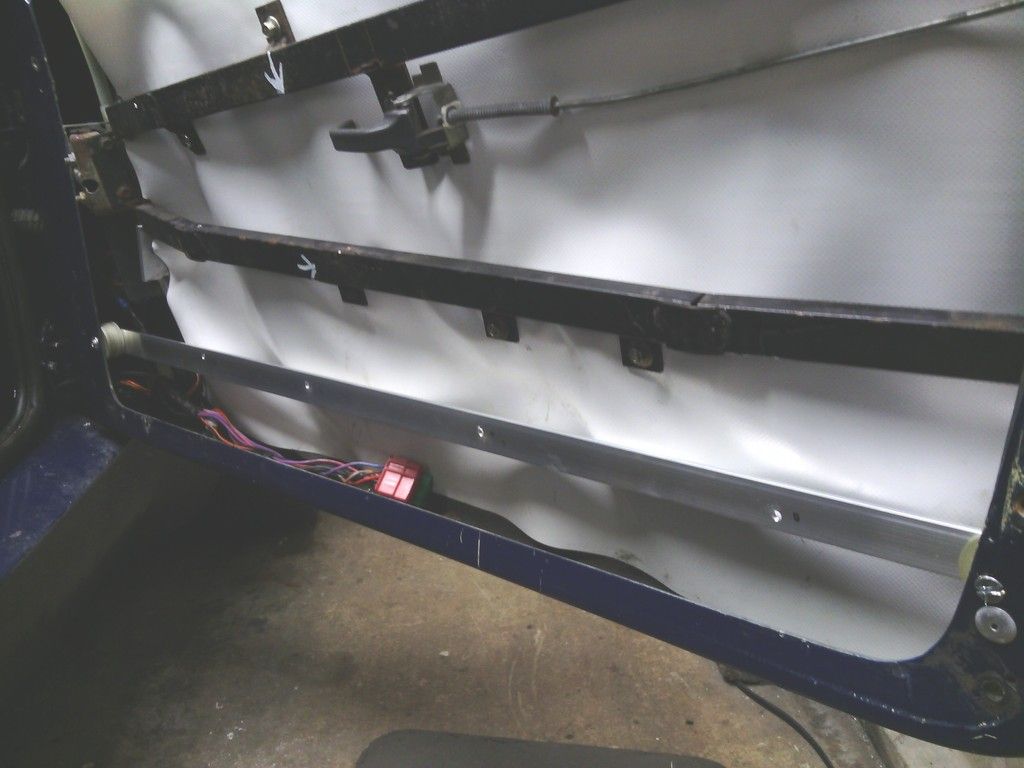
After rebuilding the doors I wanted to make them watertight, any water entering in via the weather seal or door handle etc. pours in and runs down the back of the door card into the foot wells, this is because the doors lean in towards the top when viewed front to back, I initially made a vapour barrier out of heavy duty pvc and stuck it to the steel frame,

it worked but it kept he steel frame in the vicinity of water which isn’t desirable so I made some new barriers out of heavier duty woven pvc cloth, this is sandwiched between the frame and mechanism but fits a treat and keeps the frame and interior dry- since this there has been no door leaks
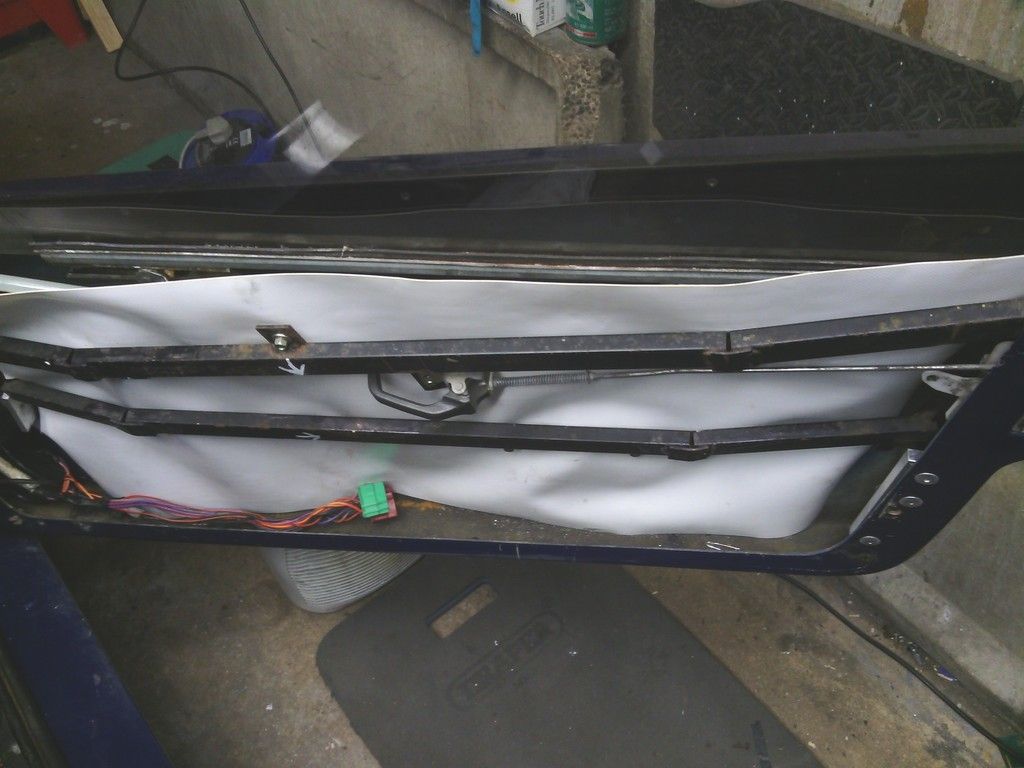
While on the doors I found bizarrely that both the door cards actually closed into the door seal on both sides which wasn’t doing the initial door alignment any good at all nor the seal itself, so I took some measurements and trimmed it down by nearly 10mm.

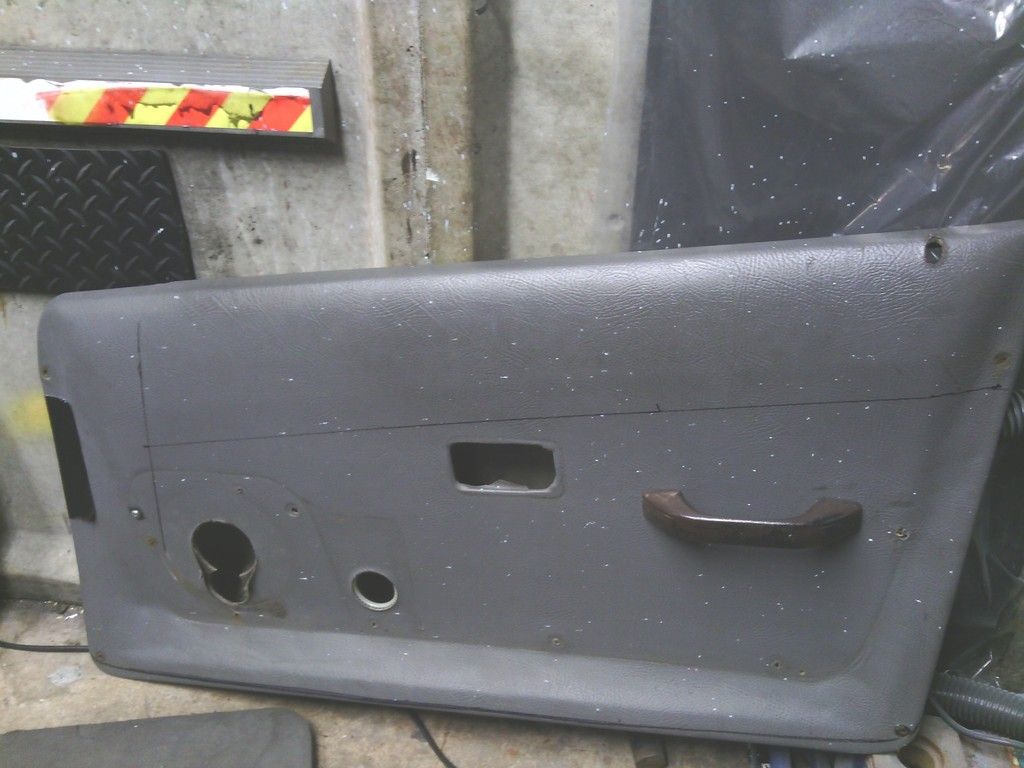
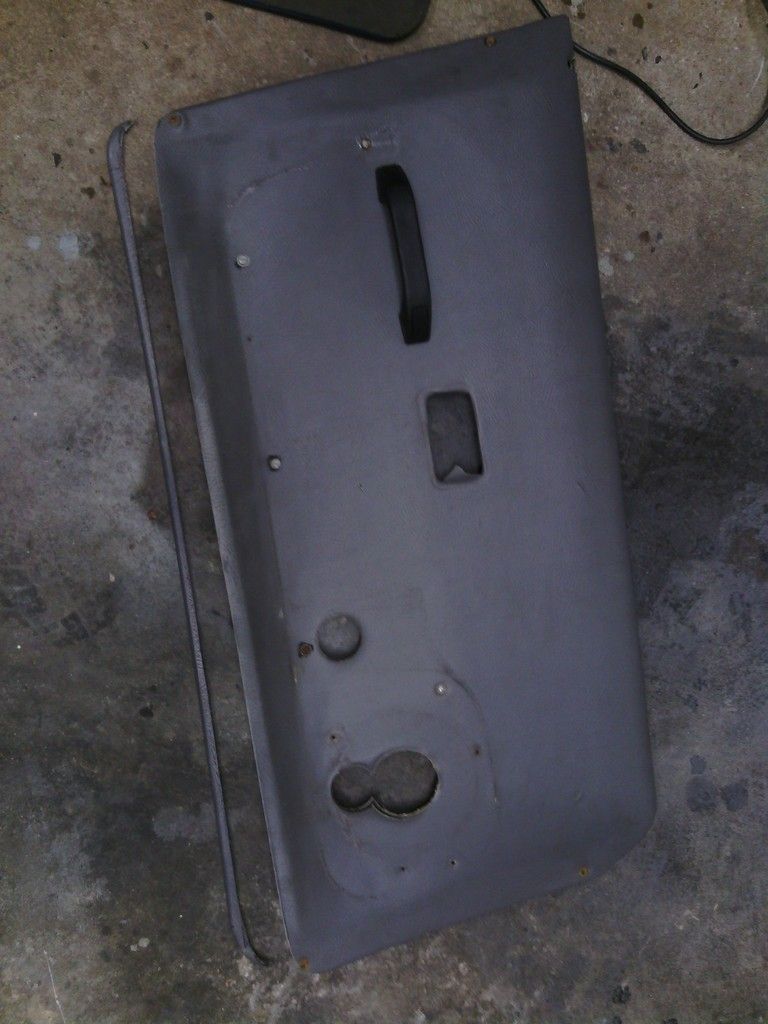
I also made a frame inside the doors to discreetly fix the door card on using the door pocket holes as fixing rather than having separate screws round the periphery which looks very kitcarish, this is as far as this has progressed until I source new door pockets and decide on interior colour scheme.
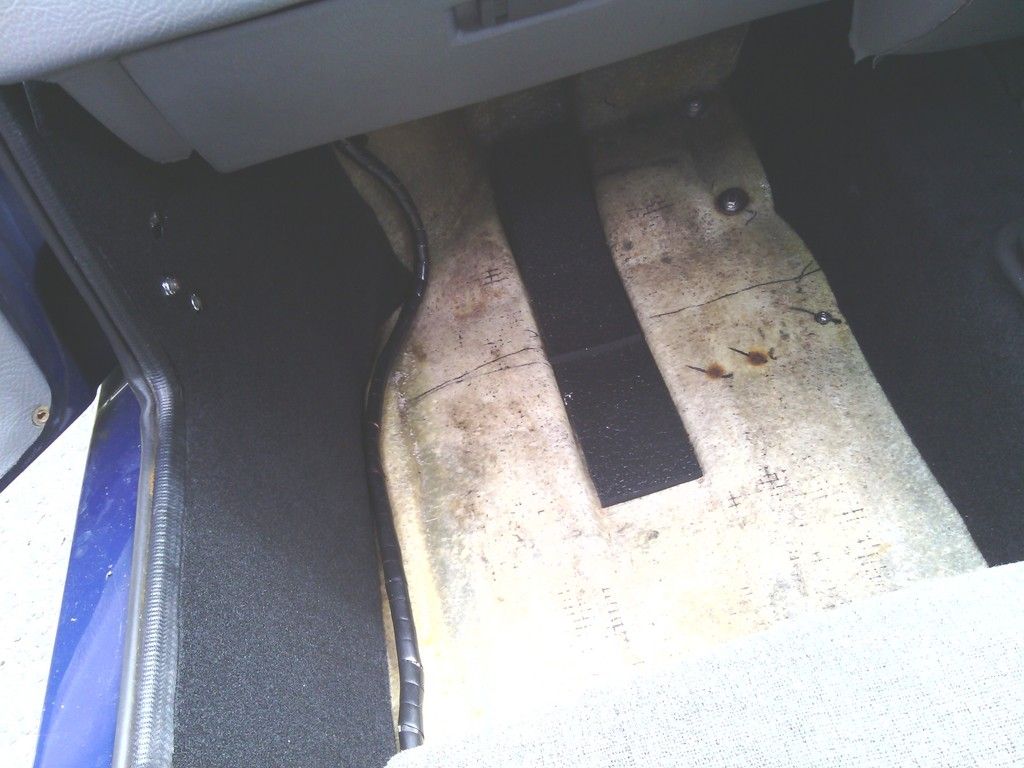
Next up was the remaining rusty fasteners holding various under floor fixings such as exhaust / petrol tank etc. so in turn each was removed (mostly by drilling the heads off) and replaced with stainless dome heads so they sit more flush to the flooring
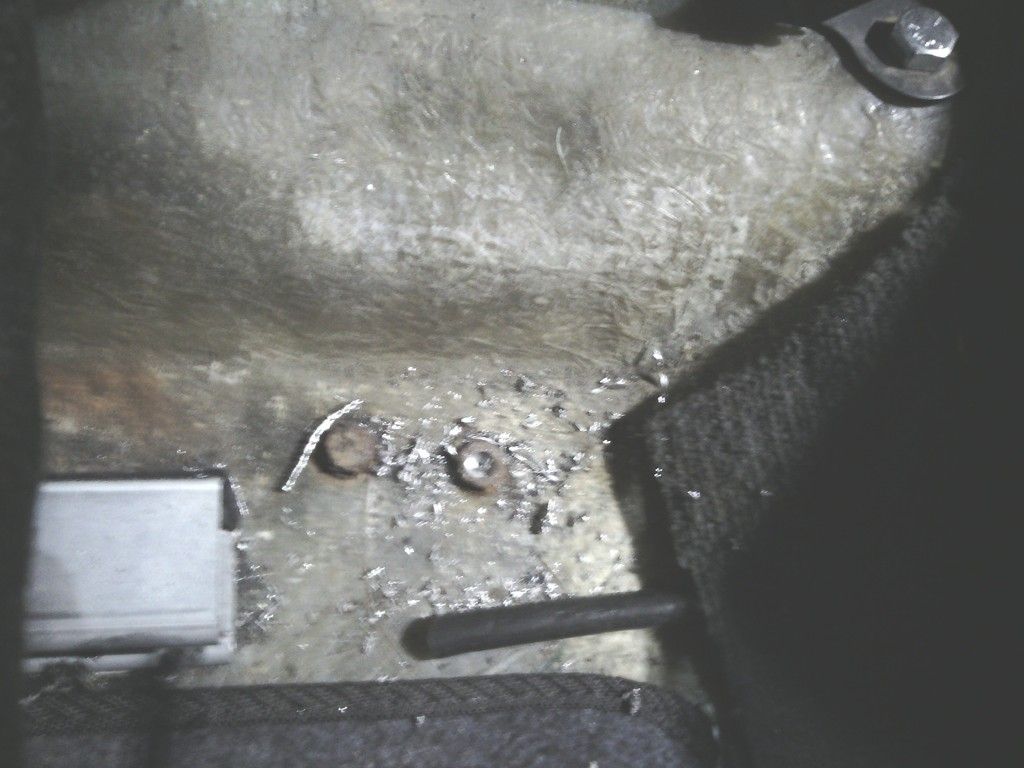
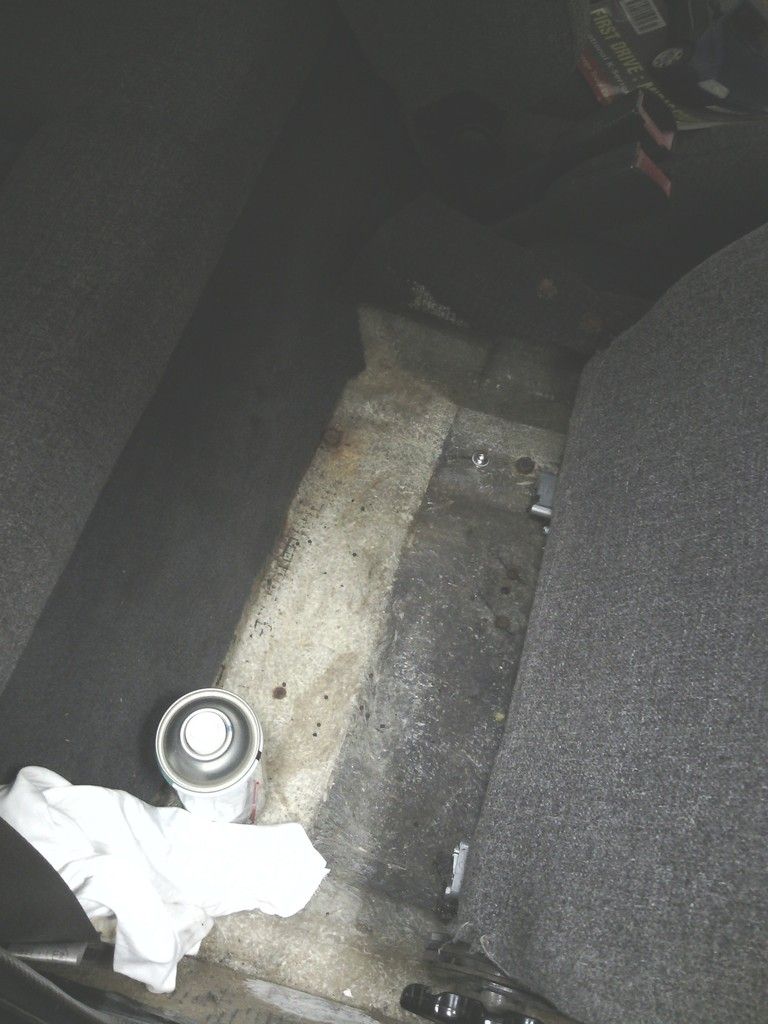
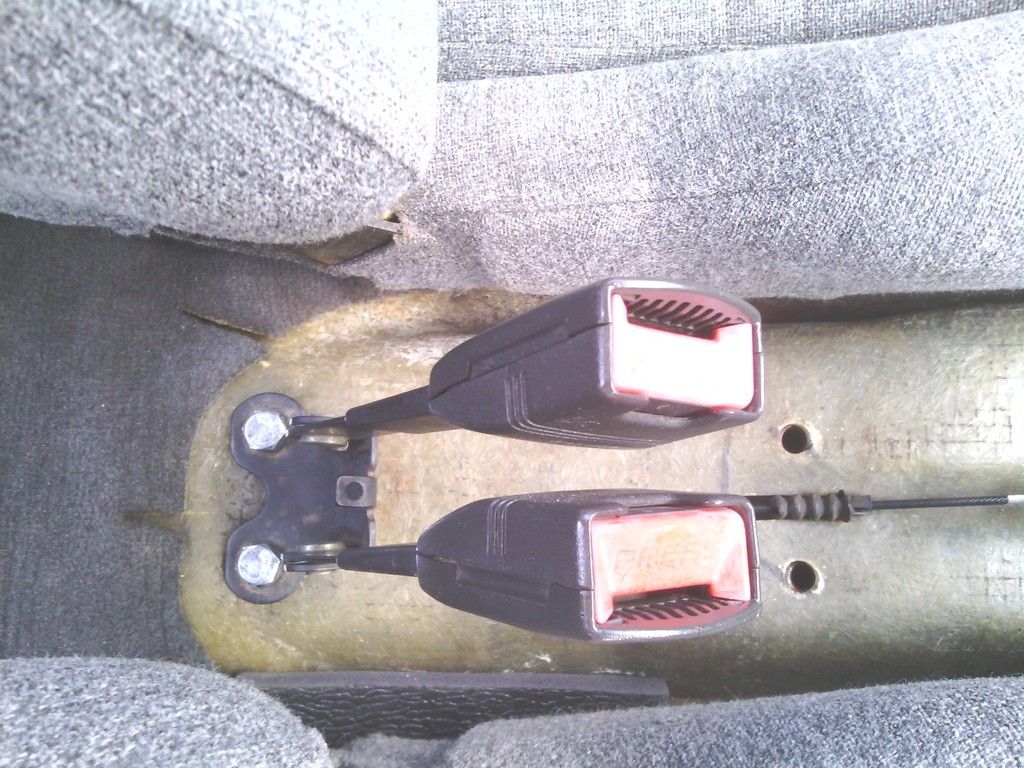
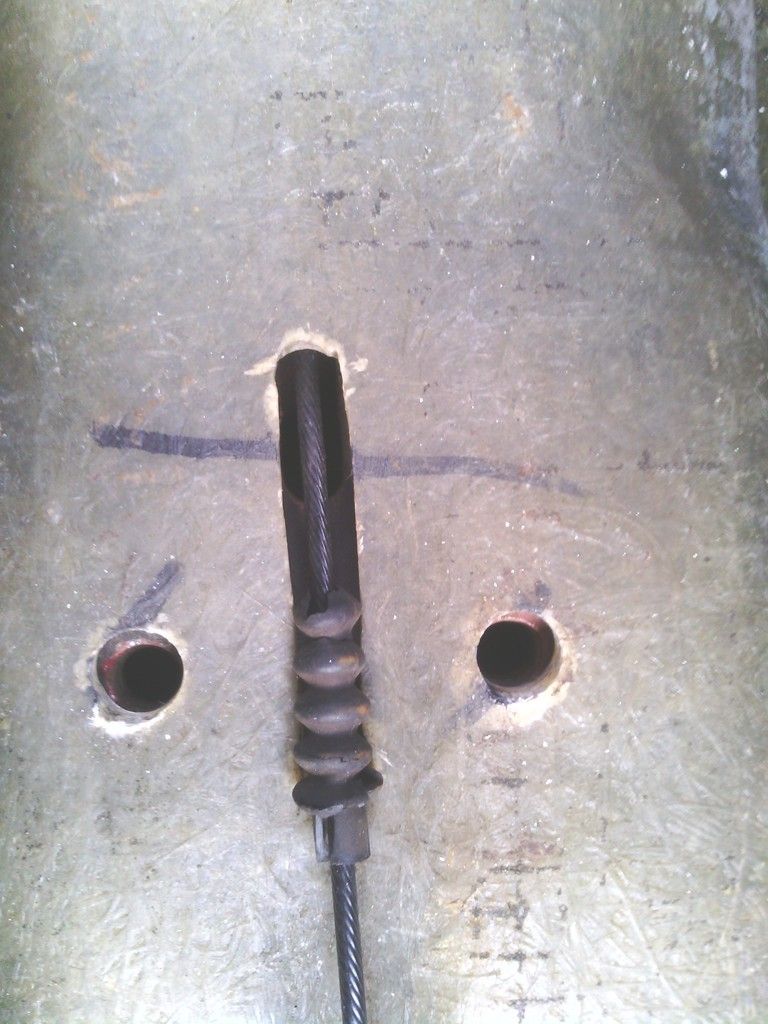
Also I found a loose plate under the centre tunnel carpet and some unused holes, these turned out to be the original seat belt mount holes (from the metro) as the seat belt location was moved further back in the Midas, but the bracket underneath also holds the handbrake cable mechanism and relied on the two 7/16 seat belt bolts to hold it in place, as it happened there was just 2 M6 holes further down the bracket holding it and the exhaust mounts on which caused the bracket to flex wildly in use, this was remedied by straightening it out and refitting the 7/16 bolts into it as well as fitting new seatbelt bolts too, much nicer
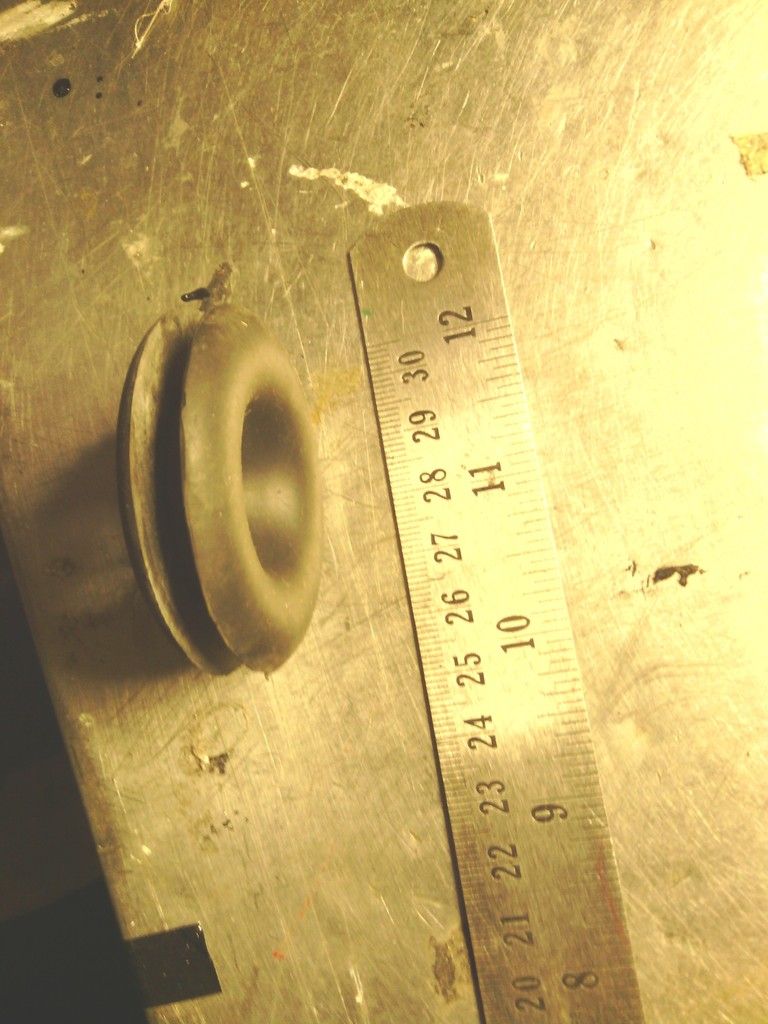
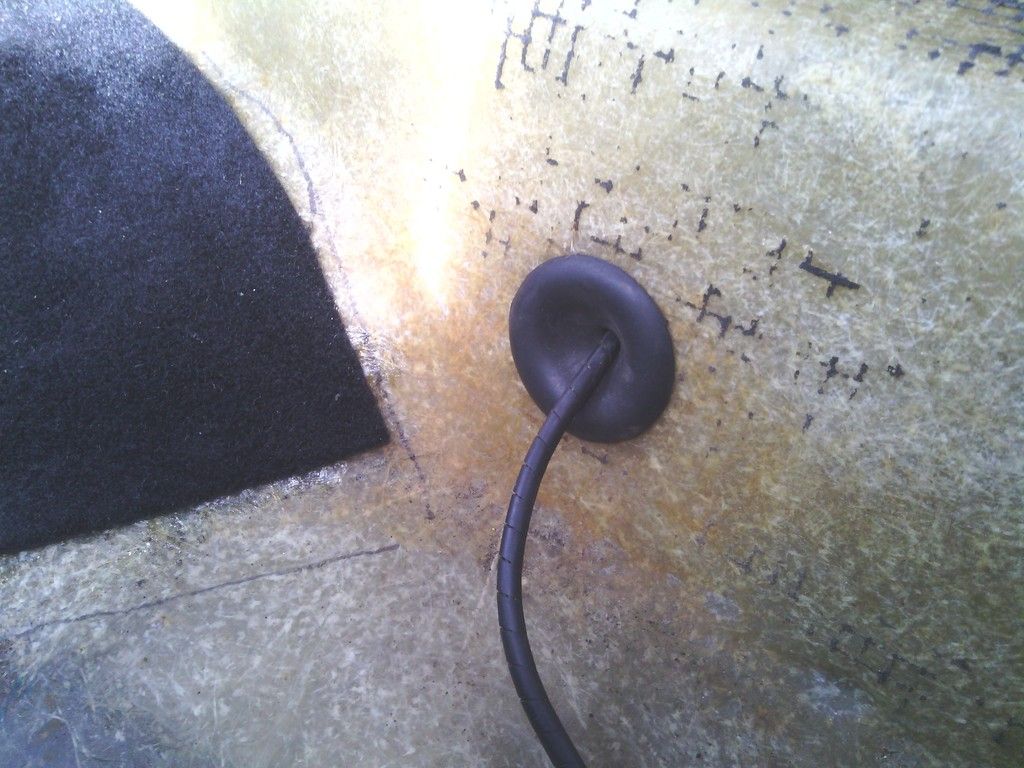
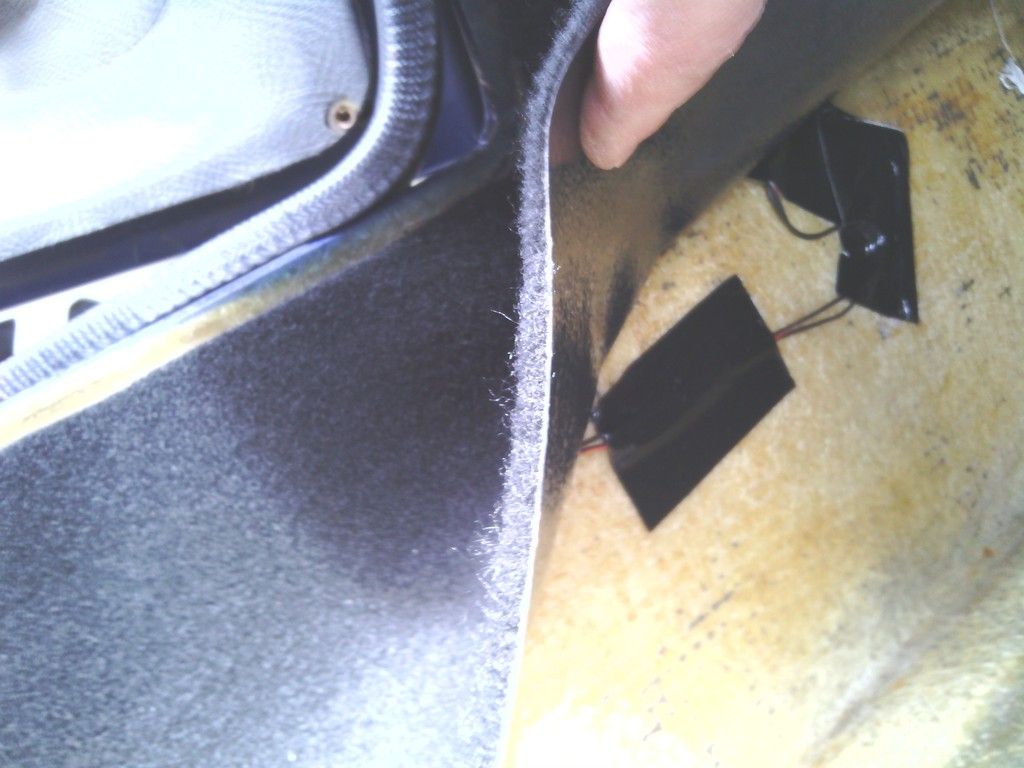
While down that end of the car I saw the fuel tank wiring not looking too healthy, the grommet (presumably donor vehicle) wasn’t even fitted which wasn’t helping in car odours much and all.
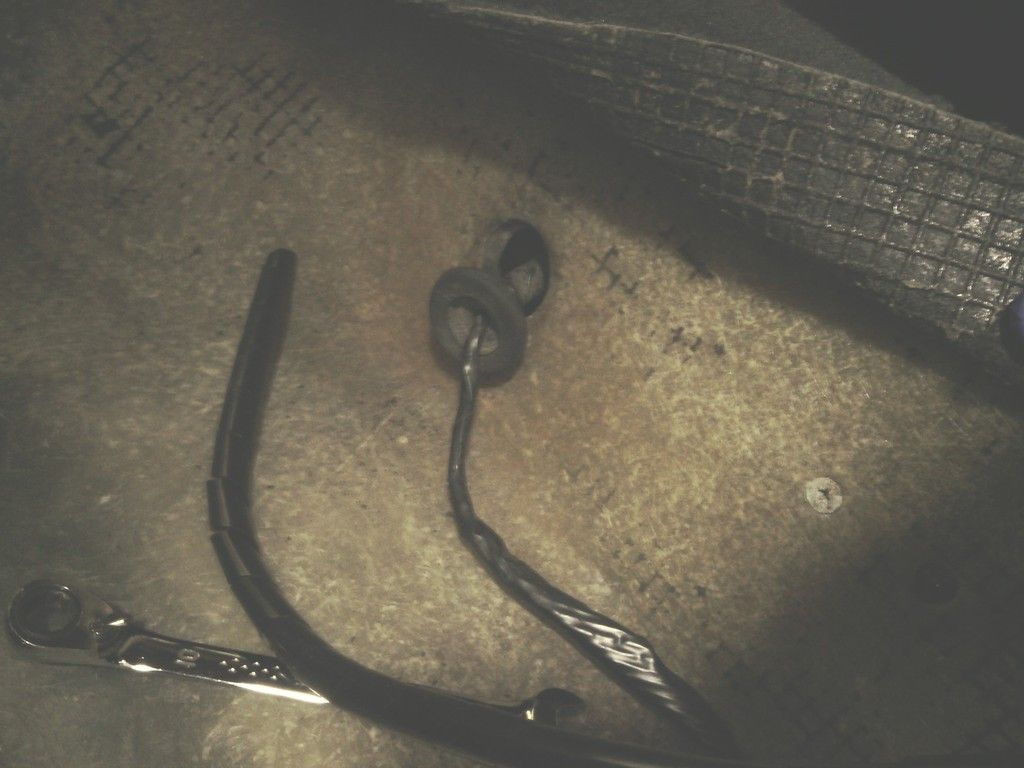
the terminals to the fuel sender / pump were passed their best, so these were renewed and a new grommet fitted, I’ve used these before, they are a land rover chassis grommet for the break pipes, they can take a thick panel no problem and fitted the thick floor of the Midas as if they were made for it
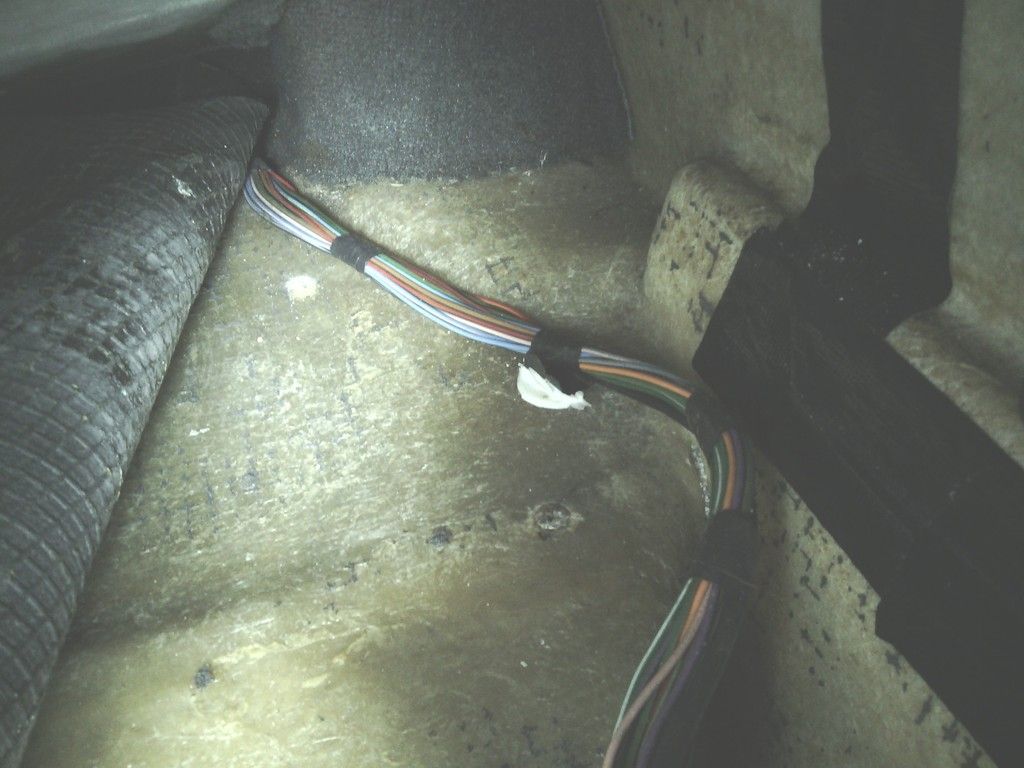
The rest of the loom was checked over - a few repairs made then all spiral wrapped up ready to be fixed into place and buried under the new carpet, talking of which, I’ve found most of this wiring loom held in place with glue not P clips – very odd
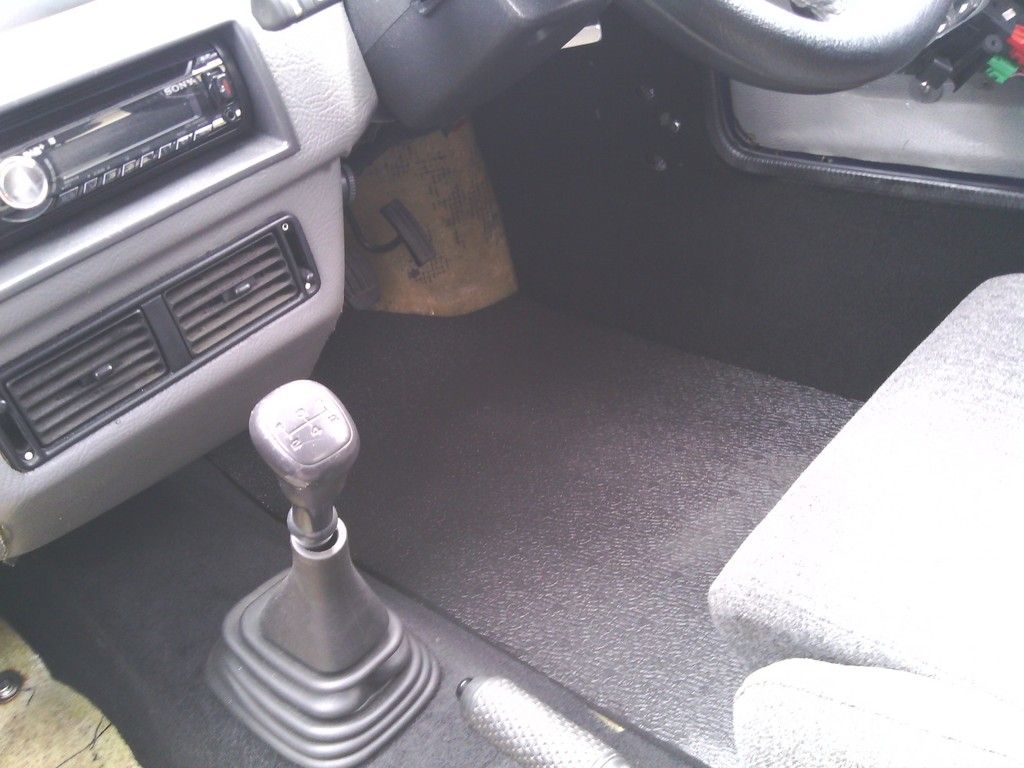
Onto the carpet, the old stuff smelt like a tramps dog and didn’t look much better so most of it was removed in the first few weeks of my ownership, what was left was removed as and when the opportunity arose, now all of it has been removed and the car is a better place, I’ve used stable matting in the foot wells since its closed cell and inorganic so wont soak up water and go mouldy, its lightweight and works well to dampen vibrations.
The re-carpeting has begun with the 2 rolls I bought from Stoneleigh, the old pieces took out the shed for template

(told you it was manky)
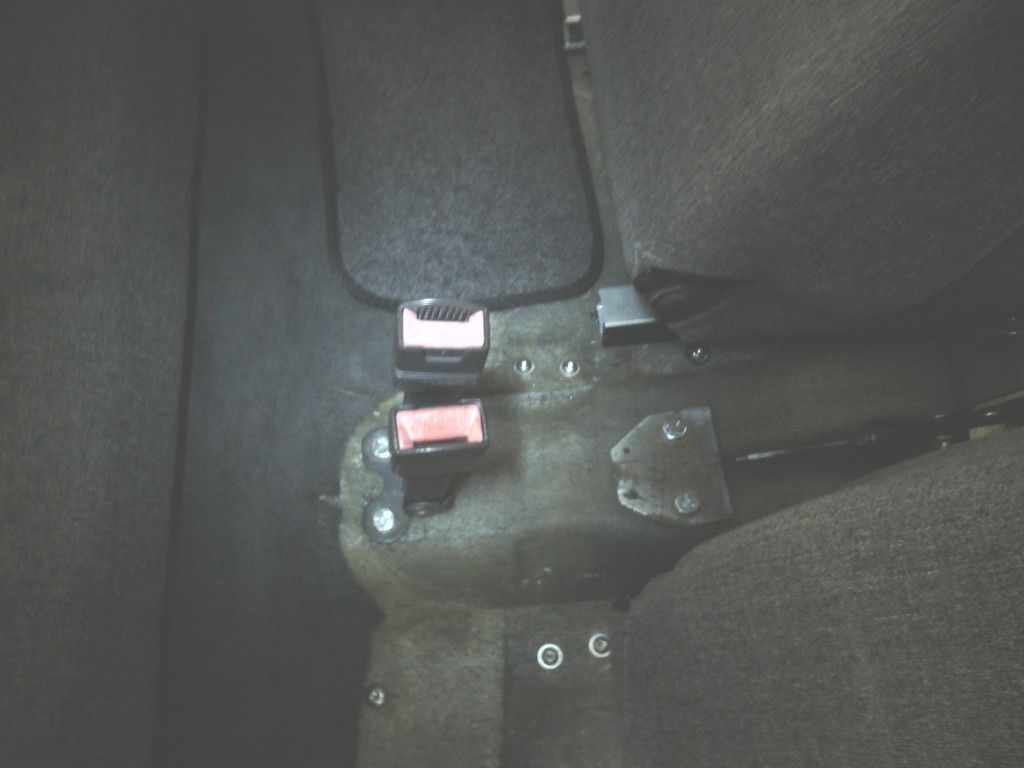
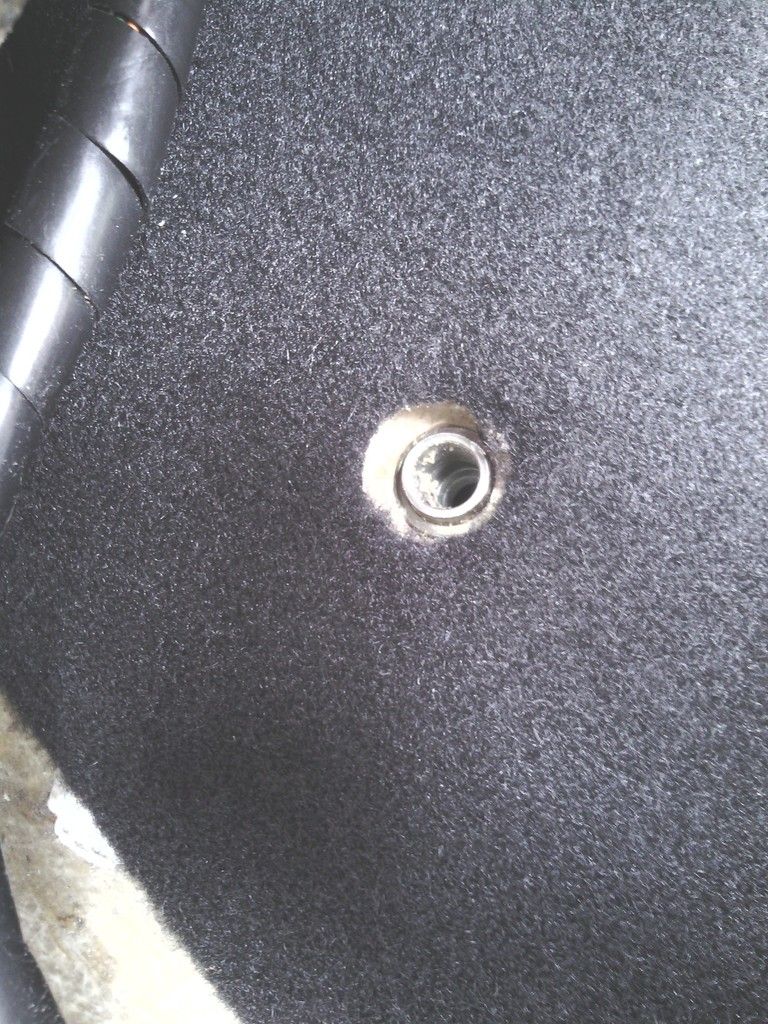
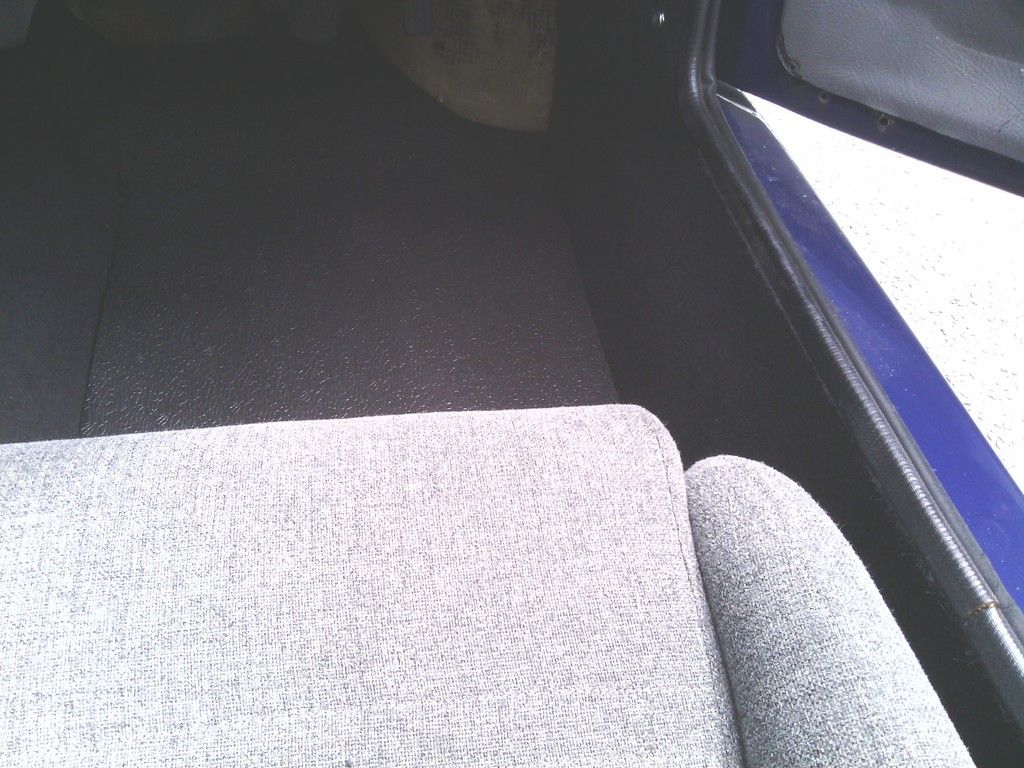
And new put in, the centre tunnel was held with contact adhesive since it was awkward but the areas by the bolt heads were slit to allow access in the future easer.
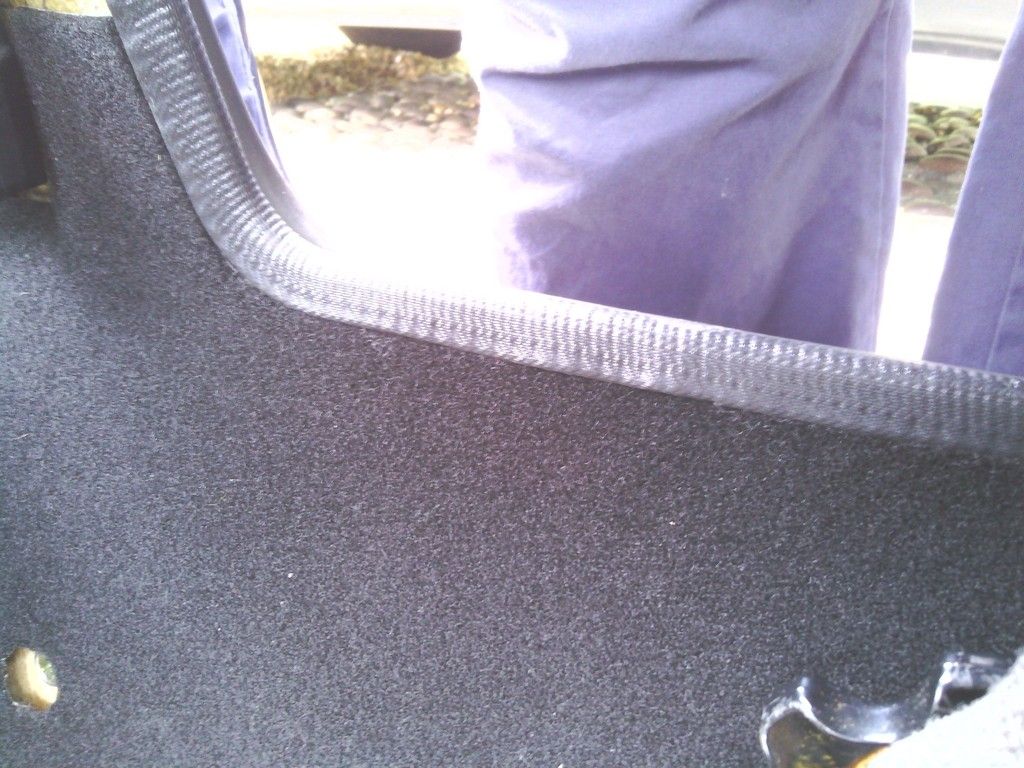
The sills were done in the same way I did the Quantum, because they are flat I cut the carpet to size and bonded them in with a bead of sikaflex at the top, this is because the bottom will be held in by the stable matting perfectly well slotting in behind its thicker make up and the top is totally sealed to stop water leaks from the door opening (although they should be banished by now) from leaking down in between, this also makes future access to the wiring and seat belt fixings a doddle
All holes for seat belt holes etc. were cut with a proper wad punch (sometimes in the right place too) to make a neat job of it
So far so good
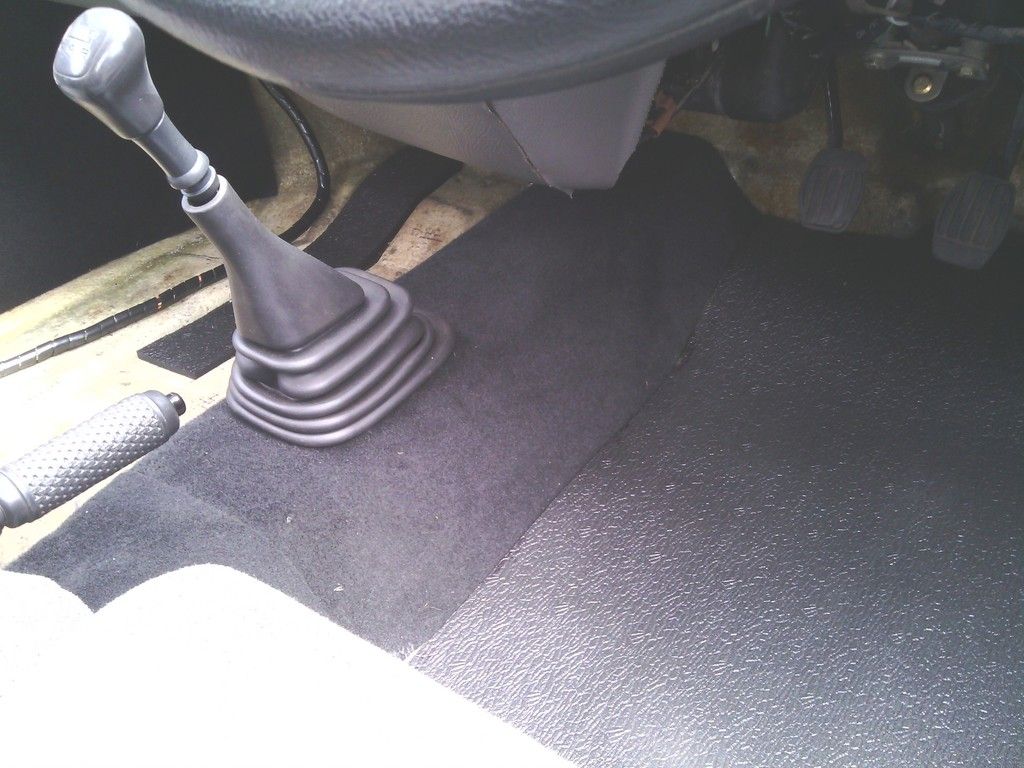
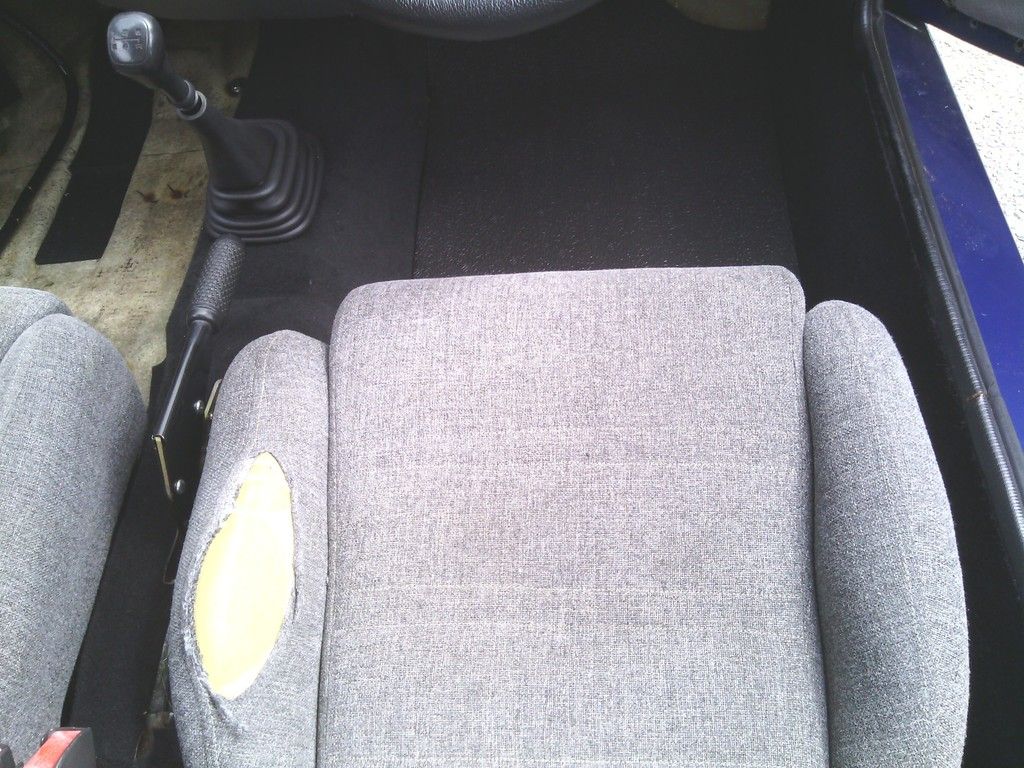
A fair bit more to do to make it habitable though, I’ll keep you updated
I started on the interior a while back, most of what I’ve done is documented here but because in reality the finished job will take ages I thought I’d break it up as I go
Phase 1
After rebuilding the doors I wanted to make them watertight, any water entering in via the weather seal or door handle etc. pours in and runs down the back of the door card into the foot wells, this is because the doors lean in towards the top when viewed front to back, I initially made a vapour barrier out of heavy duty pvc and stuck it to the steel frame,

it worked but it kept he steel frame in the vicinity of water which isn’t desirable so I made some new barriers out of heavier duty woven pvc cloth, this is sandwiched between the frame and mechanism but fits a treat and keeps the frame and interior dry- since this there has been no door leaks

While on the doors I found bizarrely that both the door cards actually closed into the door seal on both sides which wasn’t doing the initial door alignment any good at all nor the seal itself, so I took some measurements and trimmed it down by nearly 10mm.


I also made a frame inside the doors to discreetly fix the door card on using the door pocket holes as fixing rather than having separate screws round the periphery which looks very kitcarish, this is as far as this has progressed until I source new door pockets and decide on interior colour scheme.

Next up was the remaining rusty fasteners holding various under floor fixings such as exhaust / petrol tank etc. so in turn each was removed (mostly by drilling the heads off) and replaced with stainless dome heads so they sit more flush to the flooring


Also I found a loose plate under the centre tunnel carpet and some unused holes, these turned out to be the original seat belt mount holes (from the metro) as the seat belt location was moved further back in the Midas, but the bracket underneath also holds the handbrake cable mechanism and relied on the two 7/16 seat belt bolts to hold it in place, as it happened there was just 2 M6 holes further down the bracket holding it and the exhaust mounts on which caused the bracket to flex wildly in use, this was remedied by straightening it out and refitting the 7/16 bolts into it as well as fitting new seatbelt bolts too, much nicer


While down that end of the car I saw the fuel tank wiring not looking too healthy, the grommet (presumably donor vehicle) wasn’t even fitted which wasn’t helping in car odours much and all.

the terminals to the fuel sender / pump were passed their best, so these were renewed and a new grommet fitted, I’ve used these before, they are a land rover chassis grommet for the break pipes, they can take a thick panel no problem and fitted the thick floor of the Midas as if they were made for it


The rest of the loom was checked over - a few repairs made then all spiral wrapped up ready to be fixed into place and buried under the new carpet, talking of which, I’ve found most of this wiring loom held in place with glue not P clips – very odd

Onto the carpet, the old stuff smelt like a tramps dog and didn’t look much better so most of it was removed in the first few weeks of my ownership, what was left was removed as and when the opportunity arose, now all of it has been removed and the car is a better place, I’ve used stable matting in the foot wells since its closed cell and inorganic so wont soak up water and go mouldy, its lightweight and works well to dampen vibrations.
The re-carpeting has begun with the 2 rolls I bought from Stoneleigh, the old pieces took out the shed for template

(told you it was manky)
And new put in, the centre tunnel was held with contact adhesive since it was awkward but the areas by the bolt heads were slit to allow access in the future easer.
The sills were done in the same way I did the Quantum, because they are flat I cut the carpet to size and bonded them in with a bead of sikaflex at the top, this is because the bottom will be held in by the stable matting perfectly well slotting in behind its thicker make up and the top is totally sealed to stop water leaks from the door opening (although they should be banished by now) from leaking down in between, this also makes future access to the wiring and seat belt fixings a doddle

All holes for seat belt holes etc. were cut with a proper wad punch (sometimes in the right place too) to make a neat job of it

So far so good


A fair bit more to do to make it habitable though, I’ll keep you updated
https://easywider.co.uk/ universal flexible wheel arch extensions
- Jin
- Posts: 454
- Joined: Fri Aug 01, 2014 10:33 pm
Re: J171 NJO Cortez / 2+2 rebuild and modifications
![]() by Rich » Mon Jun 01, 2015 3:24 am
by Rich » Mon Jun 01, 2015 3:24 am
I'm surprised not to see the water pump being replaced at the same time Jin, they are a common suspect when just small amounts of water go missing from these engines.
-

Rich - Posts: 1285
- Joined: Wed Dec 03, 2008 1:27 am
- Location: Devon
Re: J171 NJO Cortez / 2+2 rebuild and modifications
![]() by Jin » Mon Jun 01, 2015 7:46 am
by Jin » Mon Jun 01, 2015 7:46 am
Nah, it was replaced last October (still under warranty) when I had the cam belt and tensioner changed for the first time because it was as tight as a banjo string, back when I had the option to have the head gasket done at the same time for just an extra £70 ..... Doh!
The only moving part attached to the engine that is not new is the alternator so the hunt begins...
The only moving part attached to the engine that is not new is the alternator so the hunt begins...
https://easywider.co.uk/ universal flexible wheel arch extensions
- Jin
- Posts: 454
- Joined: Fri Aug 01, 2014 10:33 pm
Re: J171 NJO Cortez / 2+2 rebuild and modifications
![]() by Rich » Mon Jun 01, 2015 2:10 pm
by Rich » Mon Jun 01, 2015 2:10 pm
Jin wrote:Nah, it was replaced last October (still under warranty) when I had the cam belt and tensioner changed for the first time because it was as tight as a banjo string, back when I had the option to have the head gasket done at the same time for just an extra £70 ..... Doh!
The only moving part attached to the engine that is not new is the alternator so the hunt begins...
Ah, fair enough! You must have kicked yourself over the £70 offer!
-
Rich - Posts: 1285
- Joined: Wed Dec 03, 2008 1:27 am
- Location: Devon
Return to Complete Midas rebuild
Who is online
Users browsing this forum: No registered users and 20 guests