Mk 1 Project Zippy. Looking Like a Car.

If you're taking on the task of rebuilding the whole Midas, please put the project in here.

Moderator: The Midas Forum Staff

Re: Mk 1 Project Zippy (Picture Heavy!)

Postby MrBounce » Sat Jul 09, 2011 8:30 pm

I thought I'd have a look at getting the dashboard out as there was bound to be more than a few horrors behind it. Amazingly, the fibreglass shell (with the middle bit which looks like a failed Star Wars character's helmet) came off really easily leaving behind another piece of fibreglass. However, this bit is bolted on at the ends so I won't be taking this off until the doors come off. It's also riveted to the main metal crossbrace so I have drilled out the rivets to make extraction easier. I'm still not sure about the what/how of the dash I'm going to use but hey, I've got time :lol:

I turned my attention to the rest of the interior: the sill carpets needed to come out. Got as far as the driver's side seatbelt mounting and as I removed this I was a bit shocked to find that once the bolt was out water poured into the car! :shock: I thought this was down to the drainage channels being blocked but further investigation revealed something else. There were two speakers in rear three-quarters so I removed them. The driver's side was nasty: it was stuffed full of underlay and old newspaper which was soaking wet, probably from the damaged seal on the small window. It dates from May 1981, about 3 months after the car was registered. A quick delve in with my hand revealed a couple of inches of water in the bottom. Still not sure how I'm going to get this out without a Vax-style hoover. We shall see. I can't get a spanner in to undo the seatbelts which attach to the rear heelboard - I need to have a closer look to see how I can do this without destroying the belt housing. I'm not going to use them again anyway, as I don't really trust a 30-year old seatbelt that's been sat in a damp car for 10 years, but I'd prefer to get 'em out the proper way without damaging too much! :twisted:

The boot area was quite easy to get all the trim out of. The fibreglass side panels came out easily without a fight and even the big flexi pipe for the fuel tank was a doddle. I even removed the rear numberplate; Underneath is the cleanest part of the car. The seatbelt clips that bolt through the floor won't come out until I've got the Midas up on axle stands. I may be losing weight at the mo but I do not fit under there to get a spanner on the nuts. :P There's a random small hole in the boot floor, and I have no clue why. Any ideas?

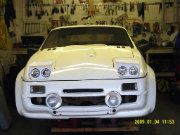
I also removed the front bumper (2 screws!) and had a quick look under the bonnet again. I am definitely thinking of a new wiring loom - possibly taking a Mini one and bridging / removing where necessary as the front loom does not look that healthy. More later 8-)

Dashboard under the fibreglass cover

Image

Horrid 1981 Sharp speakers which went straight in the bin

Image

Clean boot area

Image

Random hole in the boot floor

Image

Sodden underlay. This stank.

Image

May 1981 Croydon Borough News (Wonder if they caught the thief?)
Image

Clean interior but with seatbelts still attached

Image

The cleanest bit of the whole car!

Image

Bumper gone in about 2 minutes and still in one piece!

Image
MrBounce
 
Posts: 645
Joined: Mon May 16, 2011 9:16 pm
Location: Suffolk

Re: Mk 1 Project Zippy (Picture Heavy!)

Postby FOT17 » Tue Jul 12, 2011 11:39 am

wow mate you have ya work cut out for you one that one! best of luck :)
User avatar
FOT17
 
Posts: 25
Joined: Sat Jun 04, 2011 5:38 am
Location: NEW ZEALAND

Re: Mk 1 Project Zippy (Picture Heavy!)

Postby FOT17 » Tue Jul 12, 2011 11:43 am

to dry out the water that had managed to hide away in mine, i just left a old lightbulb (75wat) in the area and the heat dried her out in a few days, worked a treat! then as i went round re attaching bits i Ados everything! from the tail lights to the door hinges. NO LEEKS NOW MWAHAHAHAH
User avatar
FOT17
 
Posts: 25
Joined: Sat Jun 04, 2011 5:38 am
Location: NEW ZEALAND

Re: Mk 1 Project Zippy (Picture Heavy!)

Postby MrBounce » Sun Jul 24, 2011 7:53 pm

After 2 weeks enjoying the ridiculous amounts of pains au chocolat, Grimbergen Belgian beer and rain that Brittany had to offer, I realised it was time to head back into the garage and continue stripping! :o

First up was removing the rear bumper. One screw was easy, the other of course had rusted solid. After 30 seconds with my trusty Dremel, it was off. I was mildly amused by the large amount of moss growing under it. I then turned my attention to the front lights. Headlight surrounds were not properly fixed so these came off easily. The headlights themselves were also easy, with just a couple of screws holding them both in. The surround on one is utterly shot to bits having rusted away. Finding a replacement may be tricky... I have discovered that they are different types; one has a sidelight whereas the other doesn't. Not too much of an issue as the car has sidelights and indicators below the bumper but these will need a freshen up too, given that the gaskets just fell apart.

I also removed all the clips holding the wiring loom to the bodywork in the engine bay so it "should" be nice and easy to take out. This of course will depend on how I get the dashboard out. It is more stubborn than Alan Sugar. I keep finding loads of hidden bolts (all seized of course) in really inaccessible places. Once I redesign this thing I'm gonna make it so it can be removed after undoing about 6 bolts. Poxy thing... I also decided to remove the heater which took the best part of an hour. Yup, you guessed it: seized and inaccesible bolts. It is in quite nasty condition so most of it will need replacing. I intend to replace the pathetic Mini blower with a Ford item (something I found on a GTM rebuild webiste) by removing the Ford fans and replacing them with the Mini items. The motor itself is much the same size so with a bit of persuasion (Hammer) I should be able to make it work :lol:

Bumper off

Image

Front lights off

Image

State of front lights...

Image

Rather knackered indicators and sidelights

Image

Loom ready to be removed once bl00dy dash is sorted

Image

Dead (ish) heater

Image
MrBounce
 
Posts: 645
Joined: Mon May 16, 2011 9:16 pm
Location: Suffolk

Re: Mk 1 Project Zippy (Picture Heavy!)

Postby MrBounce » Mon Jul 25, 2011 9:43 pm

I have turned my attention back to the dashboard area. The bolts that hold the door on also appeared to go through the dashboard. The dashboard also seemed to be attached to the large piece of square steel tubing with heater ducting attached that ran the entire width of the car. I thought I would start here. As the dash had been riveted to this I thought it was simply the ravages of time that was keeping them together. WRONG!!! Having prised the dash front away from the steel tubing, it was this and not the dash that fell away. It wasn't structural at all and it appears that it wasn't used as any sort of eathing point. It was just where the heater ducting was channelled; 2 large pipes attach from the heater and holes in the top of the tube allowed warm air to attempt to reach the screen. It looked rubbish, and I shall endeavour to improve monumentally on this when I make my own dashboard.

I looked closer and there was a reason why the dash could not be easily removed. It wasn't just bolts holding it in place. It was fibreglassed into the car. I don't know if it was the original or not, but there was certainly some amount of modification over the years (badly!). There was also only one way it was coming out. Power tools. I immediately thought of my jigsaw but it was too big and bulky and the manouevrability would have been restricted. Dremel plus cutting disc (well, 4 actually) meant that after 15 minutes of steady cutting, the nightmare dash was out! Woo-hoo! :lol: The horrible extended switch section in the middle will need further work but it had got to past 9pm and I needed a beer! :P

The dreaded dash, before things got ugly.

Image

Weird way of ducting air.

Image

It's gone! (Well most of it anyway...)

Image
MrBounce
 
Posts: 645
Joined: Mon May 16, 2011 9:16 pm
Location: Suffolk

Re: Mk 1 Project Zippy (Picture Heavy!)

Postby MrBounce » Tue Jul 26, 2011 9:46 pm

Before today, I was fed up with the inside of the car as I seem to have been making very slow progress. However, with a bit of elbow grease, my trusty Dremel and a lot of poking and prodding, I have achieved a fair bit this evening. 8-)

I cut off the stupid switch panel in the middle of the dash. This of course was much thicker than the other fibreglass and I went through 6 Dremel cutting discs. Lucky I've got a pot of 30+ :shock: I then gave the dash area a hoover as it was gradually starting to look like a Colombian Drug Lord's "special" factory. :lol:

I gave myself a challenge - to get the front wiring loom out and in a box without cutting any of it. First of all I pulled out all the underlay and soundproofing from the dash area. There was a shedload of it, and its condition was terrible - just like dead leaves as it fell apart in your hands. :( I pushed out the heater pipes. These will be thrown away eventually but I will take measurements first - don't want to buy too little of it when I replace it! I then started to poke the wires through having unclipped the rear loom. I started pushing it back into the car rather than trying to pull it out as it was clear that was NOT going to happen given the amount of twists and tangles in it. The underbonnet wiring was surprisingly neat by comparison. I have decided that it doesn't need renewing - it actually looks alot better than I thought on closer inspection; it was just dirty and badly laid out before.

Of course the Alternator plug wouldn't fit through the crudely hacked rectangular hole in the bulkhead so once again out came my friend Mr Dremel and a small "extension" was made. :evil: I intend to cover all the bulkhead holes and start again so I can actually furnish them with grommetts. I don't know who wired this car but they know less than I do. And my knowledge of electrics is "Red to red, green to green and blue to bits" :lol: Close inspection shows there was a hole in the middle of the bulkhead originally - this had been filled in and a couple of rectangular holes butchered on either side of the bonnet catch.

I finally have a clear dash and engine bay. I've now got Master cylinders, Wiper Assembly, Bonnet Catch and Radiator to remove in the engine bay. I've also got to finish stripping the interior of old glue and the remains of the underlay (yum what a nice job!! :( as well as take the rear lights out. Then it's glass and seals before starting on body prep. It's gonna be a long summer. I'm going down to Southern Mini Days soon so will scour the autojumbles for dashboard bits amongst other things. My wallet is wincing already :o

Front Loom now out. Yay!

Image

Clear dashboard area :D

Image

Modified hole (new bit to the right). Lousy hacking job by the person who did it before!

Image

Cleaner engine bay

Image
MrBounce
 
Posts: 645
Joined: Mon May 16, 2011 9:16 pm
Location: Suffolk

Re: Mk 1 Project Zippy (Picture Heavy!)

Postby MrBounce » Fri Jul 29, 2011 10:04 pm

Managed to find half an hour this evening to take a look at the heater and establish whether it could be saved. I hoped that there was just a bit of surface rust and that the matrix was usable. Some hope...

I undid the screws on the outlet side of the heater. I say undo - I had to drill off two which had seized solid and already had chewed heads which I then made worse. I carefully prised off the side panel with a flat blade screwdriver and bingo! The matrix was proper knackered. Oh well... Guess I can get myself a secondhand heater in better nick from Southern Mini Days next weekend. I was able to remove the motor and fans though, which will enable me to experiment building my "Turbofan" Mini heater using a Ford Motor with the Mini fans and casing. The blower outlet was weird though - someone had made up a pipe reducer out of rubber and cardboard. It was fit only for the bin.

Side panel with weird pipe reducer. :?:

Image

Heater with knackered matrix :(

Image

Rustier than an HA Viva that's just crawled out of the sewer after 20 years in there :shock:

Image

The starting point for "Turbofan" :lol:

Image
Last edited by MrBounce on Sun Jul 31, 2011 10:32 pm, edited 1 time in total.
MrBounce
 
Posts: 645
Joined: Mon May 16, 2011 9:16 pm
Location: Suffolk

Re: Mk 1 Project Zippy (Picture Heavy!)

Postby MrBounce » Sun Jul 31, 2011 10:21 pm

Not much done this weekend but have manged to strip down and destroy the horrible seats. Naturally this gave me a great deal of pleasure :twisted: Some parts of the seats looked ok (some of the foam). The rest did not. Horrible, nasty and utterly rotten. Had to strip them down as the local dump (sorry - "Recycling Centre") won't take obvious car parts or seats for that matter. Plus I'd look like a right numpty trying to take just a pair of knackered seats to a breaker's...

So out came my friend Stanley and the "F" screwdriver. 10 minutes later there was a lots of crap and two metal seat frames which can go in the metal bin at the local tip.

Just foam and backrest left to go...

Image

First one done

Image

That's a big pile of crap... :lol:

Image

Stripped frames (being guarded by Moneypenny the cat) :)

Image
MrBounce
 
Posts: 645
Joined: Mon May 16, 2011 9:16 pm
Location: Suffolk

Re: Mk 1 Project Zippy (Picture Heavy!)

Postby Alan D. » Fri Aug 05, 2011 8:33 am

Just a bit out of sync due to the hacking!

I have been working on a new adjustable for camber and toe, rear beam. This one is for a Mini and I need to manufacture a radius arm to go with it, but a slightly different design is on its way for the Mk1,2 & 3 Midas. We are also doing one for a standard radius arm
The adjustment comes from turning the eccentric washer! I have used CDS tubing and it is very light compared to a sub frame!
The problem at the moment is I have so much other work on and have also been working away from home. One good job I have done is knocked two garages into one, which will give me more room for a future and different Midas rebuild!

This beam is not finished as yet, I need to make a welding jig to to set the heel board brackets in place and sort out handbrake cable and brake hose brackets etc, but we are not far away!

click on the link below:

https://picasaweb.google.com/alandonowh ... directlink

Alan
User avatar
Alan D.
 
Posts: 945
Joined: Fri Dec 05, 2008 10:34 pm
Location: Newcastle upon Tyne

Re: Mk 1 Project Zippy (Picture Heavy!)

Postby manifold » Fri Aug 05, 2011 9:01 am

That looks all rather nifty Alan if I say so myself!
Midas Cars Forum & Facebook Page Founder

Midas Gold Convertible: 1380 steel 16v KAD & 5 sp dog box, Titanium mania, KAD fr/rear callipers, CF Steering

Midas Gold Coupe: 1380 7 port xflow, SC/CR gearbox, Titanium mania, CF Steering & seats.
User avatar
manifold
 
Posts: 1724
Joined: Tue Dec 02, 2008 7:34 pm
Location: Lancaster, Lancashire

PreviousNext

Return to Complete Midas rebuild

Who is online

Users browsing this forum: No registered users and 14 guests