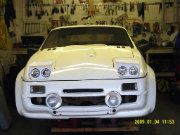
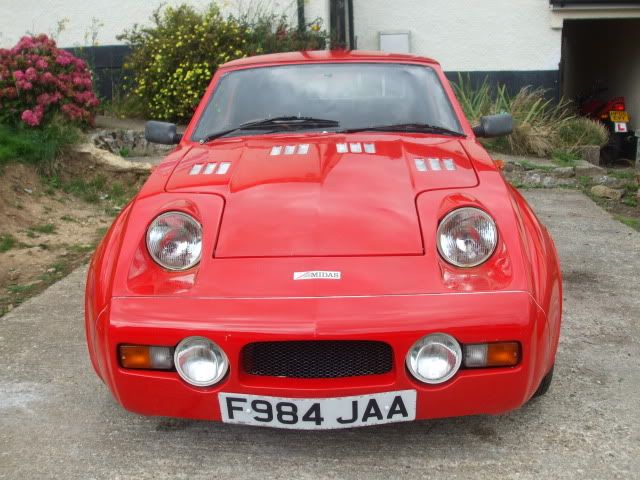
Mk 1 Project Zippy. Looking Like a Car.

If you're taking on the task of rebuilding the whole Midas, please put the project in here.

Moderator: The Midas Forum Staff

Re: Mk 1 Project Zippy (Picture Heavy!)

Postby MrBounce » Sun Sep 25, 2011 8:46 pm

It has been a bit of a frustrating time this weekend. I have bought a couple of bits and found a nightmare scenario.

Got some more paint from the bay of "e" and proceeded to give the heater parts another coat. Don't worry - they look significantly better than the photograph - it's the harsh light of the flash that makes them look far worse than they actually are!! The heater bits are going under the dash and won't be seen much anyway so I am not too bothered as I can't see it - as long as the blooming thing doesn't leak...

I also bought a handbrake (the old one in the car appears to be rustier than some of the bolts that are holding it in place and appears to be missing its release button. The one I've got is a Sportpack Mini item which I picked up for less than a tenner including postage and it looks in almost perfect condition. Superb. I have narrowly missed out on a gear selector though (don't you just HATE it when you'e outbid by 50p??).

As I'd received a headlight bracket through the post as well (Thanks Graham), I thought I would prepare that for paint, along with the other headlight bits I have. Unfortunately that was where my nightmare scenario raised its really ugly head. I have (just about) two usable "holding brackets" for the headlights and two trim brackets as well. However, the backplates are more of an issue. I have one very solid one, and... well I'll just let the pics do the talking. If anyone's got a headlight backplate for a Mk1/Mk2 Midas (it's Austin Allegro for those that don't know) in usable condition please let me know asap. Mine are completely fubar'd. B******s. :cry:

Painted stuff - it looks much better in the flesh!

Image

The headlight bits I had to play with.

Image

Some of the bits I didn't use...

Image

And the paper-thin backplates. Ouch!

Image
MrBounce
 
Posts: 648
Joined: Mon May 16, 2011 9:16 pm
Location: Suffolk

Re: Mk 1 Project Zippy (Picture Heavy!)

Postby MrBounce » Sat Oct 01, 2011 10:43 pm

Aside from the tragedy of the headlight backplates from last weekend, something worse has happened. The stereo in the garage stopped working. I like to listen to the radio or CDs when I am working on the car, as it is something I have always done. The old portable (which used to belong to my Mum after she won it in a competition in about 1994) had finally given up. It refused to play tapes (remember them?!), cds and only wanted to occasionally tune in to the radio. Must have been all the abuse carried out in its vicinity... My wonderful friend Liz came up trumps with "something she had stashed in the shed". An Aiwa mini hifi that plays CD, tape and Minidisc. Works perfectly and has remote control. That'll do! So it was pressed into (loud) service and seems to be doing very well. Top job!

As I had come across so many issues with the front lights, I thought I would see if I could find anything equally as poor at the back end of the car. I started with taking off the last piece of fibreglass trim just under where the rear hatch sits. 4 screws would generally take about 2 minutes. However, this is not a "normal" car. I keep forgetting that it has been standing 11 years. 2 screws came out with no bother. The other 2 required a bit more work and eventually were unscrewed using pliers after attempts with screwdrivers and drill drivers failed. I threatened to use the Dremel cutting discs, but was able to get them moving with sheer brutality instead.

The rear lights were next. Of course, just undoing a few bolts is easy... Yup, the old issues of car that has been standing 11 years raised its ugly head once more. Several of the studs snapped in their mountings and 2 of the screws had to be cut off with my old buddy Dremel. Once this was done however, the lights lifted out with a bit of persuasion and I was able to split them on the workbench. One looked horrible, the other looked worse... I am not sure if I will be able to modify the lenses to support new studs somehow or if I will need new lenses. No harm in trying I guess.

I also tried to undo the t-piece that holds in the spare wheel. And of course it had rusted to the glassed in nut which then broke its mounting and just turned. And of course there was no other way to remove it than to cut it out. So out came the Dremel again. I cut the rusted nut off, but I'm not sure I am going to use the t-piece again - I may come up with something different. Watch this space on that one.

The petrol filler pipe needed to come off too. This had 3 screws to remove. 2 were easy. 1 was not. Brutality happened again. Dremel cuts... I am undecided whether to try to find another TR7 cap or not as mine's broken. Any suggestions as to what else might fit and look "right"?

Finally I won an ultimate engine steady on ebay which will help with keeping the engine in the car. It has been modified slightly by someone cutting part of the side panel off, but it's certainly usable and it only cost a fiver. I'll tidy it up and go from there.

Old faithful. Goodbye old friend...

Image

New sounds. Bigger speakers too... :lol:

Image

Rear hatch panel out.

Image

Butchered screws

Image

Rear lights out. Looks weird without them.

Image

Light units before splitting.

Image

... and split, looking ugly. This was the good one.

Image

This was the not so good one... What's been growing in there???

Image

"Hump" where the spare wheel t-piece broke off. Neatly cut open with Dremel to retrieve...

Image

...broken and very rusty bolt.

Image

Dremel cuts!

Image

Fuel cap (broken) and pipe

Image

Modified engine steady. Needs new bushes and a tidy up.

Image
MrBounce
 
Posts: 648
Joined: Mon May 16, 2011 9:16 pm
Location: Suffolk

Re: Mk 1 Project Zippy (Picture Heavy!)

Postby Alan D. » Sat Oct 01, 2011 11:25 pm

You need to be cruel, to ultimately be kind!

Keep up the good work

Alan
User avatar
Alan D.
 
Posts: 945
Joined: Fri Dec 05, 2008 10:34 pm
Location: Newcastle upon Tyne

Re: Mk 1 Project Zippy (Picture Heavy!)

Postby Geoff Butcher » Sun Oct 02, 2011 8:19 pm

Here's a wheeze for removing rusty screws from GRP which often works. Scrape the head of the screw so you can see shiny metal. then take a soldering iron with a blob of solder on it and apply to the screwhead for a few seconds. This will soften th GRP enough for the screw to be wound out.
Geoff
User avatar
Geoff Butcher
 
Posts: 751
Joined: Fri Dec 05, 2008 9:10 pm
Location: Braintree

Re: Mk 1 Project Zippy (Picture Heavy!)

Postby MrBounce » Sun Oct 09, 2011 8:53 pm

It's amazing what you can find on Ebay. I now have a fully usable pair of headlight backplates along with all associated retaining brackets and trim rings. As I have been a bit stuck for time these past few days, all I have had time to do is strip all the paint and rust off and give them a coat of Hammerite.

I now have the rather daunting task of taking off the doors, removing all the glass and taking the rear beam off. Condition is unknown... :o By the way, any tips for where I can store the glass?? Mrs Bounce says no to "in the house"... :lol:

The best of the headlight brackets etc before stripping

Image

...and after paint (along with a couple of bits of heater).

Image
MrBounce
 
Posts: 648
Joined: Mon May 16, 2011 9:16 pm
Location: Suffolk

Re: Mk 1 Project Zippy (Picture Heavy!)

Postby DavidL » Sun Oct 09, 2011 10:13 pm

MrBounce wrote:By the way, any tips for where I can store the glass?? Mrs Bounce says no to "in the house"... :lol:

Sneak it past her and stick it in the attic, is what I'd do... :D
User avatar
DavidL
 
Posts: 858
Joined: Tue Mar 01, 2011 10:15 pm
Location: Tayport, Fife

Re: Mk 1 Project Zippy (Picture Heavy!)

Postby Rich » Mon Oct 10, 2011 8:18 am

faceofdoh wrote:
MrBounce wrote:By the way, any tips for where I can store the glass?? Mrs Bounce says no to "in the house"... :lol:

Sneak it past her and stick it in the attic, is what I'd do... :D


Best option!
User avatar
Rich
 
Posts: 1250
Joined: Wed Dec 03, 2008 1:27 am
Location: Devon

Re: Mk 1 Project Zippy (Picture Heavy!)

Postby MrBounce » Mon Oct 10, 2011 4:49 pm

Since I got the Midas home there have been loads of 1275 engine bits in boxes and crates which I've ignored. As I was fed up with grinding rusty bolts with the Dremel and cleaning things with the wire brush attachment on the grinder I cleaned up the bench and had a look to see what I had to play with. Andy, the previous owner, said it had come out of a Metro and one of the pistons had seized.

I laid most of it on out the bench and came to the following conclusions:

It is a standard 1275 Metro engine with standard size head and there's absolutely nothing special about it that I can tell (with my limited knowledge of engines in bits..). The bores look in excellent condition; the crank appears to be pretty much good to go again with just a clean up; the cam looks pretty standard and the followers do have a bit of pitting on them. The rods could do with a bit of a clean up but I think I will need to do the following:

Take the block, head, crank and pistons to an Engineering Shop and speak to them about what would need doing for a rebuild. There's no sense in just buying another engine of unknown quality from ebay or the small ads when I can spend that money (plus a fair bit more!!) and know exactly what I am getting. I have no intention of building something stupidly powerful (1380, twin-cam etc) as I don't need anything that pokey. I simply do not have the necessary funds to do that in one hit and I'm not prepared to get into debt over this. I would love to go to Swiftune or MED and give them a couple of grand for a few billet bits but I am the sort of person who wouldn't notice once the engine is running and I would also never recoup the money. No, just a warmed-over 1275/1293 with a decent head and cam should suffice for now and hopefully give me 80-odd bhp. I might get the flywheel and backplate lightened and balanced though.

I'm thinking only rebore if necessary, new pistons, cleaned up and balanced rods, lightened flywheel and backplate, new bearings and a reconditioned head with a bit of porting and bigger valves and a hotter camshaft. I will speak to the engineers and ask their advice on what I have.

The block is now bare apart from the core plugs, the cam followers and the funny brass bungs that you locate the gearbox with. I'm going to spend a while with the degreaser and paintbrush to clean off all the gunk from all the components.

All the dust from a couple of days' wire brushing (watch is there so you can gauge how much there is...)

Image

Engine bits on the bench (seized piston without bag)

Image

The block (before removing pump, studs etc) which desperately needs a clean!

Image

Standard camshaft. This will be replaced with something a bit spicier.

Image

Block from the bottom. You can just about see the followers with a bit of pitting on them. Clean bores.

Image
MrBounce
 
Posts: 648
Joined: Mon May 16, 2011 9:16 pm
Location: Suffolk

Re: Mk 1 Project Zippy (Picture Heavy!)

Postby MrBounce » Sun Nov 13, 2011 6:44 pm

Well it's been a bit of a while since I last went into the garage to actually do some work on the little beastie. I guess doing too many social things along with colder temperatures etc meant I put it to the back of my mind... I had an hour to spare so I thought I would attempt to take at least one of the rear drums off and have a look at the rear brakes. So I got myself some wood, an axle stand and the trolley jack and gently put everything safely up in the air having loosened to the wheelnuts.

What greeted me behind the wheel was a rusty looking drum; I grabbed the impact driver as I was sure the retaining screws would be utterly seized. Erm... no! Nice and easy to undo with a simple screwdriver. I was gobsmacked! Before I took the drum off I had a quick look at the spring & shock and the surrounding area. What looked like star-crazing in the fibreglass at first glance was in fact a spider, but the spring and shock looked like they could do with a fair bit of attention. I reckon they are probably the originals and will definitely need a full overhaul.

Amazingly the adjuster worked fine too. I am absolutely certain that this has been looked at recently. There was evidence of the cylinder leaking and the shoes seemed to be different makes, but everything seemed to be working fine. Even the inside of the drum looked pretty good. I will obviously replace all the consumables (I already have the replacement cylinders) and will clean up the drum before giving it a coat of paint. I will also be paying special attention to the rusty looking backplate! Now all I have to do is make sure the other side is just as easy to remove...

I removed one of the rear mudflaps when the wheel was off the car - I have never seen one of these before - marked "BLMC" so it's likely to be from a late 60's vehicle but what? Are these likely to be worth anything? Not sure if I am going to be keeping them or not. They're not Midas items as far as I'm aware.

Also have a bit of an annoying issue; I only have 3 centre caps for my lovely Mistral wheels. If anyone's got one kicking about in a box somewhere then please let me know! They don't look the easiest thing to replace and I would rather have all 4 than take 3 off as they're quite nice.

Also found the pictures from when I originally picked up the Midas in June so I've included these for your viewing pleasure :lol:

What lies behind such a pleasant exterior???

Image

Rusty drum...

Image

Got to be the original!

Image

Doesn't look too bad, and everything moves!!

Image

Evidence of fluid in here...

Image

Odd shoes... (they're not the same manufacturer!)

Image

Mudflaps. But from what?

Image

I love these Centre Caps. But I only have 3. Can you help?

Image

Picking up the Midas from deepest darkest Eastleigh (which was wet!!). Road train!!

Image

Andy, the marvellous guy I bought it from. Top bloke! Although he looks upset to see it go...

Image
Last edited by MrBounce on Sun Nov 13, 2011 11:48 pm, edited 1 time in total.
MrBounce
 
Posts: 648
Joined: Mon May 16, 2011 9:16 pm
Location: Suffolk

Re: Mk 1 Project Zippy (Picture Heavy!)

Postby Geoff Butcher » Sun Nov 13, 2011 9:42 pm

If that was an original spring it should have close coils at one end, they look evenly spaced to me
Geoff
User avatar
Geoff Butcher
 
Posts: 751
Joined: Fri Dec 05, 2008 9:10 pm
Location: Braintree

PreviousNext

Return to Complete Midas rebuild

Who is online

Users browsing this forum: No registered users and 1 guest

cron