Hello All,
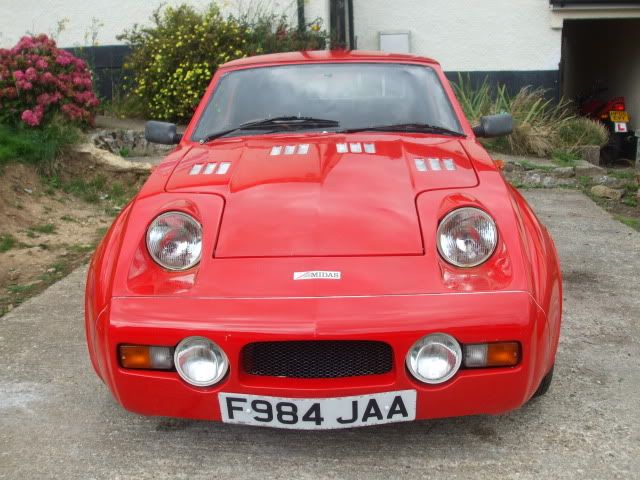
I hadn't planned on doing a full rebuild of a Midas but that is how it's turned out.
It started when I saw a Midas for sale on Ebay and remembered how much I liked them as a teenager. I was halfway through the restoration of my Scimitar GTE but couldn't resist the Midas.
The car was advertised as requiring very little work to get it back on the road - seats refitting and seatbelts, etc. Note quite accurate!
I took delivery of the car back in January. Drove it off the trailer and onto the drive without incident. There was no carpet, the original Huntsman seats were scrap, heater was missing but all trim mouldings were present. Paintwork was flat and had clearly been re-sprayed........badly. Door seals were in a box with some other spares and the headlamps just wedged into the apertures. The exhaust was a fabricated mess with a dreadful boyracer tailpipe finisher.
So as it only needed a 'small amount of work', I put the Scimitar on hold and set to on the Midas.
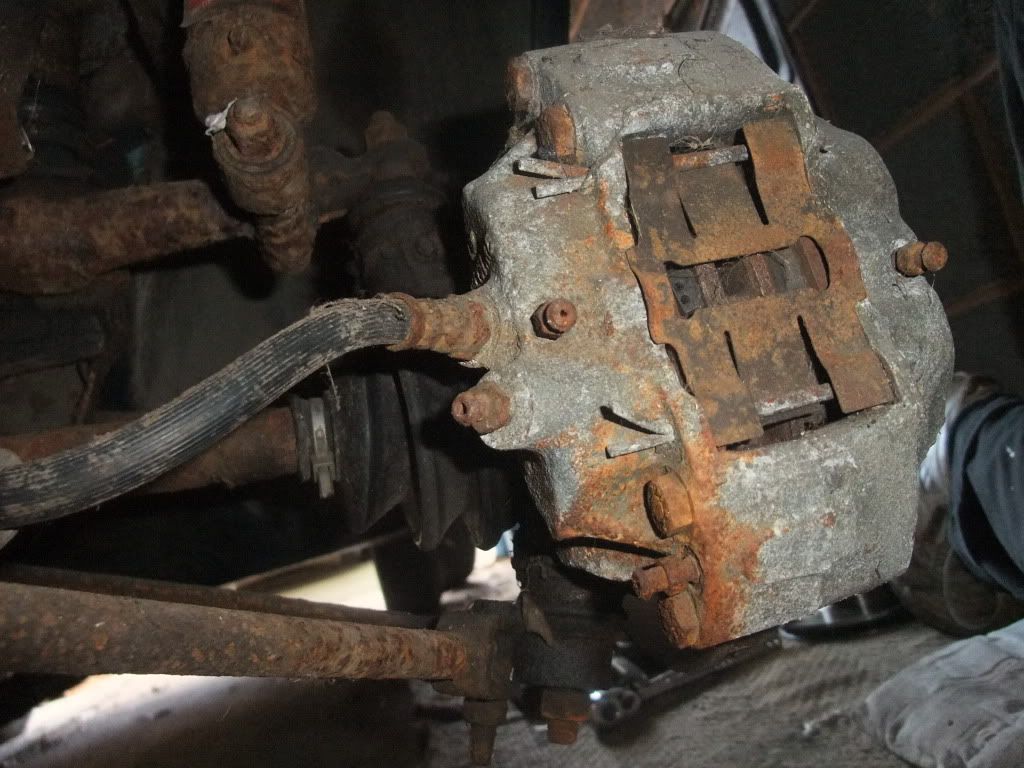
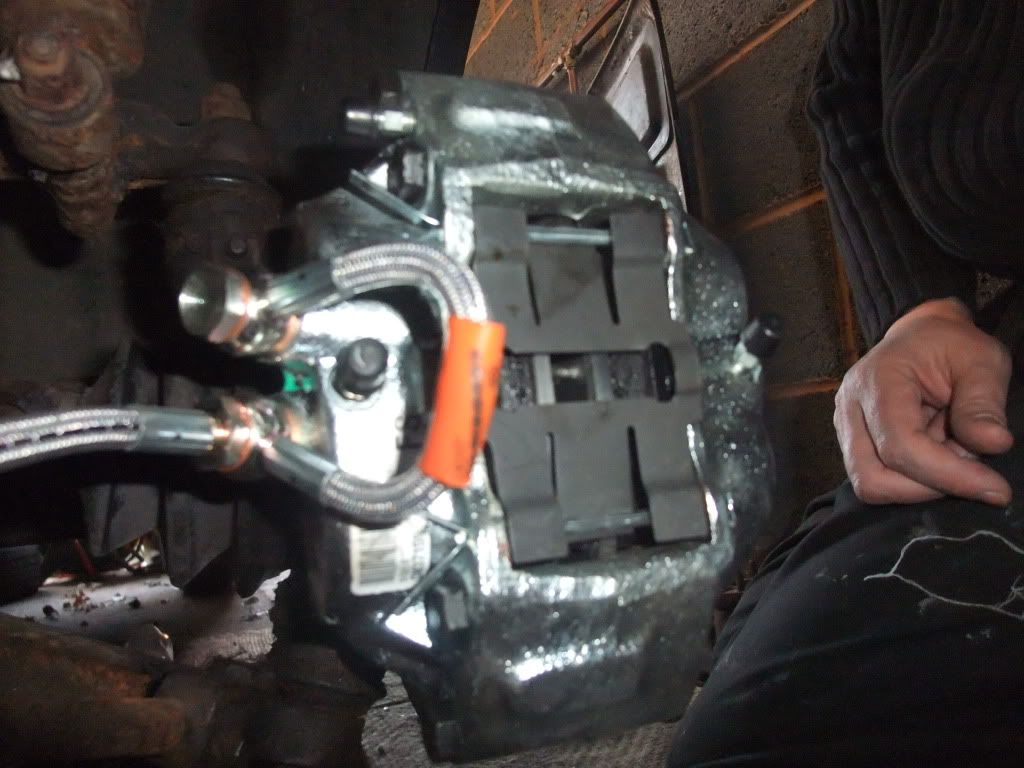
The car had clearly been off the road for quite a while, I started with the front brakes. It has MG Metro Turbo 4 pots and vented discs. First thing I noticed was the calipers only had one feed into them - should be two.
Not wanting to replace seals and pistons, I sourced new calipers / discs / pads. When fitting them, it became clear the hubs were incorrect - they were Mini hubs, which can't be used with Metro parts. The Mini hub bolts had all had their threads stripped, a miracle the wheels didn't come off! So special hubs, bolts and braided hoses were sourced and fitted. With the fronts done, the rears were in better condition except the backplates had rotted through. All new parts and braided hoses were fitted.
Fuel tank had rotted at some of the fixing points, so new tank and sender unit was fitted.
Rear lights were in poor condition. A spare set were supplied with the car, so a good set was made from the two. One of the lenses need studs, so I cut some 5mm bolts to length and glued them in. The lamp bodies were rubbed down and sprayed with 'chrome' paint. The orange indicator filters were removed and orange bulbs fitted to give a more modern look. Results are very pleasing, being much brighter.
The headlights were Metro units. The bowls had been cut away to accomodate them aswell as the headlight surround mouldings. I found a way of fitting them but didn't like the idea of not having the bowls, so original headlights were sourced and fitted.
A driveshaft seal was replaced, a slack gearchange fixed and a quickshift fitted. The radiator fan was scrap and replaced with a modern compact one, along with the corroded steel water pipes.
So why isn't it on the road? When working on the rear brakes, I noticed a small hole in the rear beam. Some poking around revealed more holes and removal of the beam confirmed my worst fears - the beam was scrap. I knew from the forum that beams were not available, so using the 'C' section beam drawing off the Midas website, a friend arranged to have one made f.o.c. Brilliant, except when it arrived, it became clear they had welded on the end caps! New caps were made to fit over the welded ones and the beam was fitted. Much later, I bought some Cooper Sportpack minilites. Fitted one side ok but when I fitted the other, the tyre fouled the bodywork and coilover. this meant the beam was not central to the body. It was also clear the geometry of one of the rear wheels was totally wrong - too much toe-in.
I now don't trust the beam or who made it, so it looks like I need one of Killerwhat's beams.
So that is pretty well where I am today. I have loaded some pictures onto Photobucket and will add more when I can find them. They seem to have loaded in reverse order, so best start at the end, if you know what I mean.
Link to Photobucket album.
http://s1216.photobucket.com/albums/dd368/Midasmadness/#!cpZZ1QQtppZZ24
Midas Cars Forum - www.midascarsforum.com
This free forum is for Midas and Midtec Bronze enthusiasts. The Midas is a British car designed as a replacement for the Mini Marcos.
Mk2 Rebuild
Moderator: The Midas Forum Staff
9 posts
• Page 1 of 1
Mk2 Rebuild
![]() by Midasmadness » Mon Jan 02, 2012 11:23 pm
by Midasmadness » Mon Jan 02, 2012 11:23 pm
- Midasmadness
- Posts: 7
- Joined: Thu Dec 29, 2011 4:11 pm
- Location: Redditch, Worcs
Re: Mk2 Rebuild
![]() by manifold » Tue Jan 03, 2012 12:59 am
by manifold » Tue Jan 03, 2012 12:59 am
Looks great on photobucket. Keep up the good work,
Midas Cars Forum & Facebook Page Founder
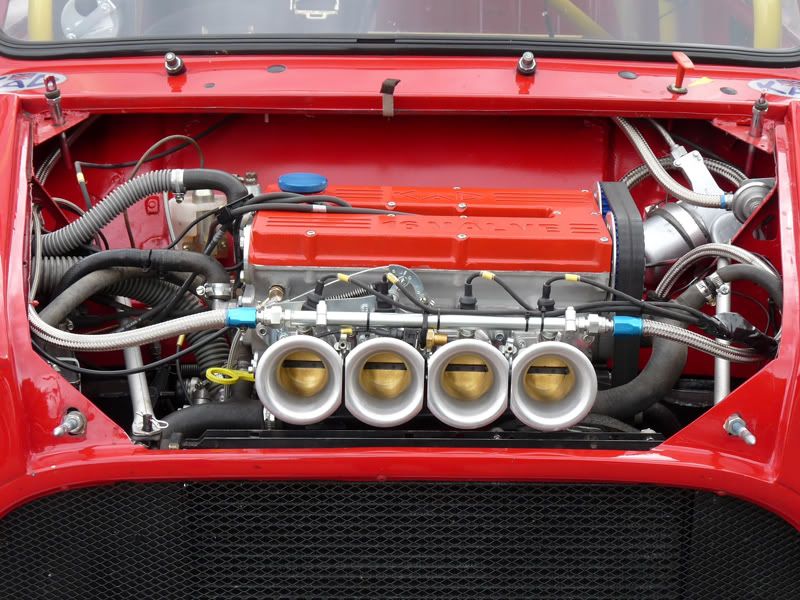
Midas Gold Convertible: 1380 steel 16v KAD & 5 sp dog box, Titanium mania, KAD fr/rear callipers, CF Steering
Midas Gold Coupe: 1380 7 port xflow, SC/CR gearbox, Titanium mania, CF Steering & seats.
Midas Gold Convertible: 1380 steel 16v KAD & 5 sp dog box, Titanium mania, KAD fr/rear callipers, CF Steering
Midas Gold Coupe: 1380 7 port xflow, SC/CR gearbox, Titanium mania, CF Steering & seats.
-
manifold - Posts: 1724
- Joined: Tue Dec 02, 2008 7:34 pm
- Location: Lancaster, Lancashire
Re: Mk2 Rebuild
![]() by Stuart » Tue Jan 03, 2012 11:23 am
by Stuart » Tue Jan 03, 2012 11:23 am
I see that they had the N/S Caliper on upside down. Not that it mattered as they were quite clearly only using the top two pistons anyway as you mentioned.
-

Stuart - Posts: 1719
- Joined: Tue Dec 02, 2008 8:29 pm
- Location: Derbyshire
Re: Mk2 Rebuild
![]() by manifold » Tue Jan 03, 2012 3:26 pm
by manifold » Tue Jan 03, 2012 3:26 pm
one circuit?
You have to wonder how or if it went through an MOT like that. Normally when the Metro callipers are used on the Mini (or Midas) a twin banjo type affair is looped through from one circuit to the other.
Mine is single circuit, but it goes through all 4 pistons.
You have to wonder how or if it went through an MOT like that. Normally when the Metro callipers are used on the Mini (or Midas) a twin banjo type affair is looped through from one circuit to the other.
Mine is single circuit, but it goes through all 4 pistons.
Midas Cars Forum & Facebook Page Founder
Midas Gold Convertible: 1380 steel 16v KAD & 5 sp dog box, Titanium mania, KAD fr/rear callipers, CF Steering
Midas Gold Coupe: 1380 7 port xflow, SC/CR gearbox, Titanium mania, CF Steering & seats.
Midas Gold Convertible: 1380 steel 16v KAD & 5 sp dog box, Titanium mania, KAD fr/rear callipers, CF Steering
Midas Gold Coupe: 1380 7 port xflow, SC/CR gearbox, Titanium mania, CF Steering & seats.
-
manifold - Posts: 1724
- Joined: Tue Dec 02, 2008 7:34 pm
- Location: Lancaster, Lancashire
Re: Mk2 Rebuild
![]() by Stuart » Tue Jan 03, 2012 3:50 pm
by Stuart » Tue Jan 03, 2012 3:50 pm
I did it this way many moons ago, with a single banjo hose it worked perfectly.
- Attachments
-
- Picture 241.jpg (53.42 KiB) Viewed 9711 times
-
Stuart - Posts: 1719
- Joined: Tue Dec 02, 2008 8:29 pm
- Location: Derbyshire
Re: Mk2 Rebuild
![]() by Rich » Tue Jan 03, 2012 7:22 pm
by Rich » Tue Jan 03, 2012 7:22 pm
A111 wrote:I see that they had the N/S Caliper on upside down. Not that it mattered as they were quite clearly only using the top two pistons anyway as you mentioned.
Wow, that's a bizarre bodge!
-
Rich - Posts: 1250
- Joined: Wed Dec 03, 2008 1:27 am
- Location: Devon
Re: Mk2 Rebuild
![]() by Jon » Tue Jan 03, 2012 8:05 pm
by Jon » Tue Jan 03, 2012 8:05 pm
I put mine together using the standard Metro hubs and discs salvaged from my Mk3, with braided hoses and ERA caliper bolts from Mini Spares. Only mod required was to adjust the Mini disc shield to fit round the Metro caliper.

-
Jon - Posts: 147
- Joined: Wed Dec 03, 2008 9:12 am
- Location: Haynes
Re: Mk2 Rebuild
![]() by MrBounce » Tue Jan 03, 2012 10:15 pm
by MrBounce » Tue Jan 03, 2012 10:15 pm
Looks very nice in the photobucket album. I feel somewhat lazy now considering I've been stripping mine for 6 months now... 
- MrBounce
- Posts: 646
- Joined: Mon May 16, 2011 9:16 pm
- Location: Suffolk
Re: Mk2 Rebuild
![]() by Midasmadness » Tue Jan 03, 2012 10:44 pm
by Midasmadness » Tue Jan 03, 2012 10:44 pm
manifold wrote:one circuit?
You have to wonder how or if it went through an MOT like that. Normally when the Metro callipers are used on the Mini (or Midas) a twin banjo type affair is looped through from one circuit to the other.
Mine is single circuit, but it goes through all 4 pistons.
Hi Manifold,
yes, mine is a single circuit system. I used the special braided hose set with the twin banjo link hose.
- Midasmadness
- Posts: 7
- Joined: Thu Dec 29, 2011 4:11 pm
- Location: Redditch, Worcs
9 posts
• Page 1 of 1
Return to Complete Midas rebuild
Who is online
Users browsing this forum: No registered users and 37 guests