Midas Cars Forum - www.midascarsforum.com
This free forum is for Midas and Midtec Bronze enthusiasts. The Midas is a British car designed as a replacement for the Mini Marcos.
J171 NJO Cortez / 2+2 rebuild and modifications
Moderator: The Midas Forum Staff
Re: J171 NJO Cortez / 2+2 rebuild and modifications
![]() by Hans Efde » Fri Sep 19, 2014 7:33 am
by Hans Efde » Fri Sep 19, 2014 7:33 am
Great improvements and amazing to read how quickly you tackle all these jobs.
-

Hans Efde - Posts: 1731
- Joined: Sat Dec 06, 2008 10:11 pm
- Location: IJlst, Netherlands
Re: J171 NJO Cortez / 2+2 rebuild and modifications
![]() by kelvink » Fri Sep 19, 2014 9:32 am
by kelvink » Fri Sep 19, 2014 9:32 am
I've seen so many Cortez with the wiper parked half way up the screen. Well done for such a good job of sorting it and posting on the forum. Excellent!
I best go and check my Picasso is still all together now
I best go and check my Picasso is still all together now
-

kelvink - Posts: 636
- Joined: Wed Jun 20, 2012 8:12 am
- Location: Dorset
Re: J171 NJO Cortez / 2+2 rebuild and modifications
![]() by Jin » Fri Sep 19, 2014 10:28 am
by Jin » Fri Sep 19, 2014 10:28 am
Cheers guys, much appreciated, I just love messing about with cars, 
Touch wood, so far I’ve not found anything that has frightened me half to death with this one so I’m on a bit of a roll.....
Touch wood, so far I’ve not found anything that has frightened me half to death with this one so I’m on a bit of a roll.....
https://easywider.co.uk/ universal flexible wheel arch extensions
- Jin
- Posts: 454
- Joined: Fri Aug 01, 2014 10:33 pm
Re: J171 NJO Cortez / 2+2 rebuild and modifications
![]() by Jin » Fri Sep 19, 2014 10:37 am
by Jin » Fri Sep 19, 2014 10:37 am
quick question, what size is the thread on the door hinges?
dosent appear to be M8 or 5/16" on mine and my nuts are rusty
dosent appear to be M8 or 5/16" on mine and my nuts are rusty
https://easywider.co.uk/ universal flexible wheel arch extensions
- Jin
- Posts: 454
- Joined: Fri Aug 01, 2014 10:33 pm
Re: J171 NJO Cortez / 2+2 rebuild and modifications
![]() by benofbrum » Fri Sep 19, 2014 4:32 pm
by benofbrum » Fri Sep 19, 2014 4:32 pm
I did say in a post on Justin's "doorbell" post that the car would be a contender for the "most Improved Midas" at Stoneleigh next year.
Meanwhile, my Excelsior now has an improved fresh air intake, taking air from above and in front of the rad. Pictures when I find out how to post pictures
Meanwhile, my Excelsior now has an improved fresh air intake, taking air from above and in front of the rad. Pictures when I find out how to post pictures
- benofbrum
- Posts: 255
- Joined: Tue Feb 07, 2012 11:58 pm
Re: J171 NJO Cortez / 2+2 rebuild and modifications
![]() by Jin » Sat Sep 20, 2014 12:24 am
by Jin » Sat Sep 20, 2014 12:24 am
Another job ticked off
Both doors (but the drivers was worse) had dropped on the hinges causing them to look out of line a fair bit, plus I need to sort the glass height soon so it would be wise to get the doors true first as a good datum,
Thankfully there is no play in the hinges so it was just a case of (I thought) elongating the holes either top or bottom or both and tightening the nuts
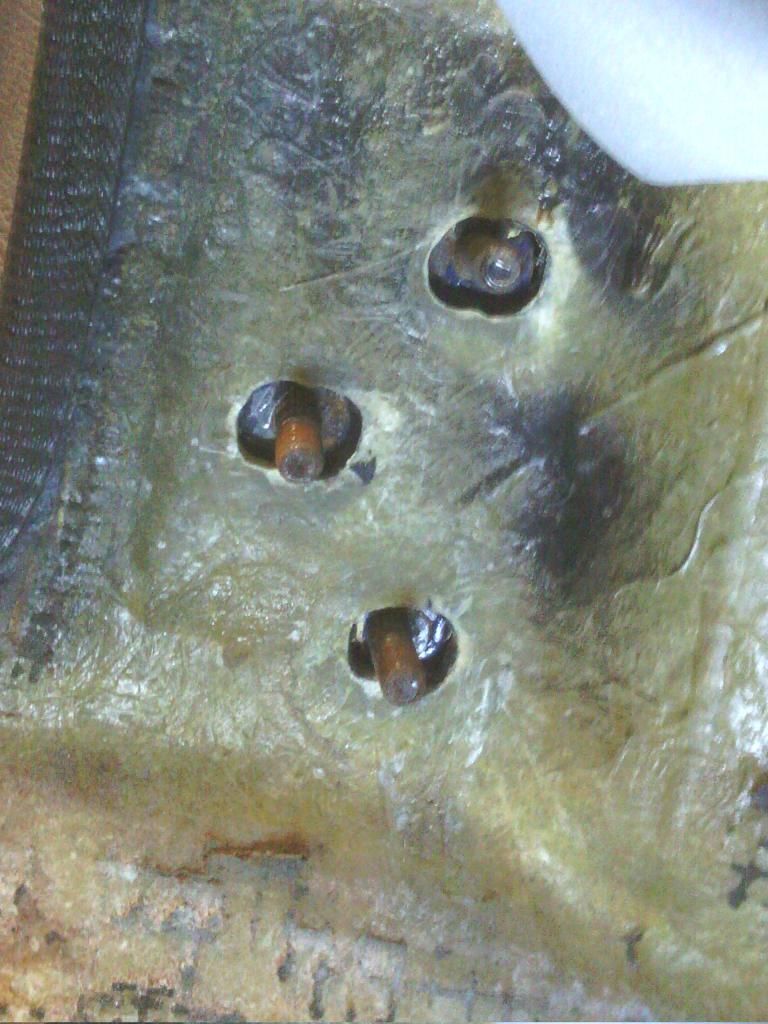
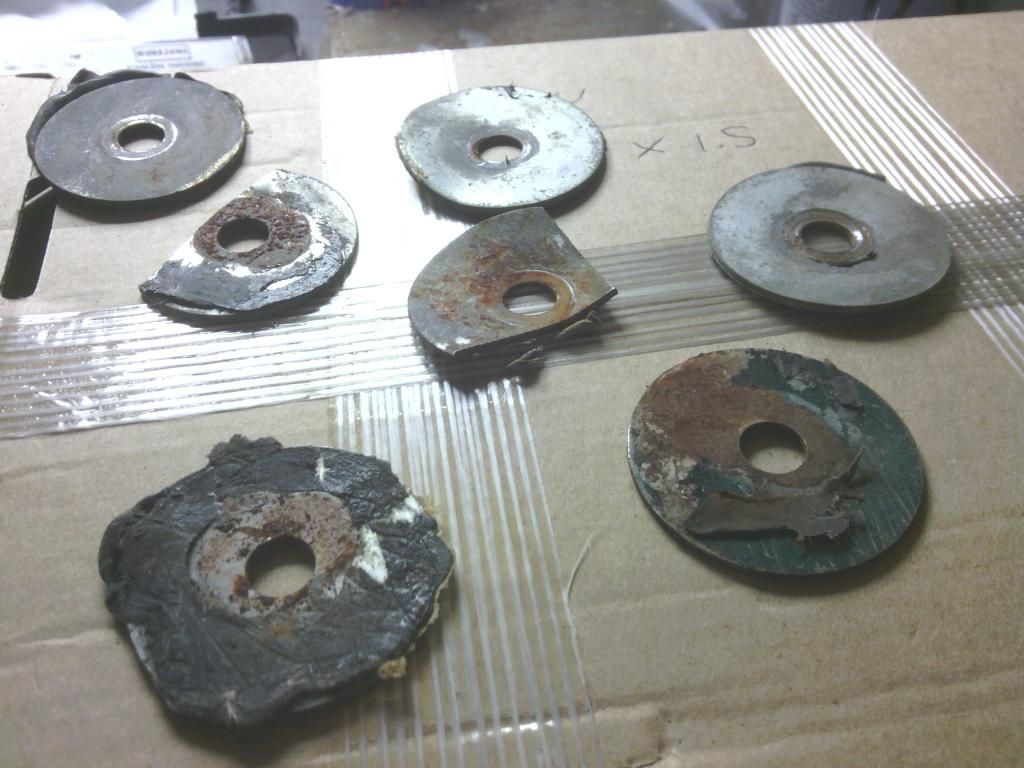
I was a bit apprehensive since the washers behind the nuts look a bit shoddy (well down right terrible if I'm honest, I can't stand cut down washers), but either way I set to work safe in the knowledge I've plenty more while washers
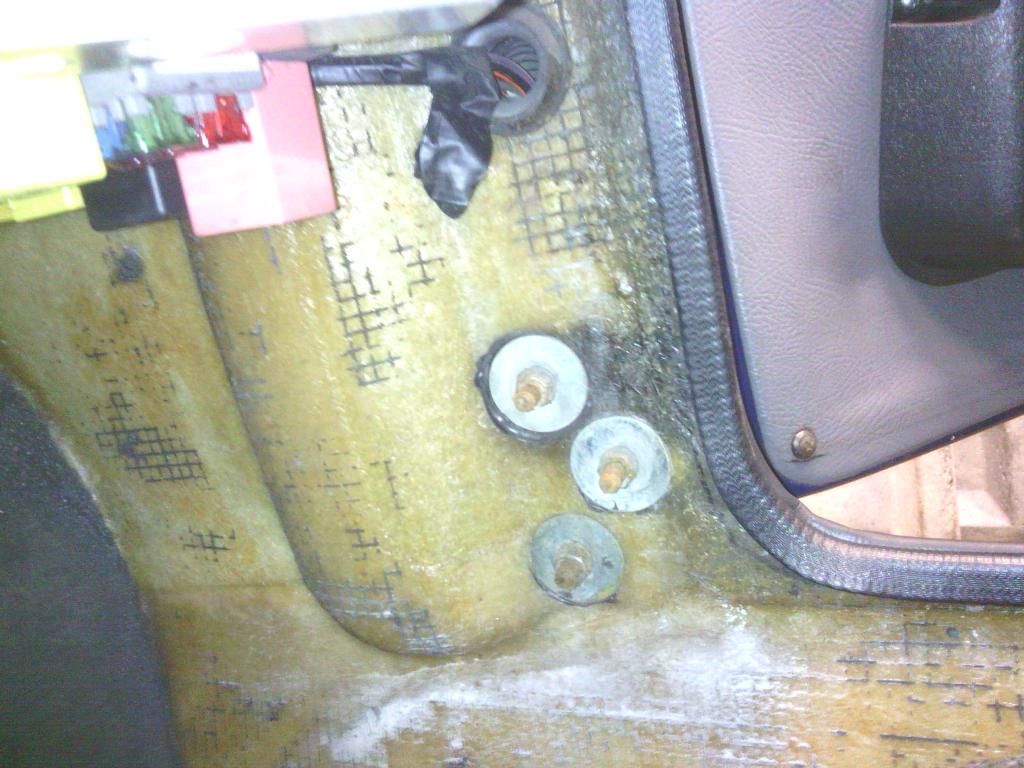
Once I removed the washers it soon became apparent I needed a plan B. I certainly didn't need my round file to "neatly slot the holes" as I thought since it looked like they were originally made using a shotgun.
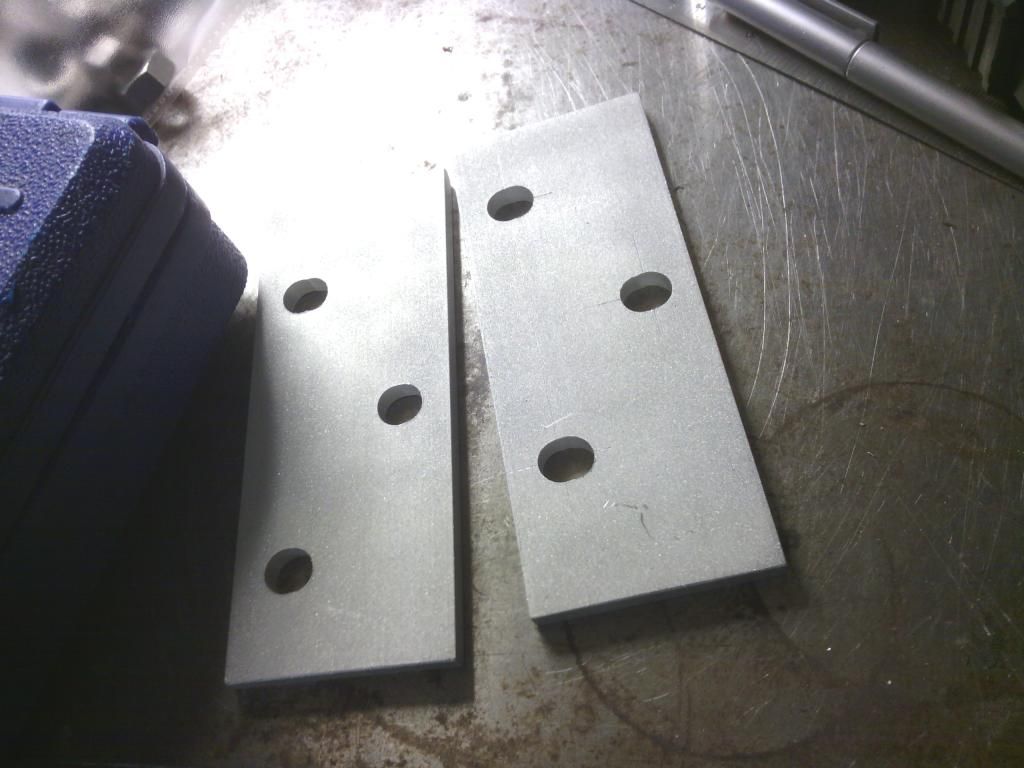
So onto plan B
I didn't fancy layering up more penny washers so I made some spreader plates out if 5x 50mm section extruded aluminium (cos it's tougher than rolled sheet) then grit blasted them to give a grip into the fiberglass to prevent slippage over time
 [/URL
[/URL
With the doors accurately chocked using laminate floor packers which come in handy making comparisons side to side
[URL=http://s120.photobucket.com/user/jindal/media/jindal016/IMG_20140919_230201_zpsd1sfurcg.jpg.html]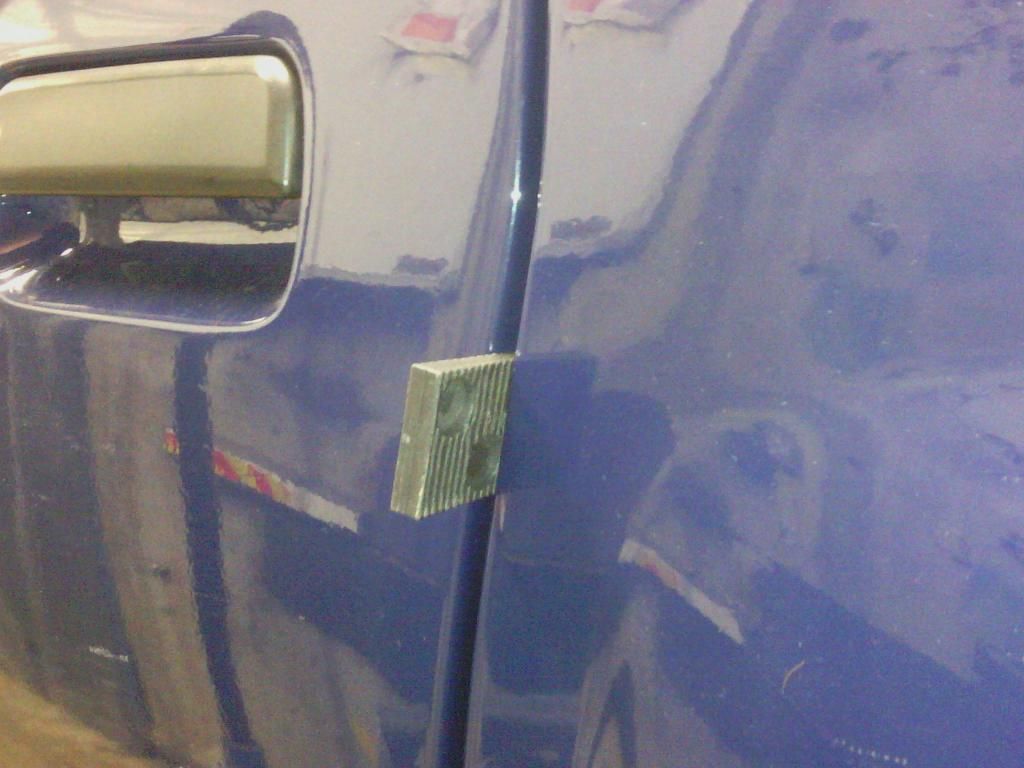
I fitted the plates with the holes filled up with polyurethane adhesive
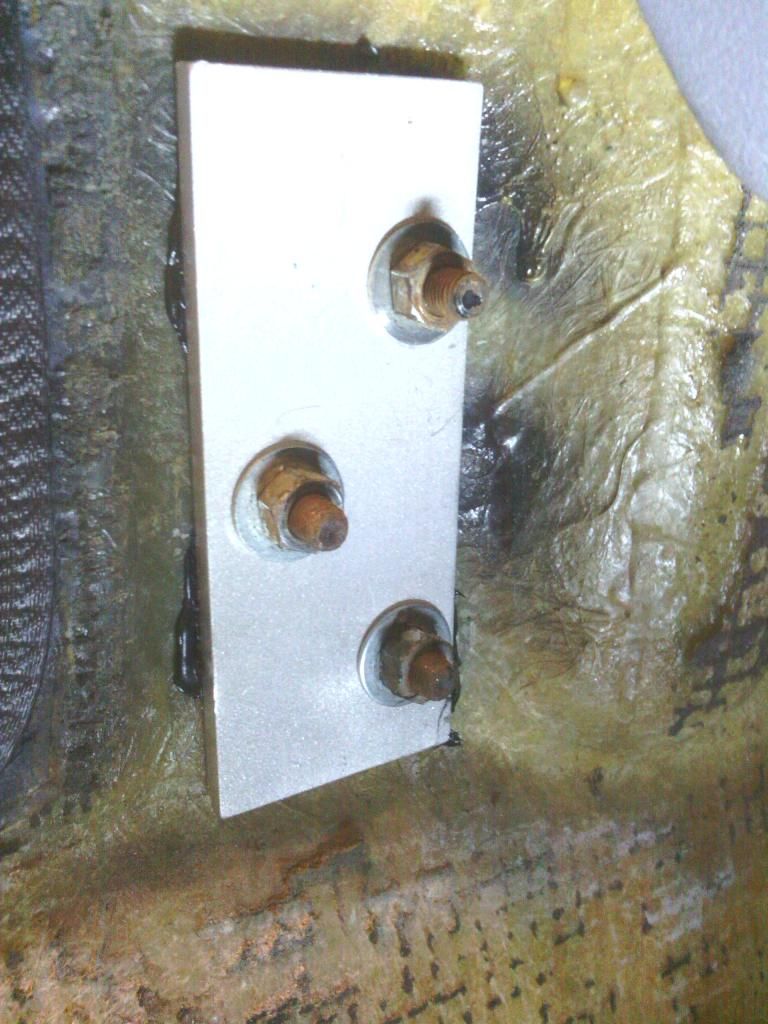
Now the load is spread and the bolts are pulling evenly across the fiberglass,
The doors a both adjusted to give a perfect gentle click upon closing and the shut lines are perfect,
The upper hinges are nowhere as bad but they do have rusty washers so they will be treated to some nice thick stainless ones once mr postie man droppers them off
Anythings got to be better than the old ones
Both doors (but the drivers was worse) had dropped on the hinges causing them to look out of line a fair bit, plus I need to sort the glass height soon so it would be wise to get the doors true first as a good datum,
Thankfully there is no play in the hinges so it was just a case of (I thought) elongating the holes either top or bottom or both and tightening the nuts
I was a bit apprehensive since the washers behind the nuts look a bit shoddy (well down right terrible if I'm honest, I can't stand cut down washers), but either way I set to work safe in the knowledge I've plenty more while washers

Once I removed the washers it soon became apparent I needed a plan B. I certainly didn't need my round file to "neatly slot the holes" as I thought since it looked like they were originally made using a shotgun.

So onto plan B
I didn't fancy layering up more penny washers so I made some spreader plates out if 5x 50mm section extruded aluminium (cos it's tougher than rolled sheet) then grit blasted them to give a grip into the fiberglass to prevent slippage over time
 [/URL
[/URLWith the doors accurately chocked using laminate floor packers which come in handy making comparisons side to side
[URL=http://s120.photobucket.com/user/jindal/media/jindal016/IMG_20140919_230201_zpsd1sfurcg.jpg.html]
I fitted the plates with the holes filled up with polyurethane adhesive

Now the load is spread and the bolts are pulling evenly across the fiberglass,
The doors a both adjusted to give a perfect gentle click upon closing and the shut lines are perfect,
The upper hinges are nowhere as bad but they do have rusty washers so they will be treated to some nice thick stainless ones once mr postie man droppers them off
Anythings got to be better than the old ones

https://easywider.co.uk/ universal flexible wheel arch extensions
- Jin
- Posts: 454
- Joined: Fri Aug 01, 2014 10:33 pm
Re: J171 NJO Cortez / 2+2 rebuild and modifications
![]() by ACourtney » Sat Sep 20, 2014 8:12 pm
by ACourtney » Sat Sep 20, 2014 8:12 pm
The Picasso wiper looks great - if Kelvin's goes missing he'll know wher it went 
Drooping doors on the Midas are always a problem, but we are not alone. Rehanging the doors was an annual service item for TVRs!
Hopefully your solution will keep them in place a bit longer.
Drooping doors on the Midas are always a problem, but we are not alone. Rehanging the doors was an annual service item for TVRs!
Hopefully your solution will keep them in place a bit longer.
-

ACourtney - Posts: 488
- Joined: Thu Dec 04, 2008 12:22 pm
- Location: Oxford
Re: J171 NJO Cortez / 2+2 rebuild and modifications
![]() by Rich » Sun Sep 21, 2014 11:20 am
by Rich » Sun Sep 21, 2014 11:20 am
I'm unlikely to ever have to buy a mild steel penny washer again due to the amount I've removed from the convertible over the last few years. Looking good and impressive speed on the modifications/repairs.
-

Rich - Posts: 1250
- Joined: Wed Dec 03, 2008 1:27 am
- Location: Devon
Re: J171 NJO Cortez / 2+2 rebuild and modifications
![]() by Jin » Sun Sep 21, 2014 7:33 pm
by Jin » Sun Sep 21, 2014 7:33 pm
Thanks guys for all the positive comments, makes all the long lonely evenings in the garage worth while
The things we do for fun
The things we do for fun
https://easywider.co.uk/ universal flexible wheel arch extensions
- Jin
- Posts: 454
- Joined: Fri Aug 01, 2014 10:33 pm
Re: J171 NJO Cortez / 2+2 rebuild and modifications
![]() by Jin » Tue Sep 30, 2014 10:09 pm
by Jin » Tue Sep 30, 2014 10:09 pm
Hi all, sorry I’ve not been on for so long, rest assured I’ve not been taking it easy and skiving off, far from it, I’ve just been up to my ears in it.
So to begin with the lasts jobs, the seats – well the mounting of.
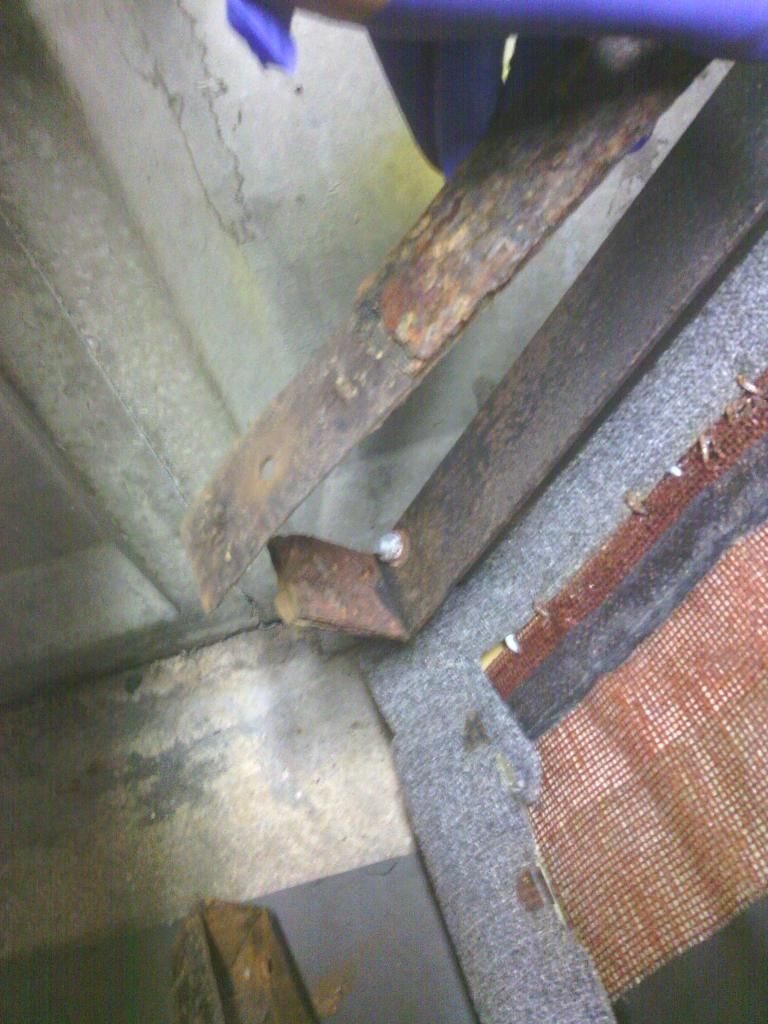
I had noticed the seat sub frames had become – shall we say a tad rusty,
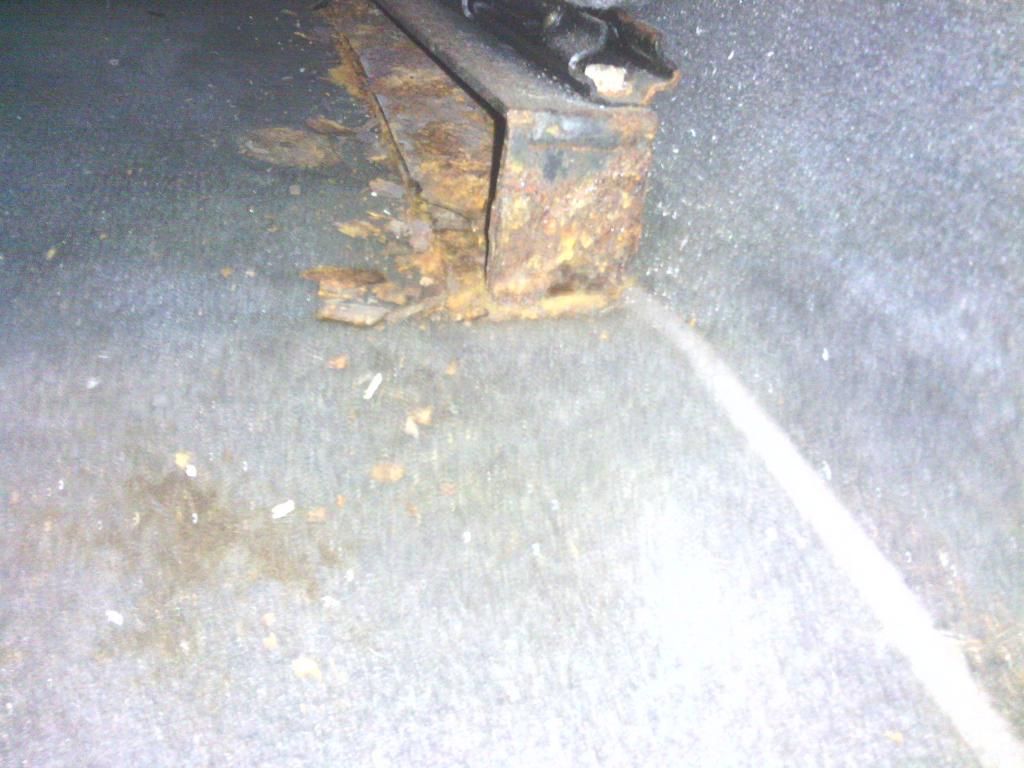
Further investigation showed the seat to not actually be attached to the floor in many places
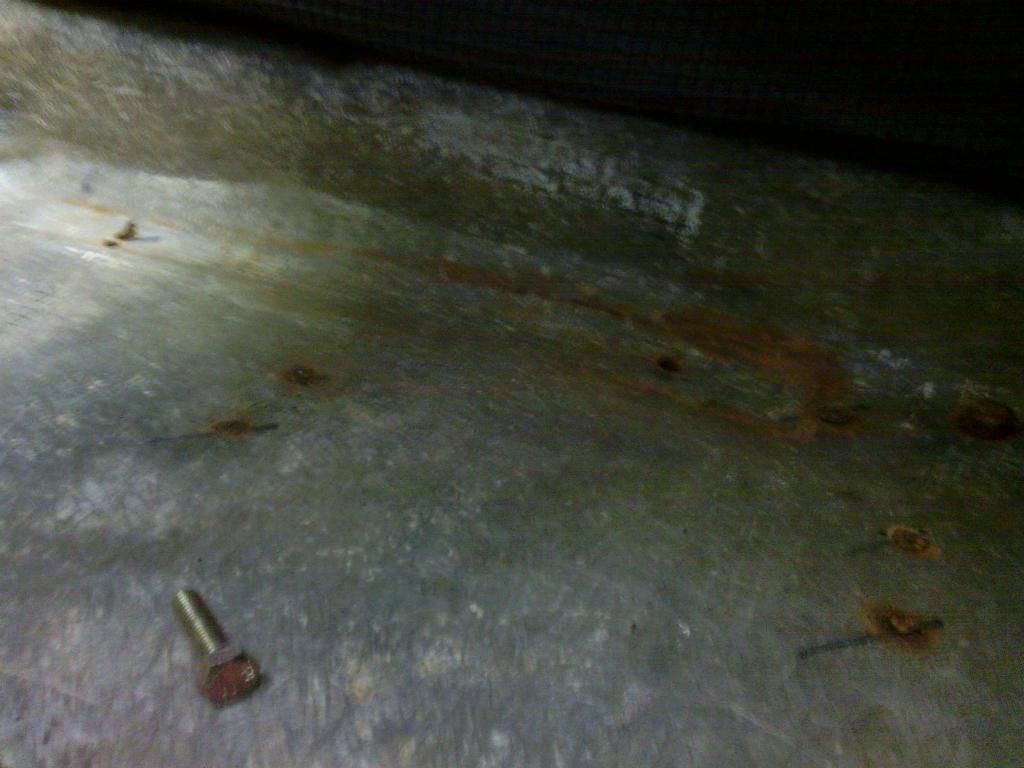
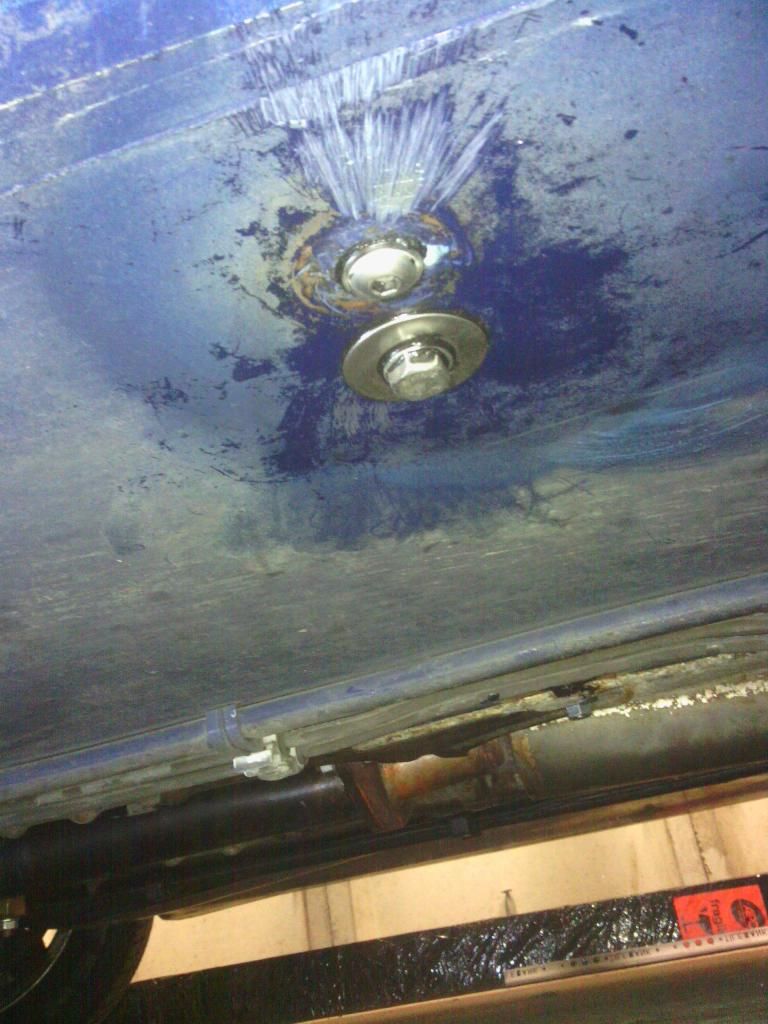
The fixing that pass through the floor didn’t look too clever either

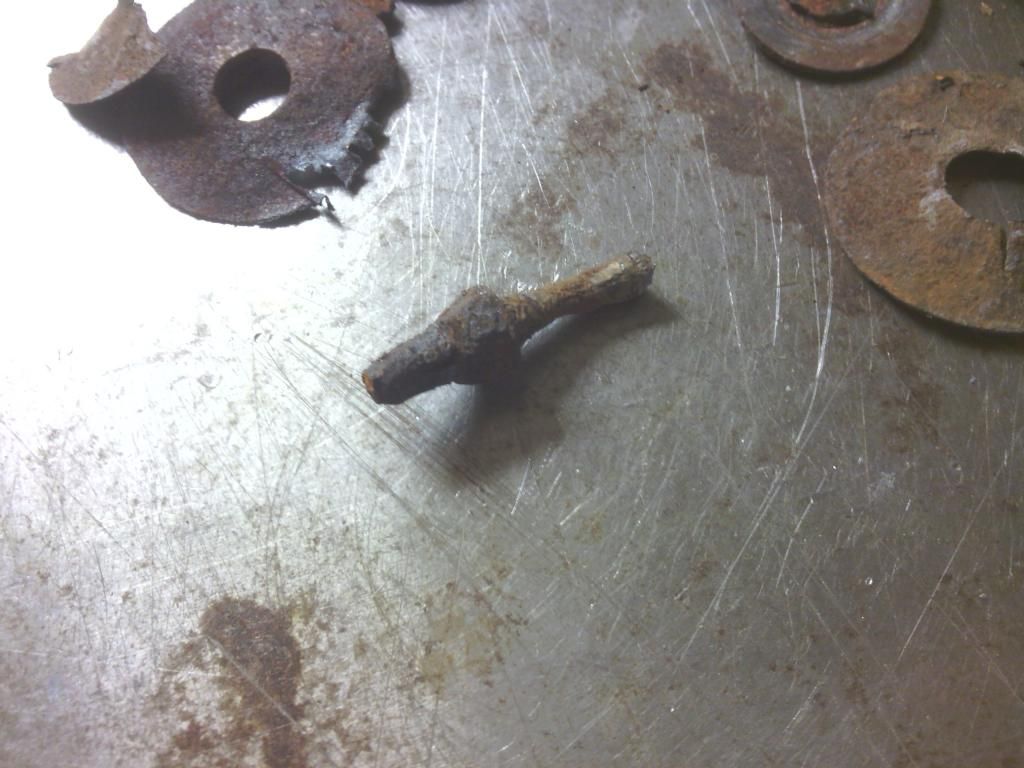
So I got out my trusty socket set and set about undoing the floor bolts, unfortunately all 4 were so corroded the heads were unidentifiable, there was no shape to grip onto,
I couldn’t chisel them off either for risk of damaging the floor so my only option was to hold a hacksaw blade between my fingertips and slowly slice the heads off – about as much fun as finding worms in your ice cream
The outer 2 were the worst probably due to being In the firing line from the wheel so I had hoped the inner 2 would at least surrender to the ,mole grips, thankfully one had the decency to shear in half
which just left one but by his point I was well and truly pi££ed off so I go the angry grinder out and lopped his head off as this bolt passed through the exhaust heat shield I felt it a safe bet.
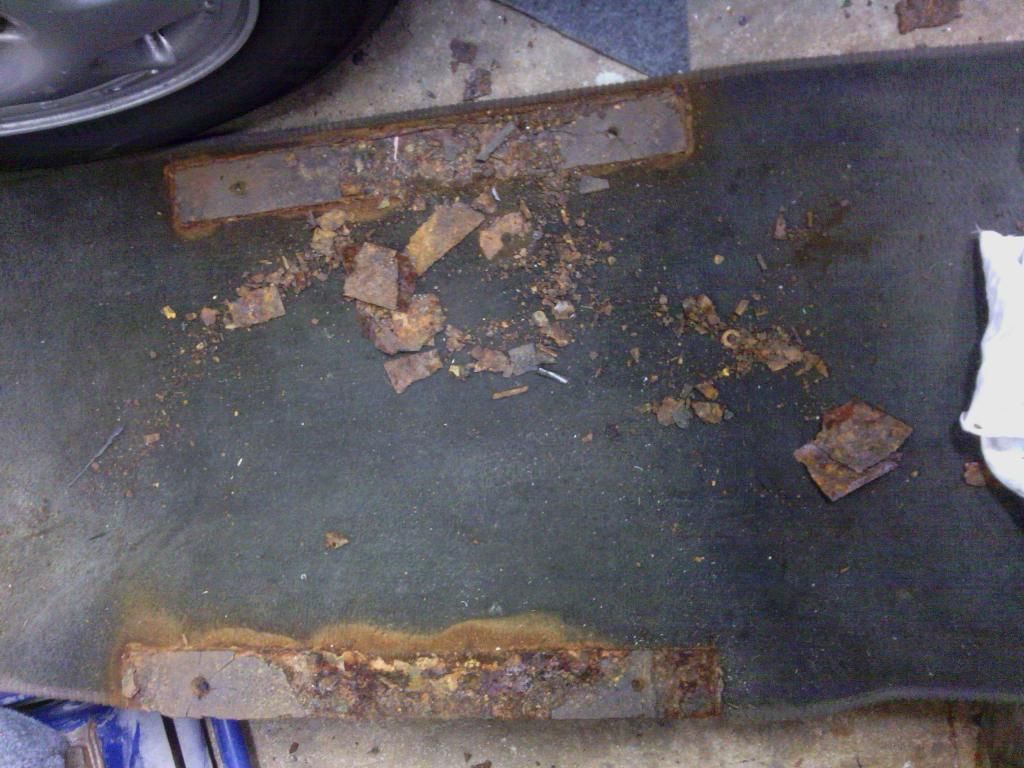
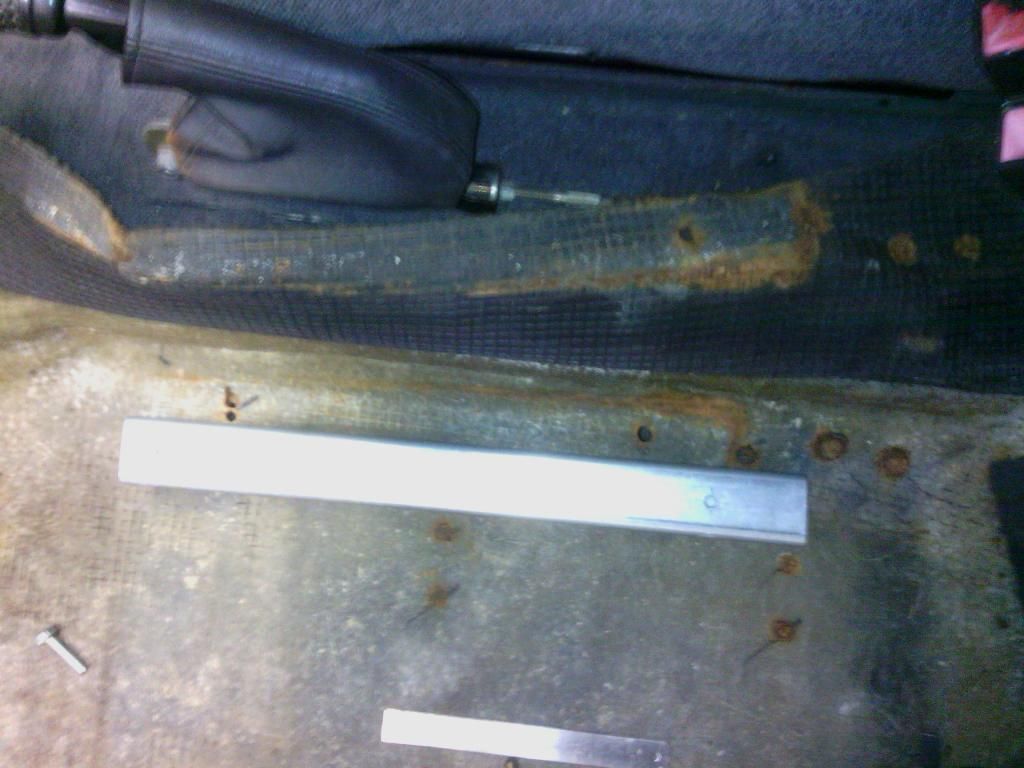
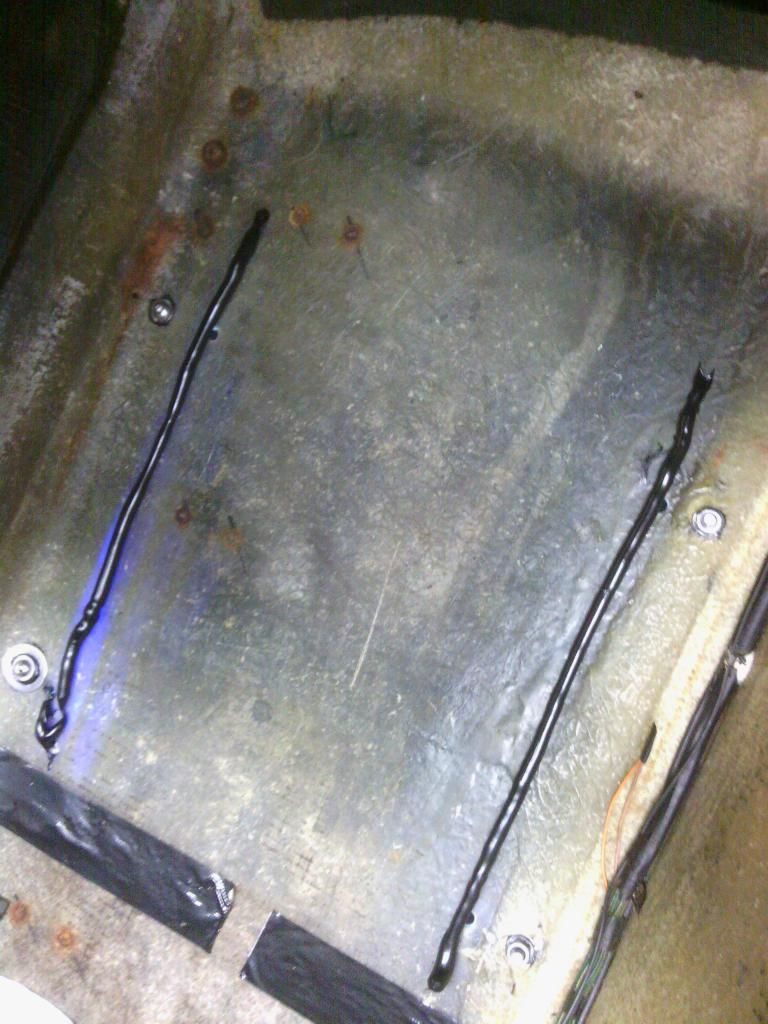
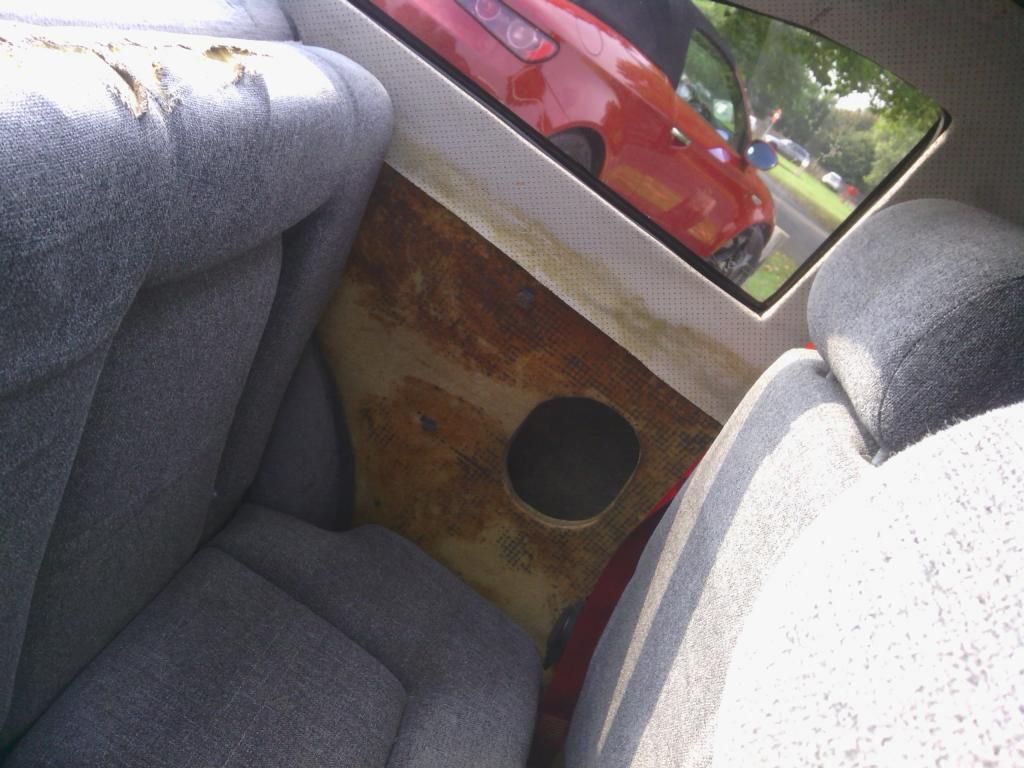
Seat out to fully appreciate the horrors
For a fiberglass car this is very rusty, even the carpet is rusty
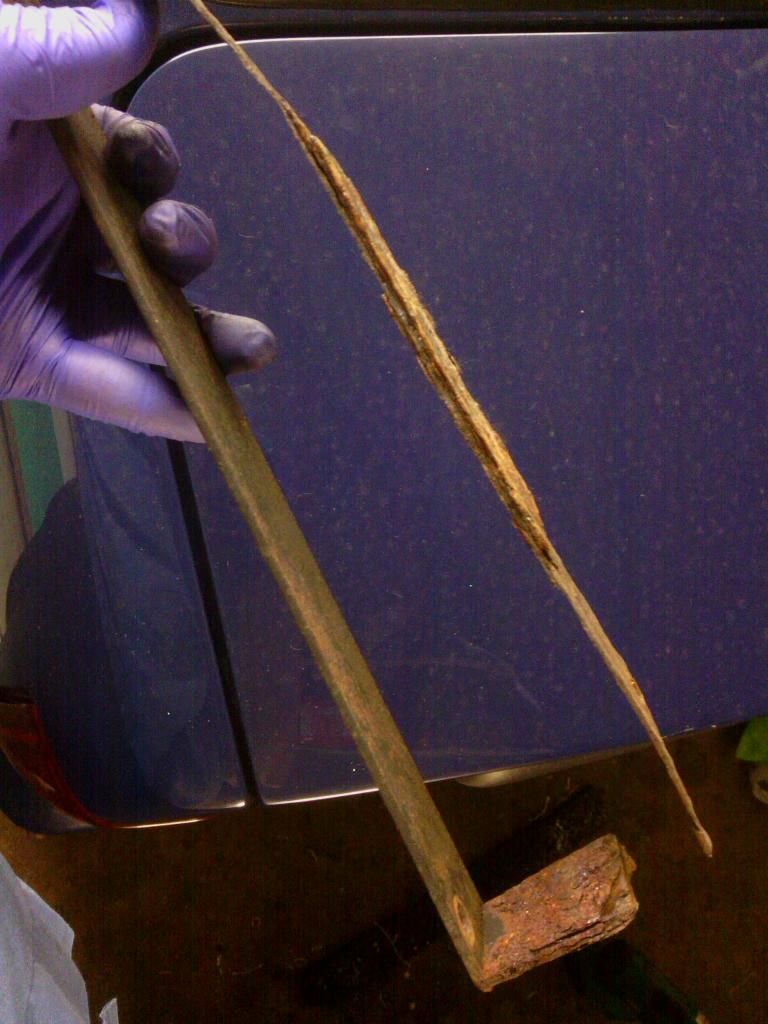
So new sub frames were needed, I didn’t like the original design since you’ve technically only got point contact front and rear, not much to spread the load down the floor, so I got hold of some galvanised cable conduit, its C section so easy to get to the fixings and 2.5mm thick so massively strong,
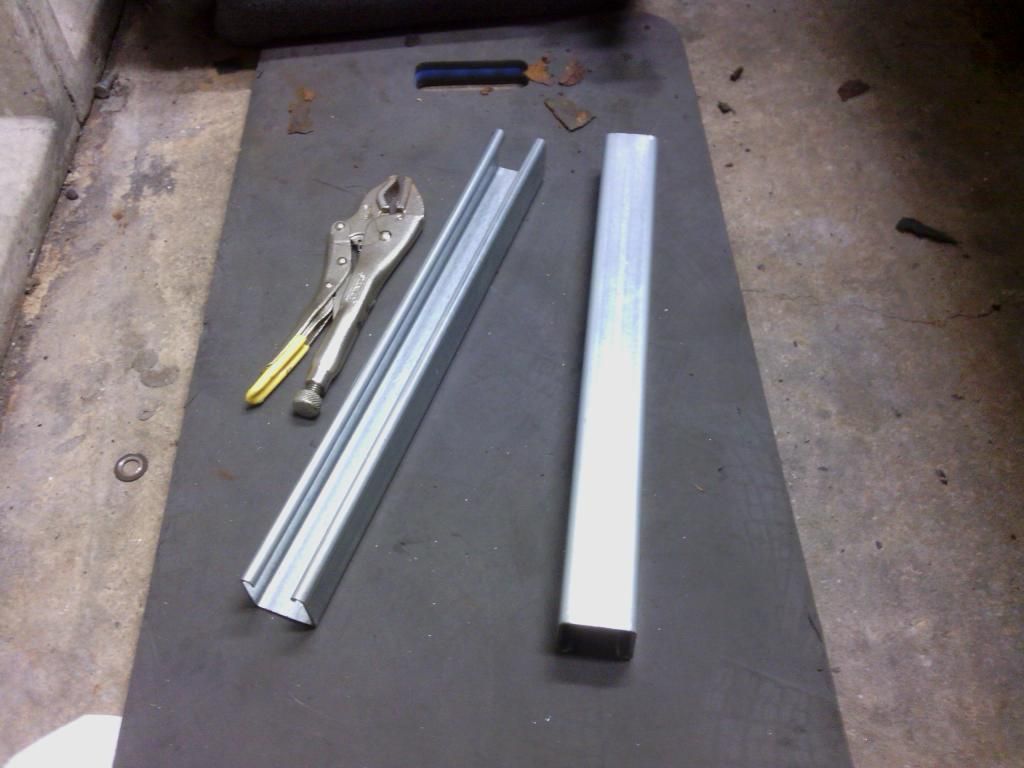
plan was to just bolt in place of the old sub frames and be happily on my way, but things never go to plan.
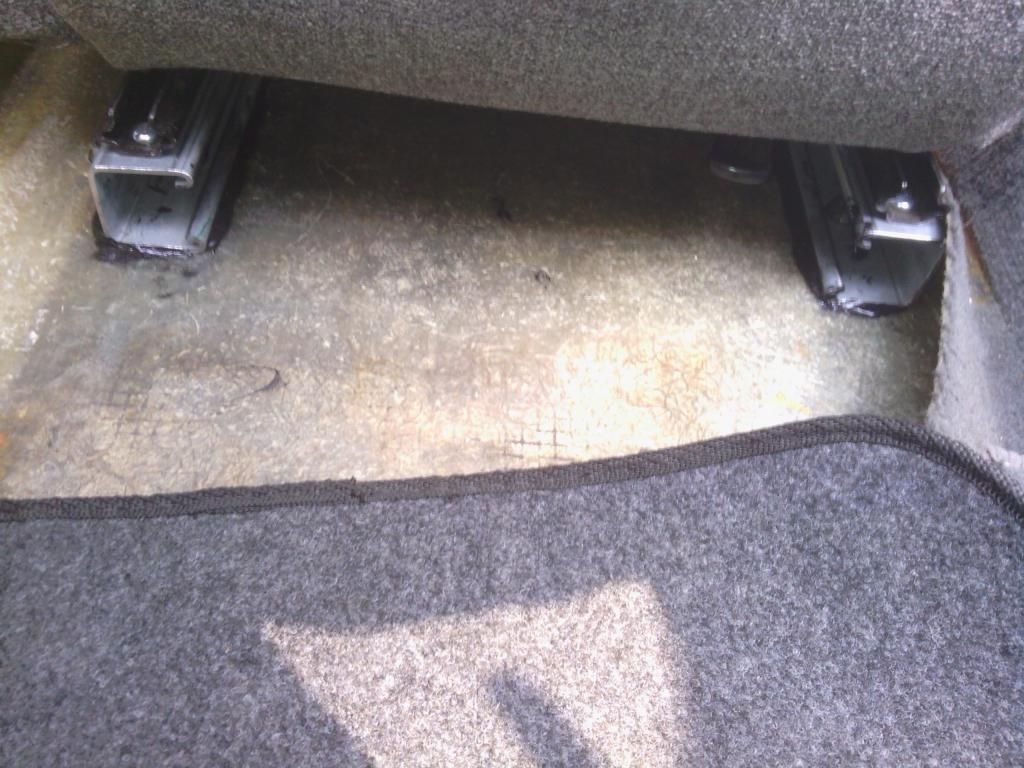
The first attempt to do just that saw the floor show up to not be totally flat at the original fixings locations,
this is because the matting has been laid up to join the inner sills to the floor and the centre tunnel also intrudes into this area, not by much ad no problem for the flexible original sub frames but there is no give in the new ones so the runners just jammed solid
So seat back out and a new flat location identified for the runners, approx. 40mm in from the originals
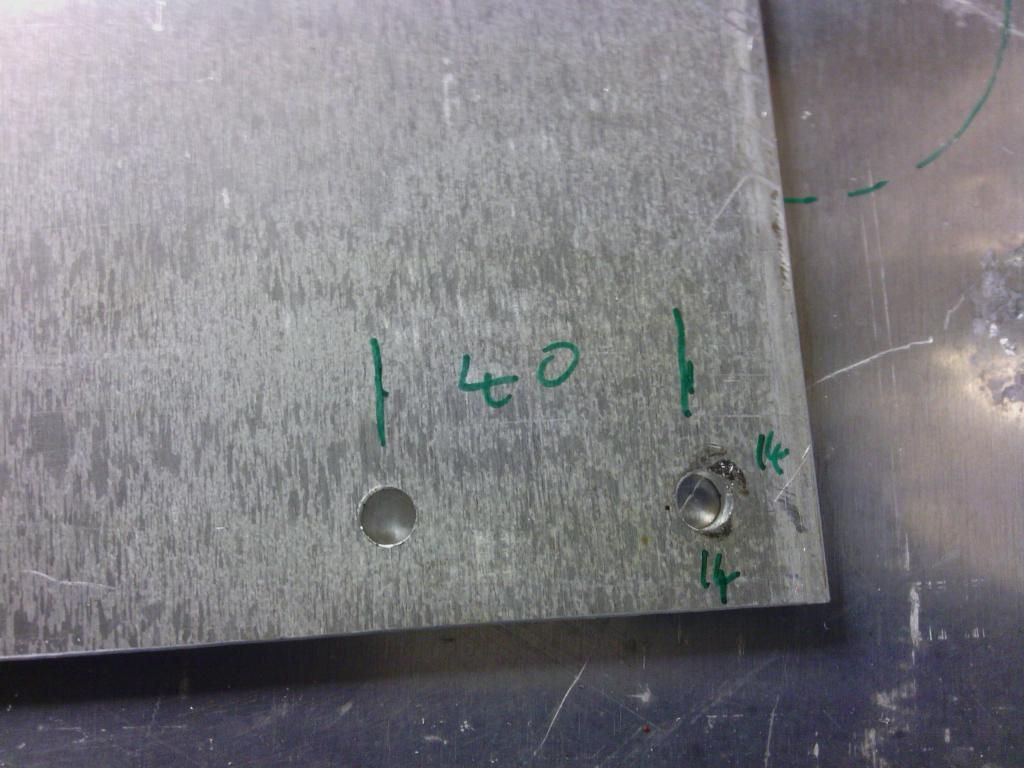
now the sub frames didn’t line up with the seat so I made some plates out of 6mm thick aluminium to allow the seat to fit to that, this is a good move since I don’t want to keep these seats for much longer and I now have a universal platform to mount the new seats onto
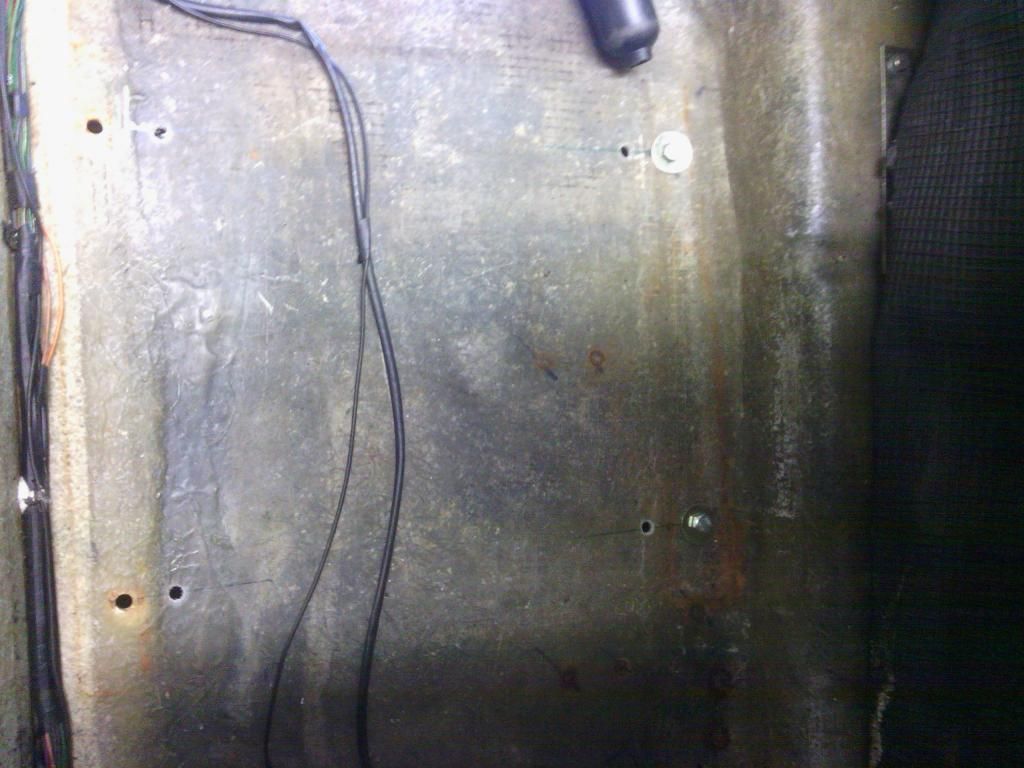
the end result
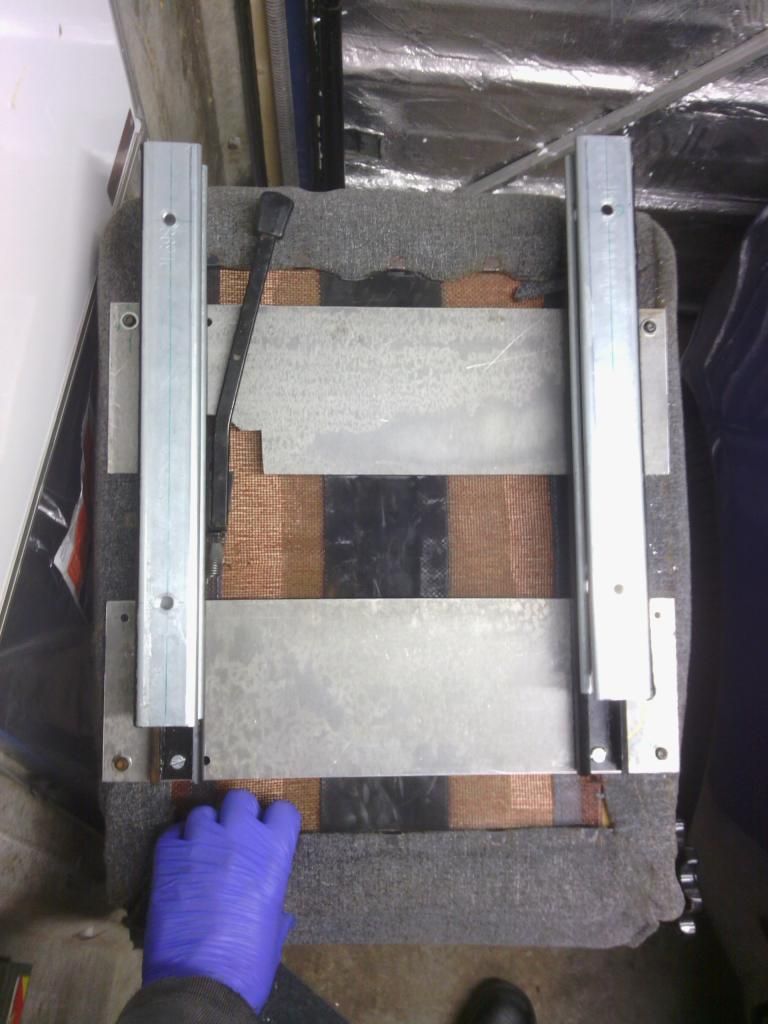
The original seat mount holes have been plugged up with M6 flange head stainless bolts and the new seat mounted down with M8 stainless flange bolts and nuts (M6 just doesn’t seem enough really) and the C section sub frames beaded down on a bead of polyurethane to prevent and moisture getting in between and to spread the load against and slight unevenness on the floor itself
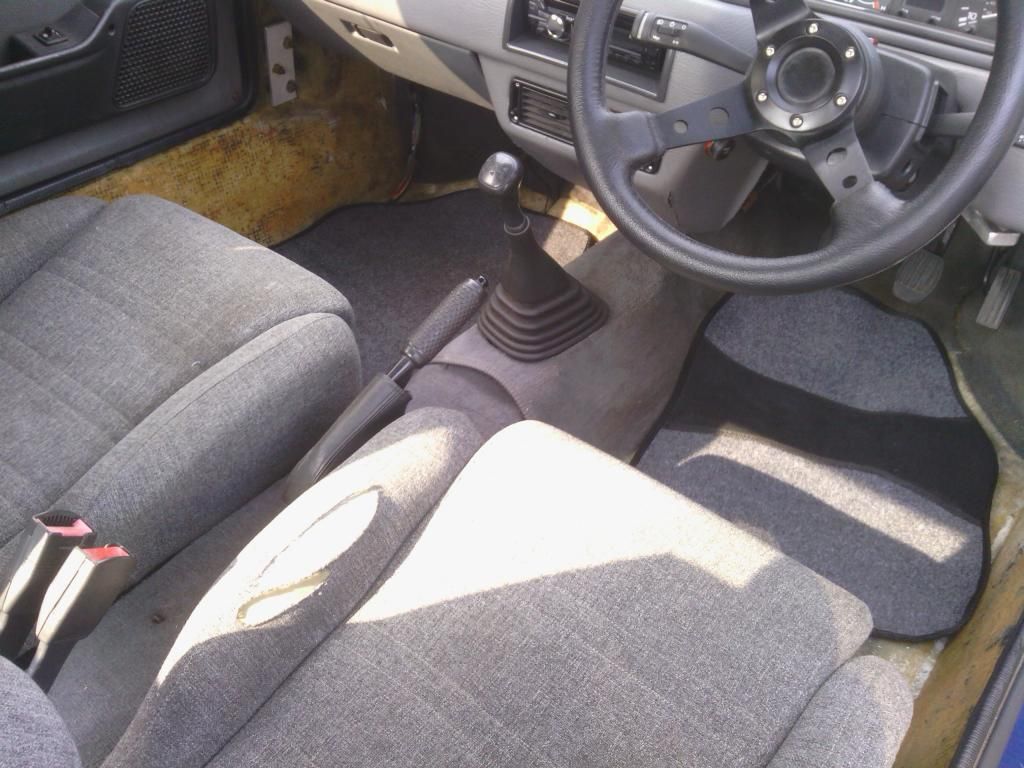
Then I had the pleasure of doing it all over again on the driver’s side, it’s all done now though and now I can drive the car safe in the knowledge my arse is safe with the added bonus I’ve been able to rip most of the carpet out now so the car smells slightly less like a tramps dog inside so a win win situation, for now I’m just rocking the no carpet race car look with a set of not very tailored mats from that well known car accessory emporium – ASDA.
At least it will be easier to trace leaks.
That’s all for now, that’s about a weeks’ worth of work there
More to come soon I promise
Stay tuned when I’ll be finding out how many attempts I can have to undo a seat belt bolt before I admit defeat and fiberglass over it and how many different methods of joining wires is it possible to cram into one 8” length?, is 4 enough or can we find more?
So to begin with the lasts jobs, the seats – well the mounting of.
I had noticed the seat sub frames had become – shall we say a tad rusty,

Further investigation showed the seat to not actually be attached to the floor in many places
The fixing that pass through the floor didn’t look too clever either

So I got out my trusty socket set and set about undoing the floor bolts, unfortunately all 4 were so corroded the heads were unidentifiable, there was no shape to grip onto,
I couldn’t chisel them off either for risk of damaging the floor so my only option was to hold a hacksaw blade between my fingertips and slowly slice the heads off – about as much fun as finding worms in your ice cream
The outer 2 were the worst probably due to being In the firing line from the wheel so I had hoped the inner 2 would at least surrender to the ,mole grips, thankfully one had the decency to shear in half

which just left one but by his point I was well and truly pi££ed off so I go the angry grinder out and lopped his head off as this bolt passed through the exhaust heat shield I felt it a safe bet.
Seat out to fully appreciate the horrors


For a fiberglass car this is very rusty, even the carpet is rusty

So new sub frames were needed, I didn’t like the original design since you’ve technically only got point contact front and rear, not much to spread the load down the floor, so I got hold of some galvanised cable conduit, its C section so easy to get to the fixings and 2.5mm thick so massively strong,

plan was to just bolt in place of the old sub frames and be happily on my way, but things never go to plan.
The first attempt to do just that saw the floor show up to not be totally flat at the original fixings locations,

this is because the matting has been laid up to join the inner sills to the floor and the centre tunnel also intrudes into this area, not by much ad no problem for the flexible original sub frames but there is no give in the new ones so the runners just jammed solid
So seat back out and a new flat location identified for the runners, approx. 40mm in from the originals


now the sub frames didn’t line up with the seat so I made some plates out of 6mm thick aluminium to allow the seat to fit to that, this is a good move since I don’t want to keep these seats for much longer and I now have a universal platform to mount the new seats onto

the end result

The original seat mount holes have been plugged up with M6 flange head stainless bolts and the new seat mounted down with M8 stainless flange bolts and nuts (M6 just doesn’t seem enough really) and the C section sub frames beaded down on a bead of polyurethane to prevent and moisture getting in between and to spread the load against and slight unevenness on the floor itself


Then I had the pleasure of doing it all over again on the driver’s side, it’s all done now though and now I can drive the car safe in the knowledge my arse is safe with the added bonus I’ve been able to rip most of the carpet out now so the car smells slightly less like a tramps dog inside so a win win situation, for now I’m just rocking the no carpet race car look with a set of not very tailored mats from that well known car accessory emporium – ASDA.


At least it will be easier to trace leaks.
That’s all for now, that’s about a weeks’ worth of work there
More to come soon I promise
Stay tuned when I’ll be finding out how many attempts I can have to undo a seat belt bolt before I admit defeat and fiberglass over it and how many different methods of joining wires is it possible to cram into one 8” length?, is 4 enough or can we find more?
https://easywider.co.uk/ universal flexible wheel arch extensions
- Jin
- Posts: 454
- Joined: Fri Aug 01, 2014 10:33 pm
Return to Complete Midas rebuild
Who is online
Users browsing this forum: No registered users and 41 guests