Yes i think Alistair mentioned those vents in a prior post, ill have to make some notes at the next (first) group meet i can attend.
i would like a sunroof but im also considering converting the rear side glass to opening, as per pug 205 gti
Midas Cars Forum - www.midascarsforum.com
This free forum is for Midas and Midtec Bronze enthusiasts. The Midas is a British car designed as a replacement for the Mini Marcos.
J171 NJO Cortez / 2+2 rebuild and modifications
Moderator: The Midas Forum Staff
Re: J171 NJO Cortez / 2+2 rebuild and modifications
![]() by Jin » Fri Sep 12, 2014 6:50 pm
by Jin » Fri Sep 12, 2014 6:50 pm
https://easywider.co.uk/ universal flexible wheel arch extensions
- Jin
- Posts: 454
- Joined: Fri Aug 01, 2014 10:33 pm
Re: J171 NJO Cortez / 2+2 rebuild and modifications
![]() by streetsy » Fri Sep 12, 2014 7:47 pm
by streetsy » Fri Sep 12, 2014 7:47 pm
National mini day Sunday or castle Combe in a fortnight, will be midas at both
-
streetsy - Posts: 214
- Joined: Wed Apr 04, 2012 8:19 pm
- Location: Mansfield, Notts.
Re: J171 NJO Cortez / 2+2 rebuild and modifications
![]() by Jin » Fri Sep 12, 2014 9:59 pm
by Jin » Fri Sep 12, 2014 9:59 pm
Would love to mate but with work and babies I'm flat out at the mo
In all honesty it will be stoneliegh next spring.
In all honesty it will be stoneliegh next spring.
https://easywider.co.uk/ universal flexible wheel arch extensions
- Jin
- Posts: 454
- Joined: Fri Aug 01, 2014 10:33 pm
Re: J171 NJO Cortez / 2+2 rebuild and modifications
![]() by DavidL » Sat Sep 13, 2014 11:20 am
by DavidL » Sat Sep 13, 2014 11:20 am
Hans Efde wrote:On the Gold coupe that was a smart job with vents just besides the tail lights. It only needed opening the aft sidewalls what many people didn't know. But also a sunroof will do the job quite well of sucking out the cabin air.
Hans, are you saying that the Gold coupe's tail light vents are not always functional - did they still need to have the aft sidewalls drilled after they left the factory, to allow air to flow through the car?
-

DavidL - Posts: 858
- Joined: Tue Mar 01, 2011 10:15 pm
- Location: Tayport, Fife
Re: J171 NJO Cortez / 2+2 rebuild and modifications
![]() by Hans Efde » Sat Sep 13, 2014 12:41 pm
by Hans Efde » Sat Sep 13, 2014 12:41 pm
DavidL wrote:Hans Efde wrote:On the Gold coupe that was a smart job with vents just besides the tail lights. It only needed opening the aft sidewalls what many people didn't know. But also a sunroof will do the job quite well of sucking out the cabin air.
Hans, are you saying that the Gold coupe's tail light vents are not always functional - did they still need to have the aft sidewalls drilled after they left the factory, to allow air to flow through the car?
Yes I had to do it with both my coupees. First you need to have vents in the aft wall (wooden board), usually these are present. But in the storage space behind the wooden board (where the spare tyre sits) there need to be an opening in the left and right hand inner walls. The factory never drilled these. I used a large hole drill (something like 10cm diam.) to make a few vent holes. When that's done you have made a passage for the interior air to flow outside.
-

Hans Efde - Posts: 1731
- Joined: Sat Dec 06, 2008 10:11 pm
- Location: IJlst, Netherlands
Re: J171 NJO Cortez / 2+2 rebuild and modifications
![]() by Jin » Sat Sep 13, 2014 1:37 pm
by Jin » Sat Sep 13, 2014 1:37 pm
Got any pics?
Just to give me some ideas?
Just to give me some ideas?
https://easywider.co.uk/ universal flexible wheel arch extensions
- Jin
- Posts: 454
- Joined: Fri Aug 01, 2014 10:33 pm
Re: J171 NJO Cortez / 2+2 rebuild and modifications
![]() by Jin » Mon Sep 15, 2014 10:01 pm
by Jin » Mon Sep 15, 2014 10:01 pm
More progress
The annoying clacking noise emanating from the front bulkhead / dashboard area has been pin pointed to the steering column bottom bearing being goosed, so a replacement was demanded off a metro breaker off ebay along with the wiper stalk too since that didn’t work either
Im always dubious about buying second hand car parts off ebay (and with good reason too, when I built the quantum and needed the driver’s side XR2 tie rod bracket I had to have 3 attempts to get the part in a useable condition, the first was so bent from a front end shunt the 3 bolt holes ended up a 45 degrees to each other and the second looked like it had been gnawed off by an angry badger) but in this instance the part was in such good condition it could have easily passed for new both visually and physically so I’m very happy and it was put to good use.
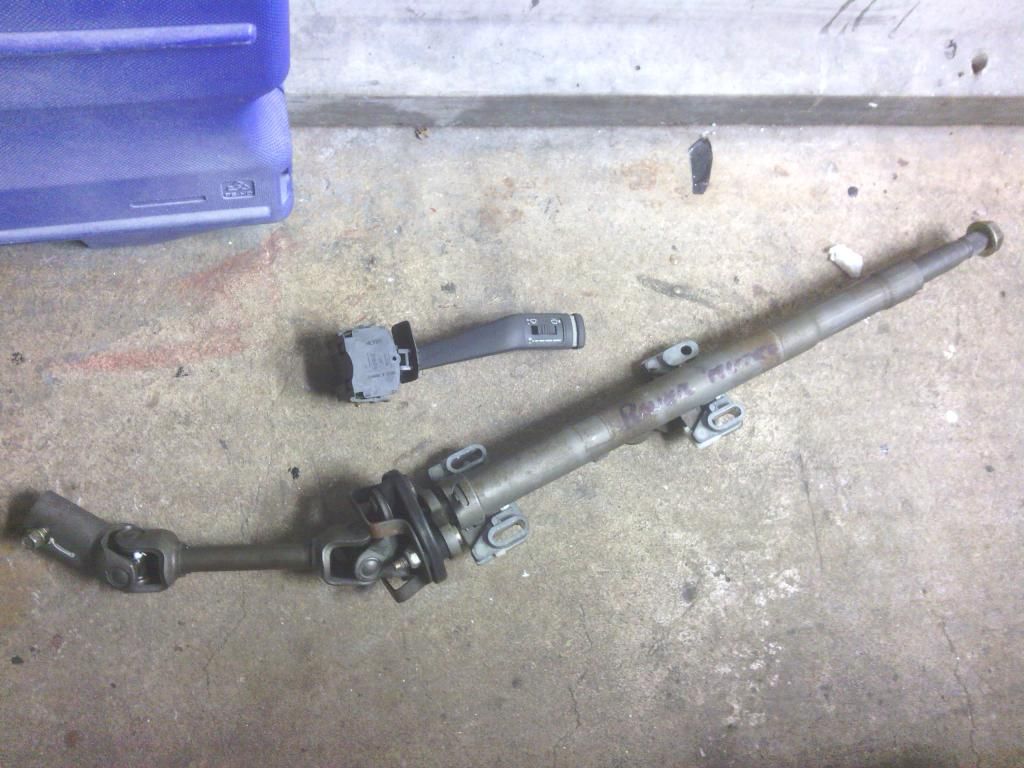
All fitted in and no clackety clackety clack
Next the cat, the heat shield welded under it has rotted and rattles like mad, then the cat itself hits the upper heat shields on the move again making annoying noises, the decision was taken to fit a de-cat pipe in place, since this is pre K reg I’ll probably get away with it as back then the standards were pretty low (not like removing it from a 2014 car anyway) so we shall see, I’ll hang onto it just in case, after drenching the nuts in WD40 for 3 days it made all of no difference,
when you’ve got yer best spanner on the nut and 1 foot tuber for leverage and your pulling so hard your dragging yourself across the garage floor and its still not shifting the nut you know you’re in trouble (not as much trouble as I could have been had I not had good reason for the subsequent scratches down my back when the wife asked, note to self, must carpet garage) and I didn’t fancy heating it up either with it being so close to the body.
After a bit of head scratching I chocked the exhaust to the body with wood so it couldn’t move, then put spanner on nut with a trolley jack under the spanner, the car literally lifted 3” or so before any movement on the thread at all, I don’t think ive ever had nuts that tight before (snigger)
With the old cat out the way it was just time to realise the de-cat pipe was made by someone working from a blurry photo, so my new shiny pipe had to be tweaked with a large hammer and a bench vice, I didn’t feel happy with what I had just done but it fitted and only hit the heat shields most of the time,
Lowering the rear exhaust hanger did the trick of providing more clearance in the end and nothing looks too bad after all.
Old cat
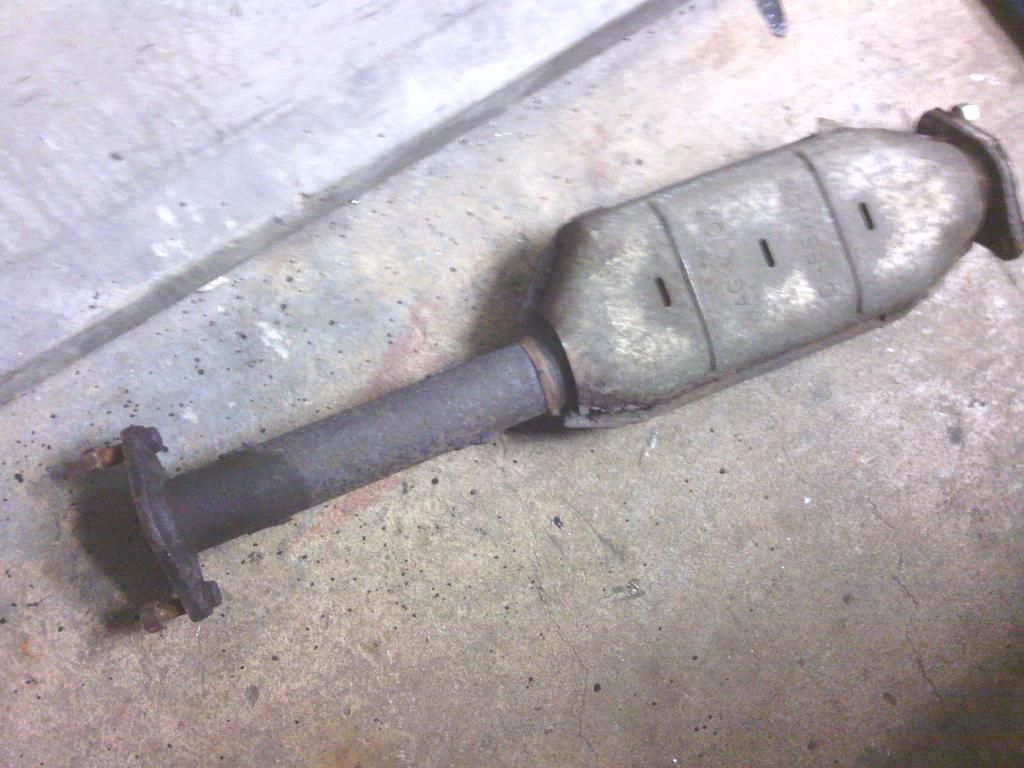
No cat
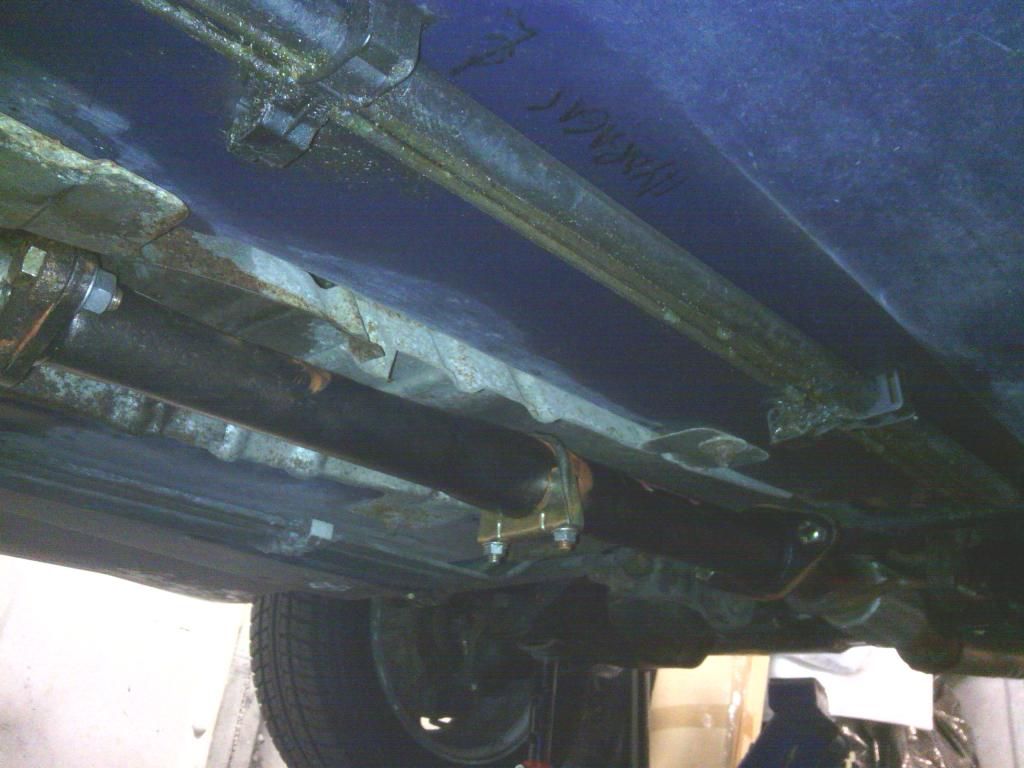
My cat

The drive to work this morning was the quietest yet with only 3 annoying rattles (one may have been down to me leaving the boot open) so it’s actually becoming quite refined,
The down sides of this work is spending so long under the car I’ve now noticed nearly all of the fuel and brake pipe clips are doing nothing to hold the pipes in place, that job is being taken care of by the anti-roll bars and cable ties (?)
So there’s another one to add to the list
Its good to be busy….
The annoying clacking noise emanating from the front bulkhead / dashboard area has been pin pointed to the steering column bottom bearing being goosed, so a replacement was demanded off a metro breaker off ebay along with the wiper stalk too since that didn’t work either
Im always dubious about buying second hand car parts off ebay (and with good reason too, when I built the quantum and needed the driver’s side XR2 tie rod bracket I had to have 3 attempts to get the part in a useable condition, the first was so bent from a front end shunt the 3 bolt holes ended up a 45 degrees to each other and the second looked like it had been gnawed off by an angry badger) but in this instance the part was in such good condition it could have easily passed for new both visually and physically so I’m very happy and it was put to good use.

All fitted in and no clackety clackety clack

Next the cat, the heat shield welded under it has rotted and rattles like mad, then the cat itself hits the upper heat shields on the move again making annoying noises, the decision was taken to fit a de-cat pipe in place, since this is pre K reg I’ll probably get away with it as back then the standards were pretty low (not like removing it from a 2014 car anyway) so we shall see, I’ll hang onto it just in case, after drenching the nuts in WD40 for 3 days it made all of no difference,
when you’ve got yer best spanner on the nut and 1 foot tuber for leverage and your pulling so hard your dragging yourself across the garage floor and its still not shifting the nut you know you’re in trouble (not as much trouble as I could have been had I not had good reason for the subsequent scratches down my back when the wife asked, note to self, must carpet garage) and I didn’t fancy heating it up either with it being so close to the body.
After a bit of head scratching I chocked the exhaust to the body with wood so it couldn’t move, then put spanner on nut with a trolley jack under the spanner, the car literally lifted 3” or so before any movement on the thread at all, I don’t think ive ever had nuts that tight before (snigger)
With the old cat out the way it was just time to realise the de-cat pipe was made by someone working from a blurry photo, so my new shiny pipe had to be tweaked with a large hammer and a bench vice, I didn’t feel happy with what I had just done but it fitted and only hit the heat shields most of the time,
Lowering the rear exhaust hanger did the trick of providing more clearance in the end and nothing looks too bad after all.
Old cat

No cat

My cat

The drive to work this morning was the quietest yet with only 3 annoying rattles (one may have been down to me leaving the boot open) so it’s actually becoming quite refined,
The down sides of this work is spending so long under the car I’ve now noticed nearly all of the fuel and brake pipe clips are doing nothing to hold the pipes in place, that job is being taken care of by the anti-roll bars and cable ties (?)
So there’s another one to add to the list
Its good to be busy….
https://easywider.co.uk/ universal flexible wheel arch extensions
- Jin
- Posts: 454
- Joined: Fri Aug 01, 2014 10:33 pm
Re: J171 NJO Cortez / 2+2 rebuild and modifications
![]() by kelvink » Tue Sep 16, 2014 8:13 pm
by kelvink » Tue Sep 16, 2014 8:13 pm
I keep meaning to take a photo of the rear vents on my Midas Gold Coupe for you
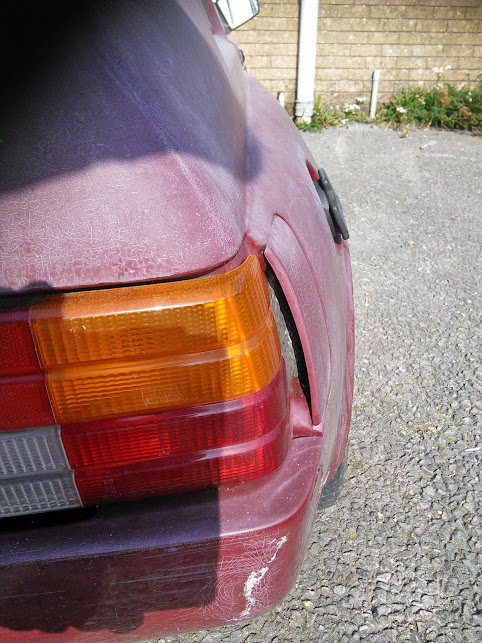
I remembered the camera today. Not easy to get a photo to show the vent hole but I think you can make it out here. The Cortez/Excelsior has the same kind of shape moulded into the rear body adjacent the lights but closed off the vent with continuous GRP rather than the separate cover

You should be able to do something though.
I remembered the camera today. Not easy to get a photo to show the vent hole but I think you can make it out here. The Cortez/Excelsior has the same kind of shape moulded into the rear body adjacent the lights but closed off the vent with continuous GRP rather than the separate cover
You should be able to do something though.
-

kelvink - Posts: 636
- Joined: Wed Jun 20, 2012 8:12 am
- Location: Dorset
Re: J171 NJO Cortez / 2+2 rebuild and modifications
![]() by Jin » Wed Sep 17, 2014 8:44 am
by Jin » Wed Sep 17, 2014 8:44 am
ahh, thank you very much for taking the time to do that for me, much appreciated
i see the similarities now and that looks quite stylish too
I’ve had a poke around the rear of the cortez and that upright flat to the side of the rear lights leads into a closed off box section that must separate the outer wing from the inner boot and presumably the inner rear quarter panels (these cars a re such a clever well thought out design, it must take a lot of skill to make one) so this looks possible
on the upside there is a hollow box section where i could make a small opening in the rear light panel and folow it through with a vent let into the rear quarter panel besides the rear seat
the downside is any hole made into this rear light panel could then let water in to the void with the potential to fill it up?
i could maybe make some kind of a duct to follow it up inside the rear wing cavity but i would want to know for sure the rear wing cavity is hollow front to rear before i start chopping holes in it, best have another dig about
thanks for your help mate
https://easywider.co.uk/ universal flexible wheel arch extensions
- Jin
- Posts: 454
- Joined: Fri Aug 01, 2014 10:33 pm
Re: J171 NJO Cortez / 2+2 rebuild and modifications
![]() by Jin » Thu Sep 18, 2014 9:49 pm
by Jin » Thu Sep 18, 2014 9:49 pm
More jobs done
The windscreen wiper was letting the new scuttle panel down,
It didn’t clear the glass in a full sweep and it parked itself right in my field of view
First job was to look at the sweep, great thing with his car is once the dash top has fallen off the access to the wiper motor is perfect, a quick look saw a potential route to increase the sweep by straightening out the stepped crank attached to the motor spindle, this would also put it at a better angle in relation to the crank arm
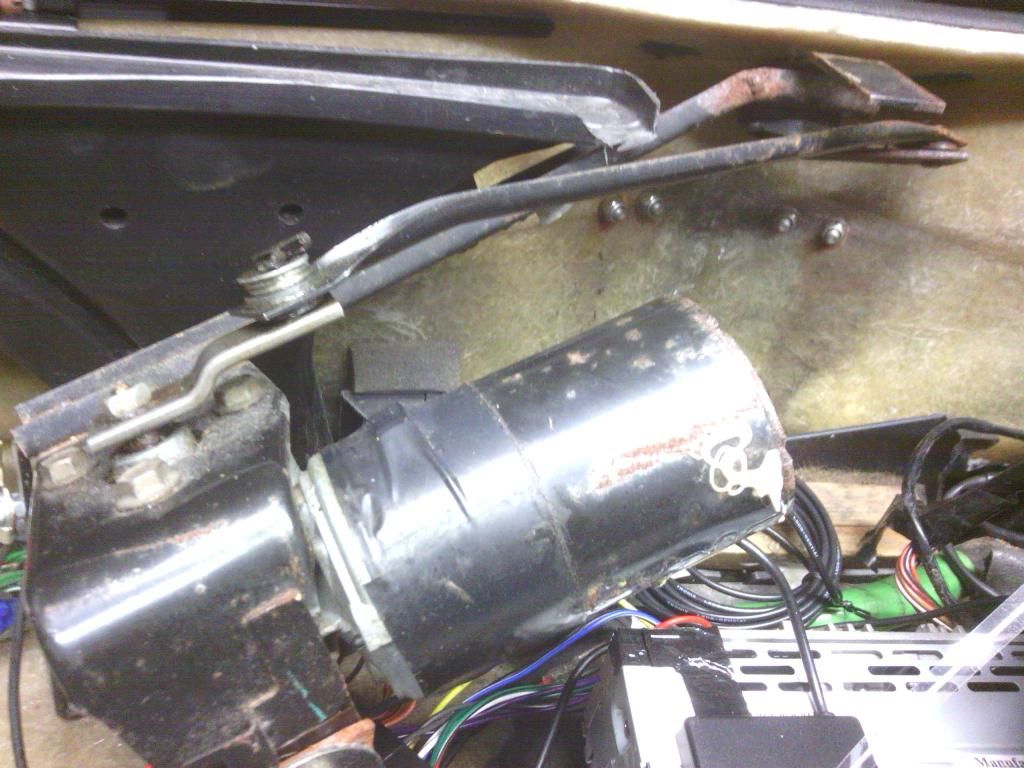
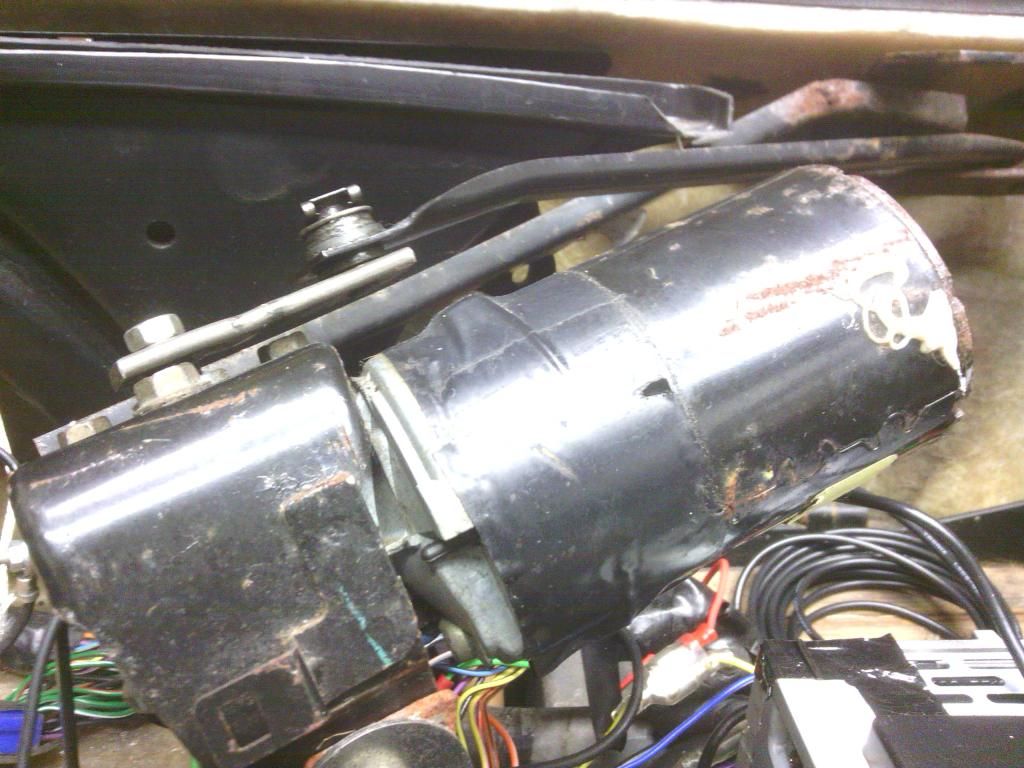
With that done the sweep has increased to a better level, you can see the difference where I put a bit of tape where the old setup stopped

Next the motor crank was turned 180 degrees to park the blade over the passenger side
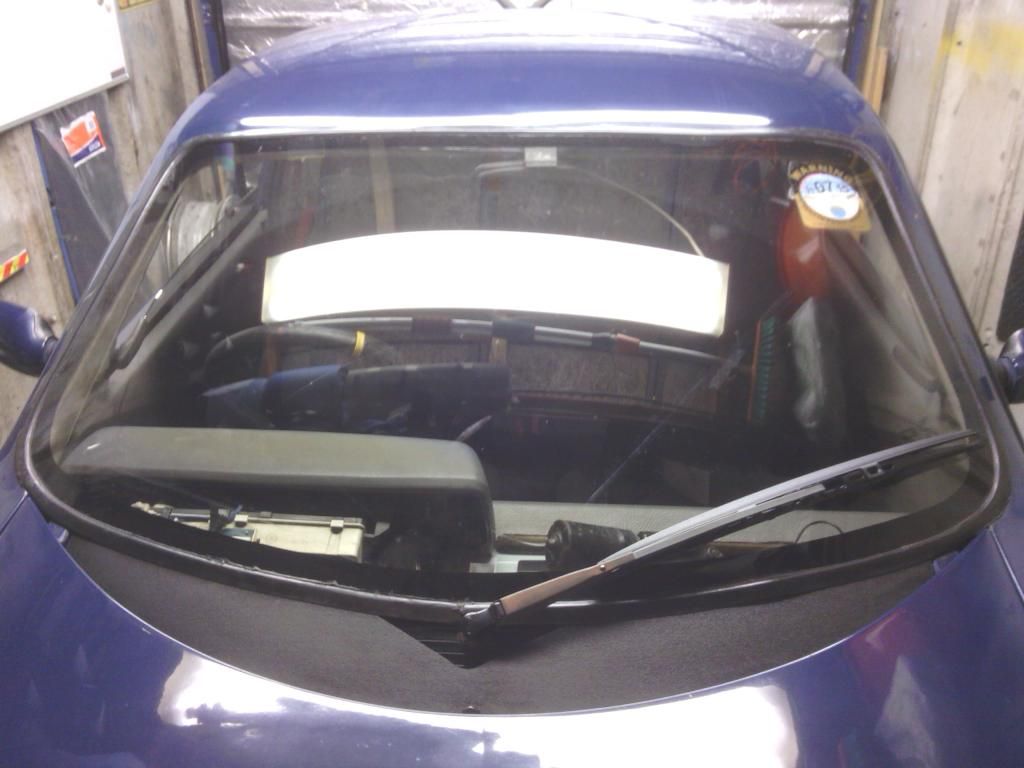
Better
Now the arm itself looked proper tatty.
Quick mooch on ebay saw a Citroen Picasso rear wiper to be the same length / fitting and perfectly straight, and its stylishly moulded in plastic so it wont go rusty again
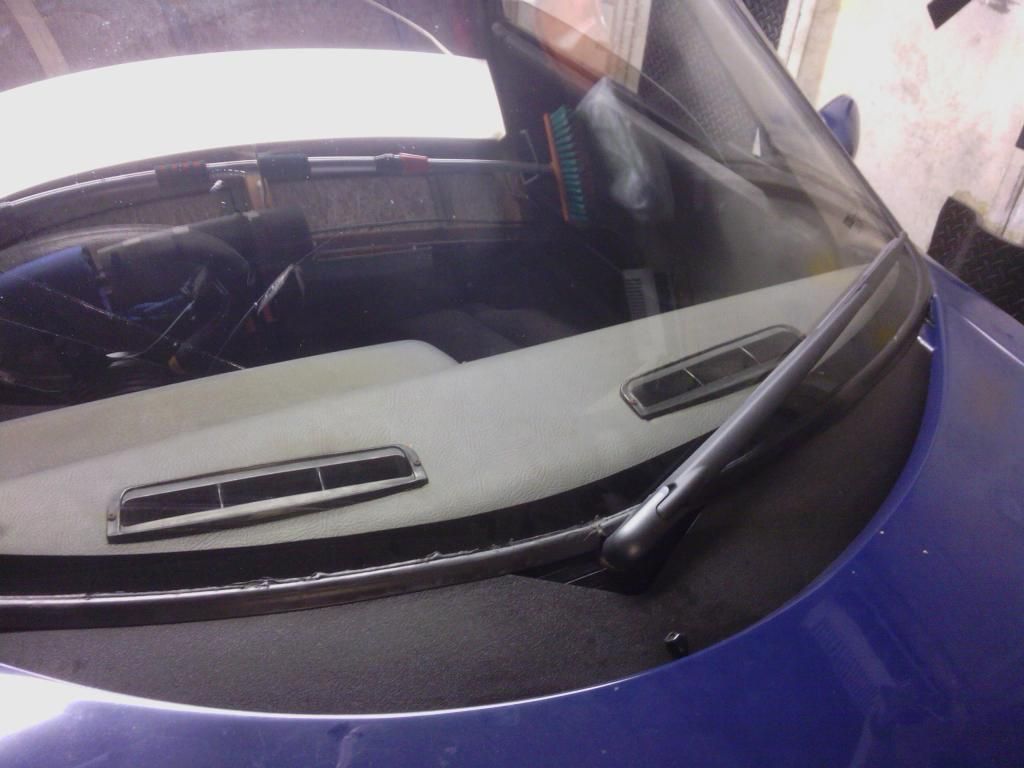
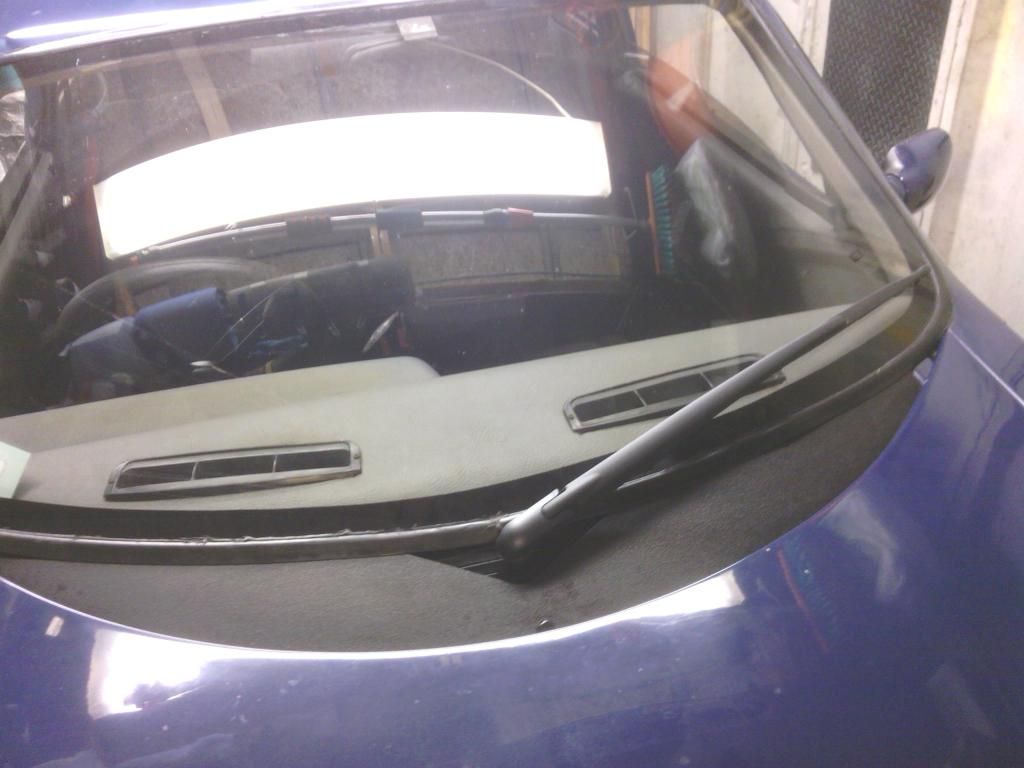
Lets hope for some rain now
________________________________________________________
https://easywider.co.uk/ universal flexible wheel arch extensions
- Jin
- Posts: 454
- Joined: Fri Aug 01, 2014 10:33 pm
Return to Complete Midas rebuild
Who is online
Users browsing this forum: No registered users and 30 guests