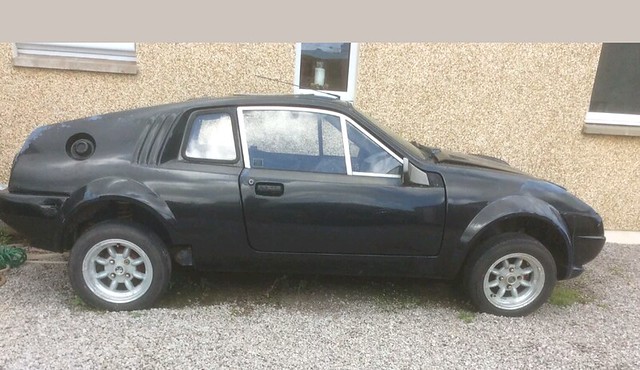
Well, after looking for a new shell for the last couple of years for my rather tired Mini...... i came across a complete (minus engine) Midas Mk 2.
After wallowing around in the company car for the last few years ive bitten the bullet and decided to go back to what i love - simple mechanics & a car to just drive and enjoy. The midas will be a daily car so its a full rebuild for reliability etc.
After a very late night pickup from scotland (from a lovely mini and Marcos enthusiast) where a wheel nearly fell off the trailer (....4 wheels on trailer - remove 2...sorted) my new project landed in Yorkshire:
 Screenshot_20190529-124933 by Timothy Ordway, on Flickr
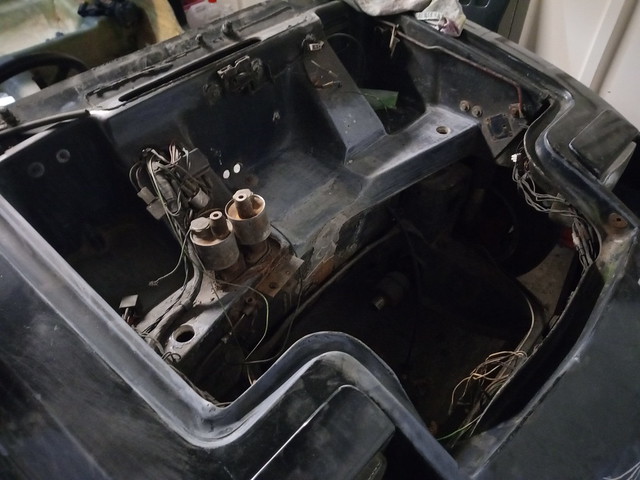
The interior wasnt too rotten to a good sign that not too much water had gotten in:
 IMG_20190608_170206 by Timothy Ordway, on Flickr
Rear beam doesnt look too bad ...yet (more investigation etc) and it came with some new-ish spare shocks to replace the rather rusty ones:
 Screenshot_20190529-125151 by Timothy Ordway, on Flickr
Ant the front end was clearly refurbished with adjustable ties etc in the last few years:
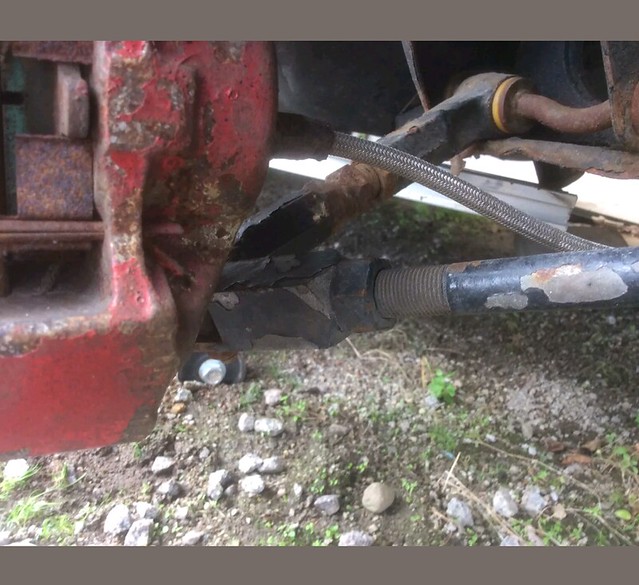 Screenshot_20190529-125114 by Timothy Ordway, on Flickr
So - i set about the great strip and after reading the build manual (rather sparse) and scouring the forum for a few hours i had a good idea of how she came apart - 4 hours later:
 DSC_0031 by Timothy Ordway, on Flickr
 DSC_0034 by Timothy Ordway, on Flickr
Minor bump damage found in repaired bumper and compression cracks to the main body behind on gelcoat filled in previously:
 DSC_0039 by Timothy Ordway, on Flickr
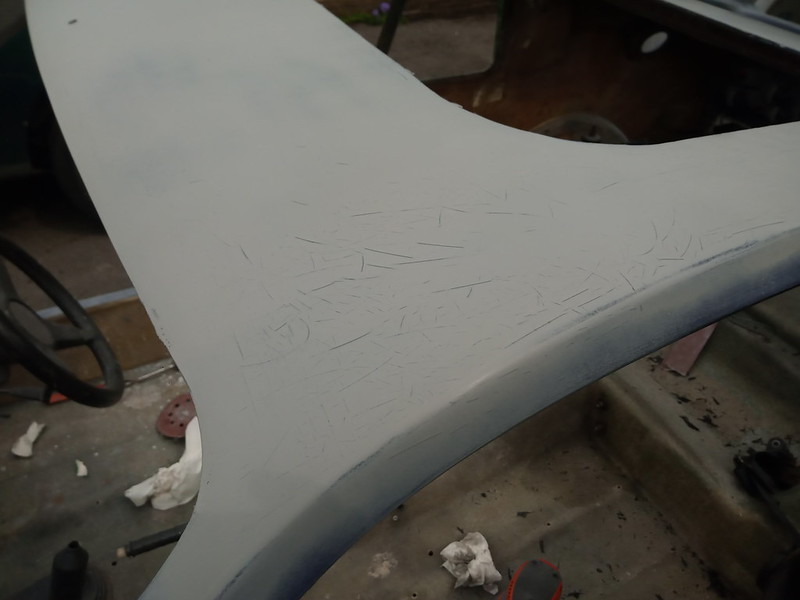
So now its the endless sanding, filling, sanding exercise for prep to paint (by somone with 2K ability due to their being small gelcoat cracking all over etc).
i have to say - while its nice to have no rust.... gelcoat and fibreglass takes a bit of learning, firstly ive learned that:
1. where possible sand back to gelcoat after guide coating (fills minor scratches).
2. Using a crosshatch pattern seems to be a good way of sanding (60 - 140 - 500 grit).
3. where the gelcoat has deep cracks - dremel is your friend to gouge out the gelcoat and use epoxy filler (im using a classic west system for boats).
4. there are LOTS of curves...... which takes ages to get a good finish.
5. do all sanding by hand in block style where possible so as not to burn through the gelcoat.
6. the gelcoat is very thick and very tough!
7. Its exhausting lol.
So here are a few photos of where im up to after about 20h work.
Resin repairs to do to subframe bolt:
 DSC_0046 by Timothy Ordway, on Flickr
Back quarter dust coating - stopping filler to minor cracks & general sanding:
 DSC_0044 by Timothy Ordway, on Flickr
Those rear gills take some fiddly sanding!
 DSC_0045 by Timothy Ordway, on Flickr
Cracks to gelcoat dremel out ready for epoxy filler:
 DSC_0043 by Timothy Ordway, on Flickr
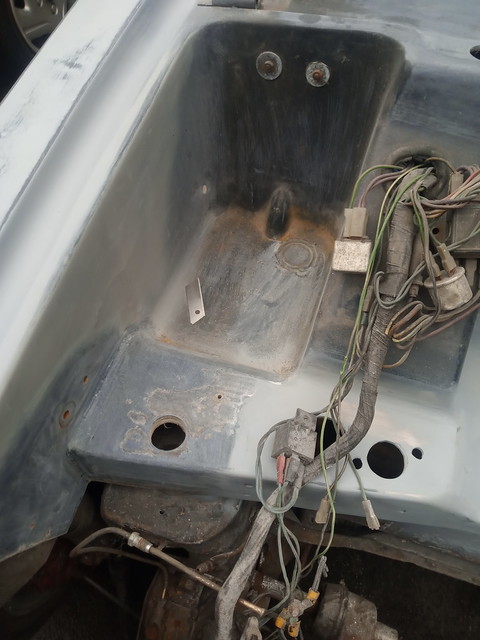
Engine Bay in progress:
 DSC_0047 by Timothy Ordway, on Flickr
Wiper posts completely corroded = next purchase a dremel
 DSC_0027 by Timothy Ordway, on Flickr
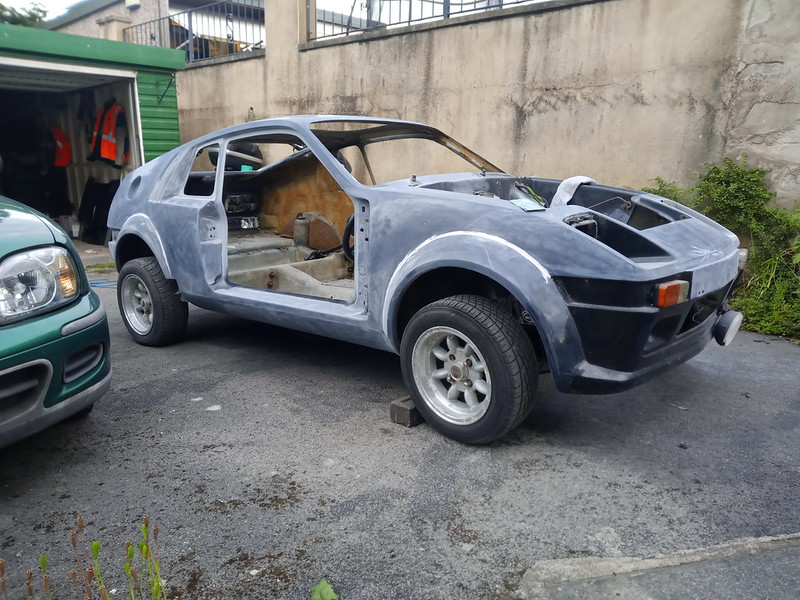
Pushed her out into the sunshine..... just to keep some inspiration (quickly followed by dash back in due to rain lol).
 DSC_0042 by Timothy Ordway, on Flickr
All my daughter said is "its even smaller than my car dad" lol
 DSC_0041 by Timothy Ordway, on Flickr
Some rather poor historic repair work to the bulkhead due to heat damage - not sure if its a remove and repair job yet as the resin and matt is rather thick! i was going to install an aluminium heat shield over anyway so might be just a tidy up job.
 DSC_0048 by Timothy Ordway, on Flickr
And "George" my ever faithful friend - sits in the garage watching me, he seems excited (which is more than i can say for my daughter lol).
 DSC_0050 by Timothy Ordway, on Flickr
So all in all, after the strip i can see i will be calling on Alastair's help for door seals, trim's, window seals etc but most of what i need is all there or in my donor.
The only parts i'm struggling to source (or repair) are:
1. The front fibreglass headlining was missing - any idea where to get one or what else to use? i have the rear lining around the boot.
2. Carpets - they look like cleverly stitched up items with vinyl trims etc - has anyone got patterns or a supplier whos done these before?
3 - Front lights - allegro metal frames utterly rotten - none on ebay and wondered if anyone has had any luck with using standard kit car suppliers - the bulb size is fine, its more the plastic angle adjuster frame etc that the issue.
4 - Rear beam - anyone still making the new uprated units ive seen from a few years ago on the forum?
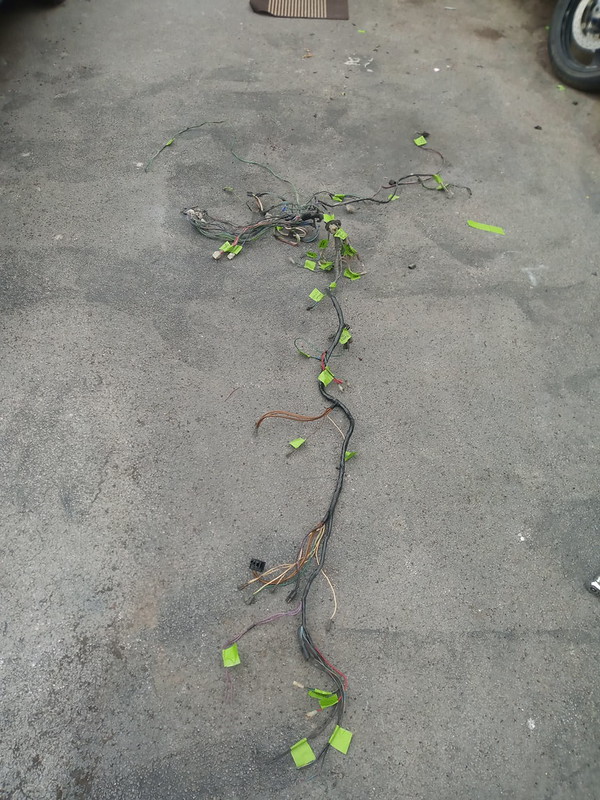
5 - Wiring diagram - I think mine was an MG Metro (red lines on the speedo binnacle) but having no luck finding a decent pinout etc.
6. Any advice gratefully received re sanding, prep & painting (this is my weakest area).
Anyway, i shall try to keep the posts coming with a 16 week plan for rebuild (huge parts pack order ready to go for Huddersfield MiniSpares).
Oh - and if there is anyone near to Huddersfield with a Mk 2 id love to be able to pop over just to see what it should look like and connect with fellow enthusiasts etc (and catch a lift to the Oldham run if possible).
Tim