Page 3 of 4

Re: Midas Gold Q997 WAK

PostPosted: Fri Mar 04, 2011 10:37 pm
by bushbaby
The axle is a four link, i've got two trailing arms going forward to the original beam mount area and then on drag link going back to the flat area behind the fuel tank area. The fourth link is from the centre of the axle to the drivers side forward link. This is the best photo i've got showing the passenger side.

Another massive picture post!

Simon

Re: Midas Gold Q997 WAK

PostPosted: Sat Mar 05, 2011 9:52 am
by Stuart
Thanks Simon, I've not seen a set-up like that before, always the classic 5-link.

Is that axle a complete one-off then or one adpted from something else your dad might do?

I've got a 5-link on my Micra, it seems to work pretty well.

Re: Midas Gold Q997 WAK

PostPosted: Sat Mar 05, 2011 9:39 pm
by bushbaby
The axles a one off we made up. I used standard metro hubs so that i could use disc brakes and MGF calipers and also alter the toe in/out. The biggest pain was having the move the fuel tank around to fit it in (ended up making two stainless tanks), the axle runs right through where the original metro tank is.

Simon

Re: Midas Gold Q997 WAK

PostPosted: Tue Jan 08, 2013 7:04 pm
by bushbaby
Hi Guys. First time i've posted in while although i do pop in every couple of days to see whats going on.

I've updated my photo stream on flickr with some resent pictures of my new front nose cone. It's a real problem having a midas that is slightly wider at the front than the norm as a normal front nose won't fit mine and my original finally give up and broke into about three pieces. So i've started to produce a new one that is ever so slightly longer at the front to accomodate my intercooler setup etc.

Up to now i've got about two weeks work in on it at the moment. It sounds so simple when you decided to do a new piece for your car, it's not until you start you realise how long these things take. At least this time i'm going to take a mould so that if the worst happens i don't have to go through this pain again.

Once the nose is done i just need wipers and washer jets to sort and then on for the MOT; can't wait to see the testers face when i roll up in it!

Anyhow, hope this link works: http://www.flickr.com/photos/59695866@N05/

Simon

Re: Midas Gold Q997 WAK

PostPosted: Tue Jan 08, 2013 9:14 pm
by max midas
Blimey, you'll have more radiators in your car than I have in my house at this rate :D
That's some envelope you're pushing, keep up the good work, can't wait to see it all finished.
You'll have to post a video of how she drives, I suspect it may be :o

Re: Midas Gold Q997 WAK

PostPosted: Tue Jan 08, 2013 9:50 pm
by Alan D.
Amazing job Simon, A great deal of thinking outside the box there!!!

I take it the Hydrogas rear suspension has made way for coil sprung rear end.

Wish I was brave enough to tackle fibreglass moulding.

One thing which puzzled me what's the 13 amp plug for, which is emerging from the front bumper area. Unless it's heater for keeping the moulding warm!

I've lots of questions about the engine.

Thanks for letting us see the pictures.

Alan D.

Midas Gold Q997 WAK

PostPosted: Tue Jan 08, 2013 10:43 pm
by b1zbaz
Where are you located I would love to see this project your a brave man I must say will you potentially be at any shows this year

Re: Midas Gold Q997 WAK

PostPosted: Wed Jan 09, 2013 9:15 pm
by Hans Efde
Looks awesome Simon. Must be extremely fast. Nice color change as well.

Re: Midas Gold Q997 WAK

PostPosted: Wed Jul 16, 2014 8:09 pm
by bushbaby
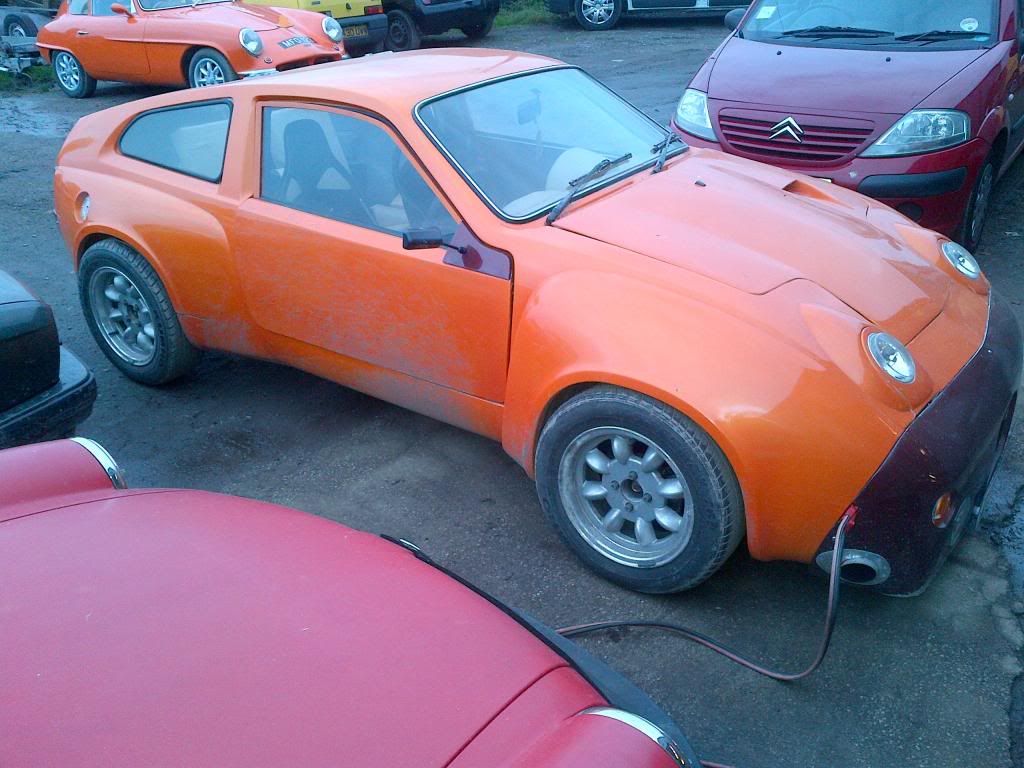
Well it's been a while since I've posted anything.

Since the last post the car has passed an MOT and has been on the road (The look on the MOT testers face was good). Suffice to say it's quick :o .

Image

I had a few teething problems to start with, keeping it cool was one of the biggest problems. In the end it was nothing an hour with a hole saw didn't sort out. Mapping the engine has been a pain. Clutch slip has been a major issue, anything above 3.5K on full throttle would slip the clutch.

After around four months of running around with that I bought an uprated clutch. So took a couple of days, engine and box out, swapped in the new clutch and engine back in. All was looking good until one Sunday afternoon. I though I'd go out for a run and let the mapping commence properly now the clutch was holding. Unfortunately after about ten minutes of full throttle pulls to improve the map I split and engine liner :cry:

Image

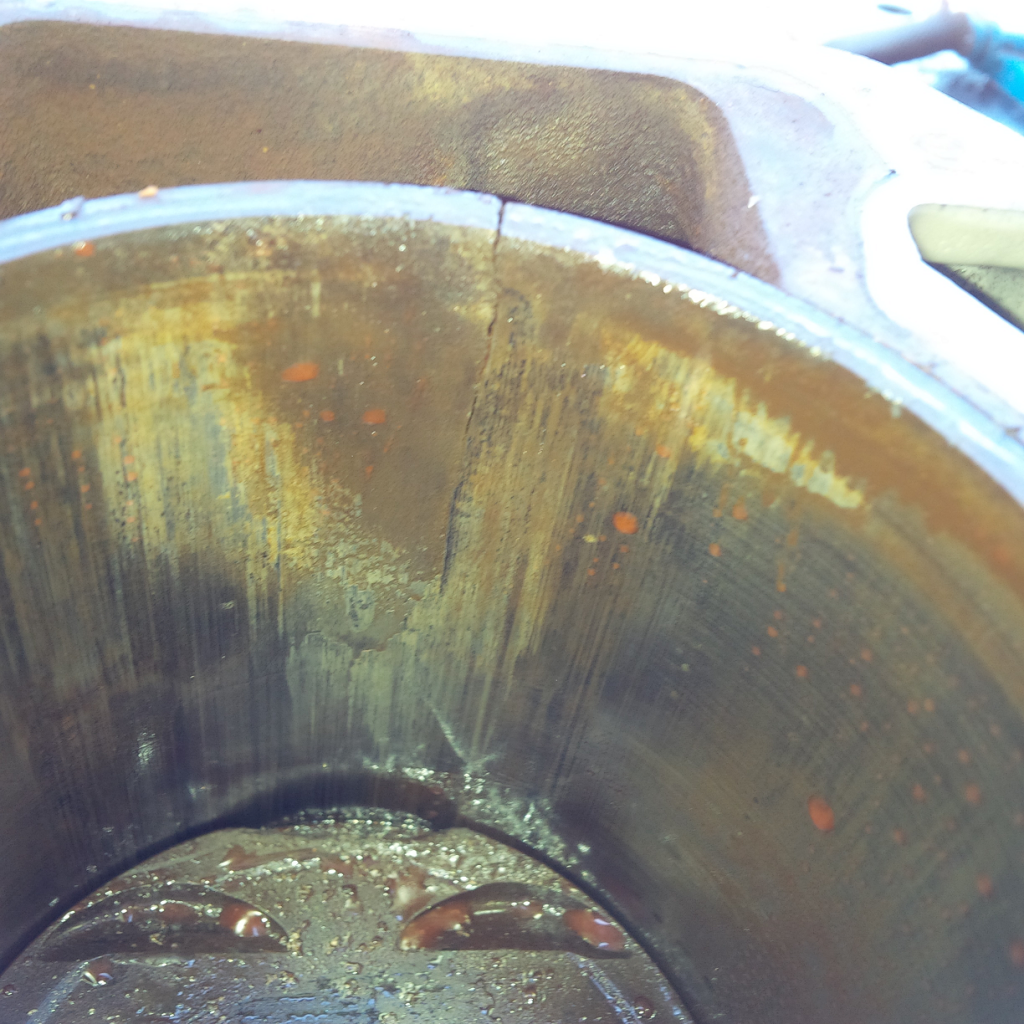
Cue lots of steam and smoke and a little swearing, followed by laughter once I'd calmed down. I was actually quite surprised the engine lasted as long as it did running 10 psi of boost on a standard k series.

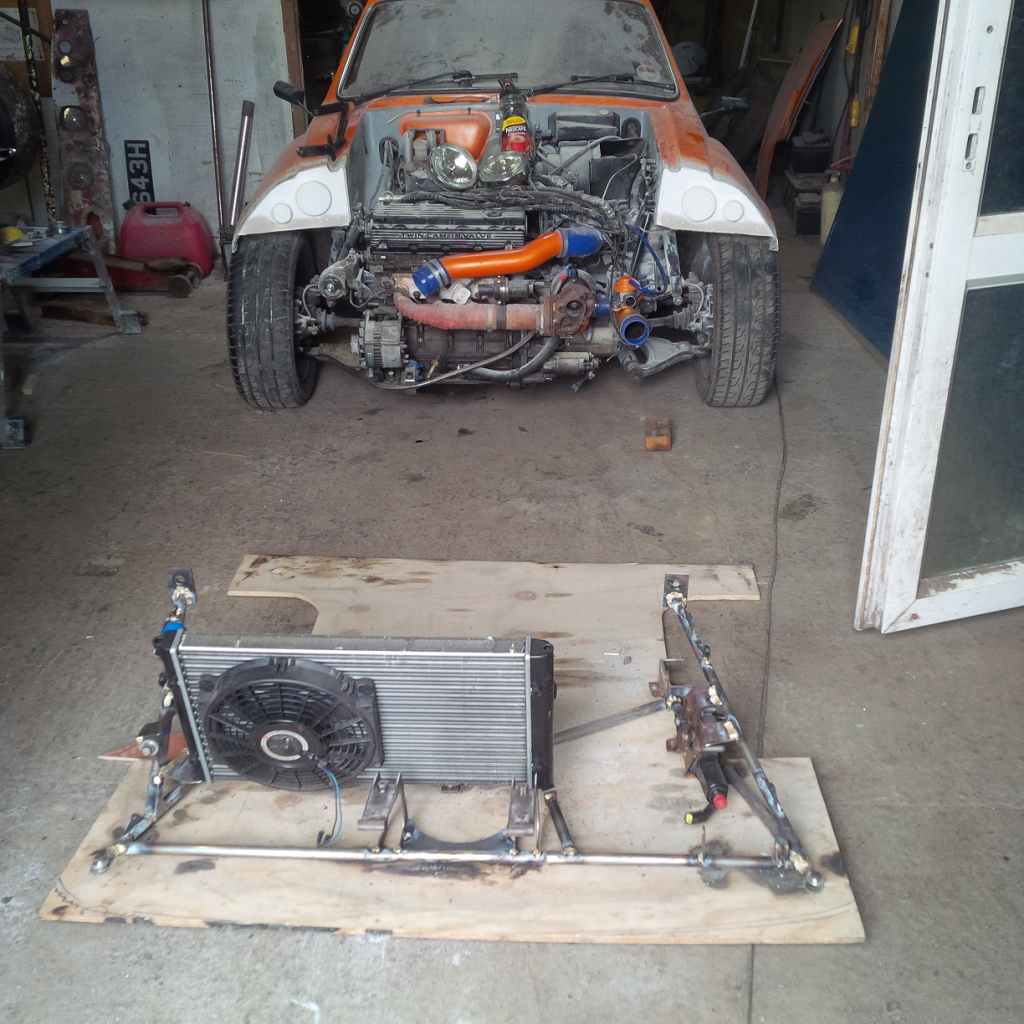
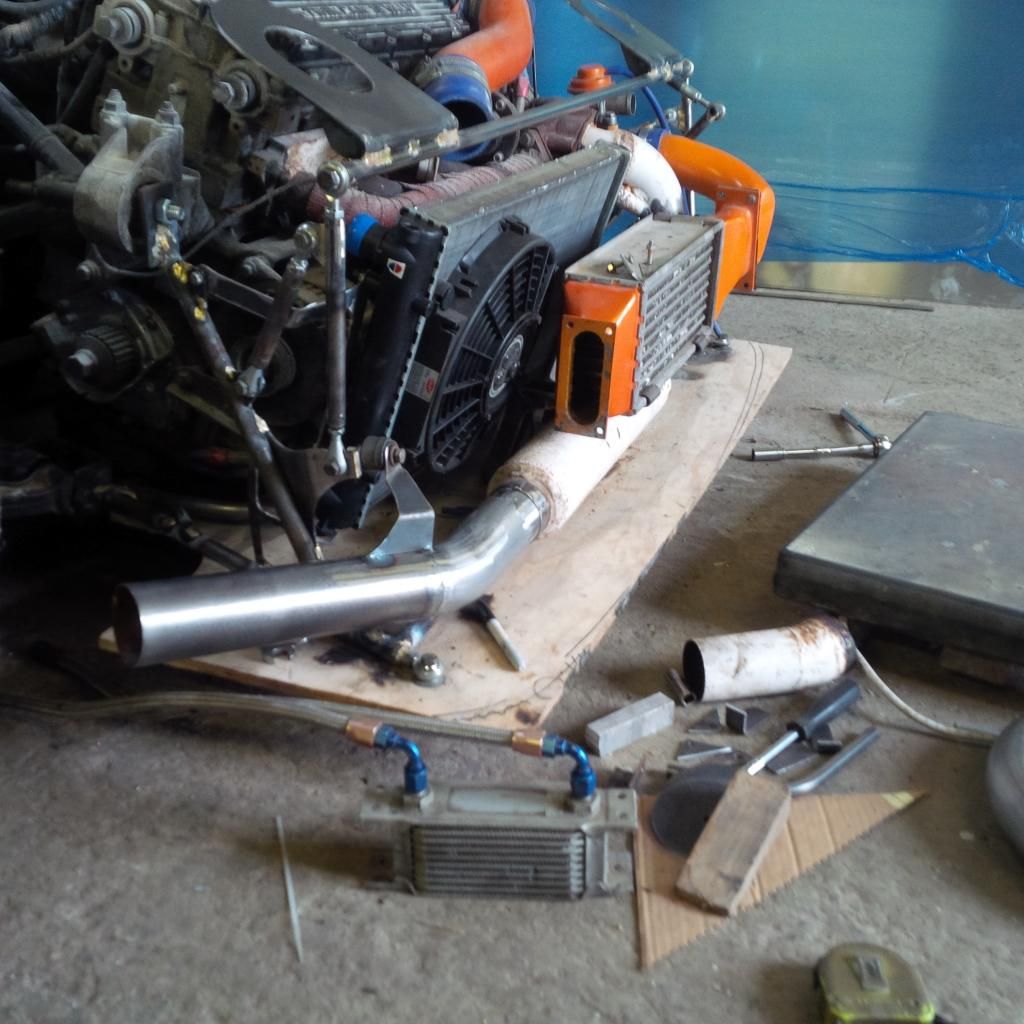
So having just had the engine out and back in a was faced with having to do this all over again. So between me and my dad we decided more access to the engine was required as this was bound to happen again. So this is what we come up with:

Image

Image

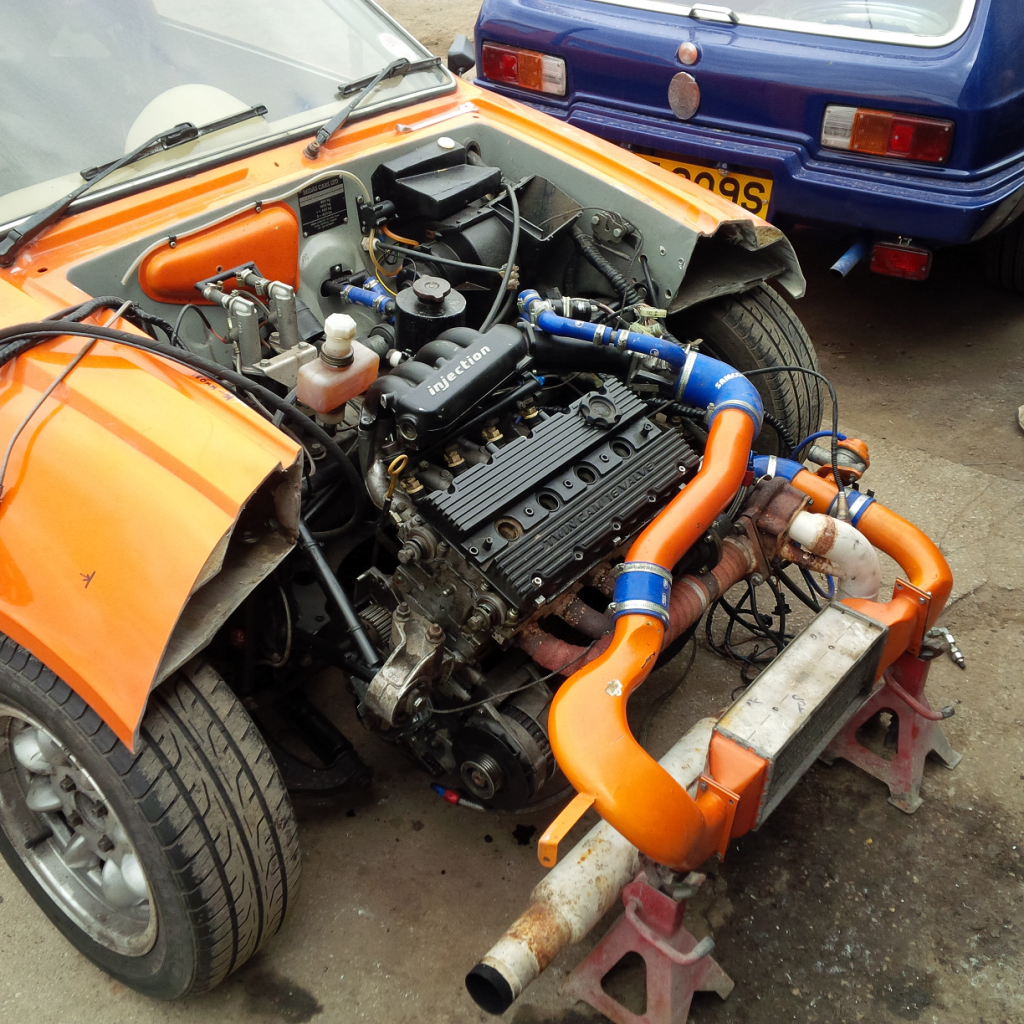
It makes working on the engine a breeze and engine out takes about ten minutes :D

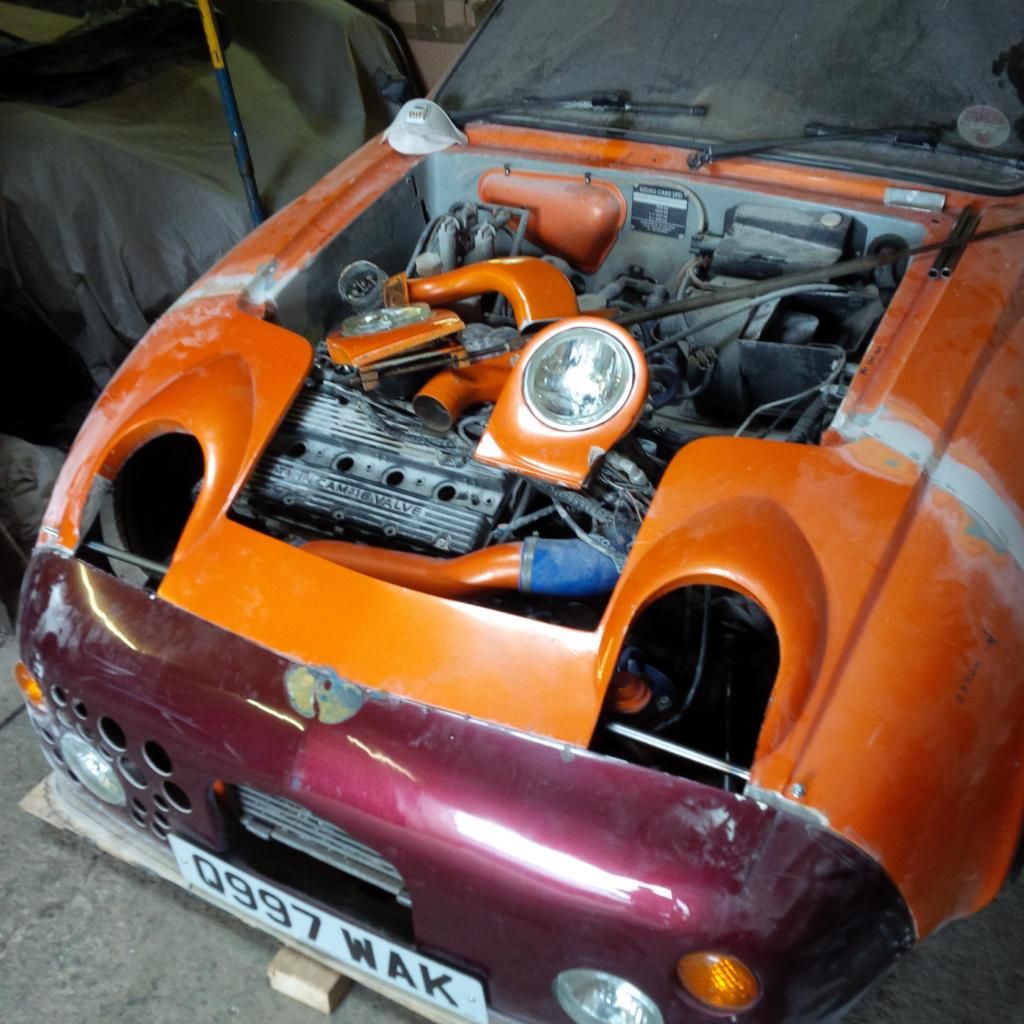
That was a few months ago. I've now finished the tube frame to hold the radiator and intercooler as well as the mechanism for the pop-up lights. I did contemplate changing the lights for something a bit easier but as you can tell, if there's an easy way and a hard way I for some reason go the hard way.

Image

Image

Image

Image

Image

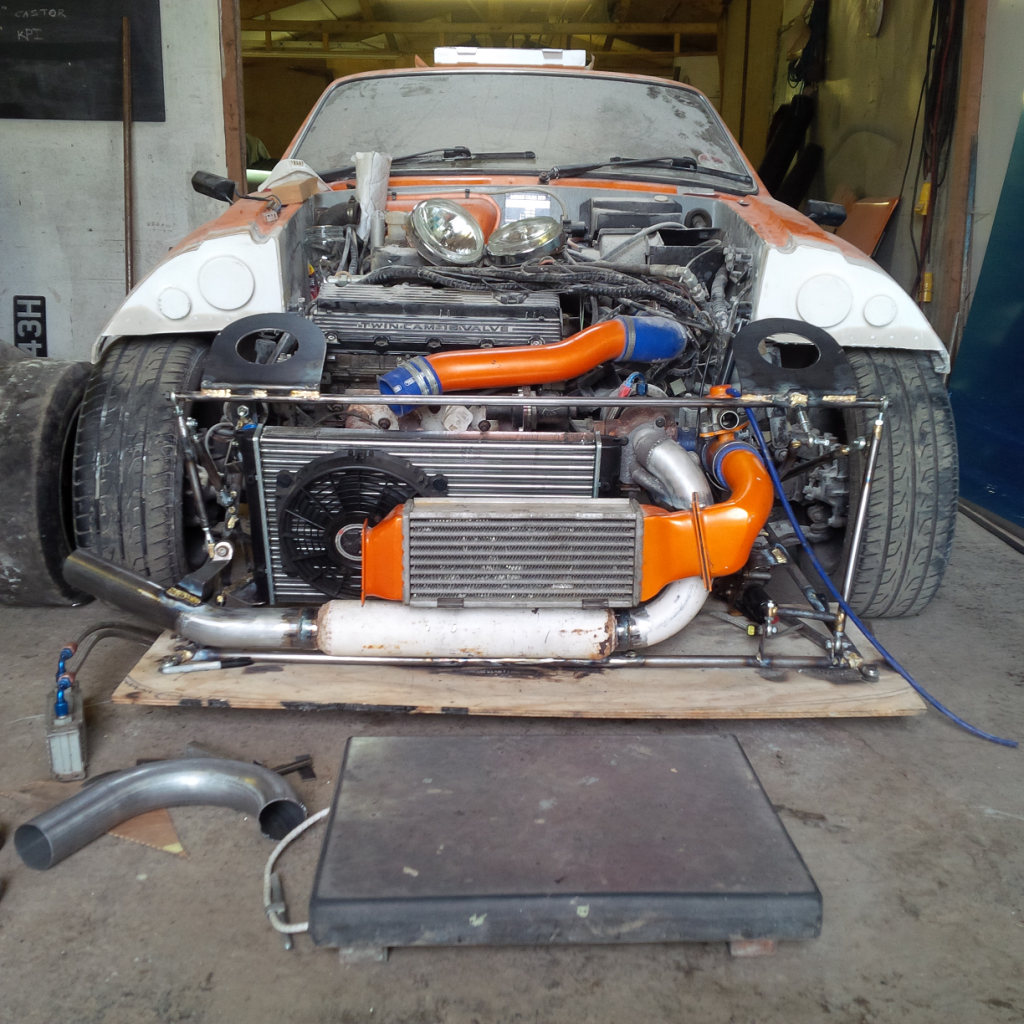
Next I need to build up the replacement engine which is now a 1.8k but with a turbo bottom end to reduce the compression ratio. Then clean and paint the tube work, prep the body and respray for the front end, fit a front under tray (plywood i'm going with) and get it all bolted back together. My hope is I can have I back on the road by the end of August, hopefully this engine will last a bit longer than the previous although if it does blow up again it will be easier to change.

Simon

Re: Midas Gold Q997 WAK

PostPosted: Wed Jul 16, 2014 9:46 pm
by Hans Efde
Amazing work Simon. Once it's finished don't forget to inform the kitcar magazines. I think they'd love to write something about it.