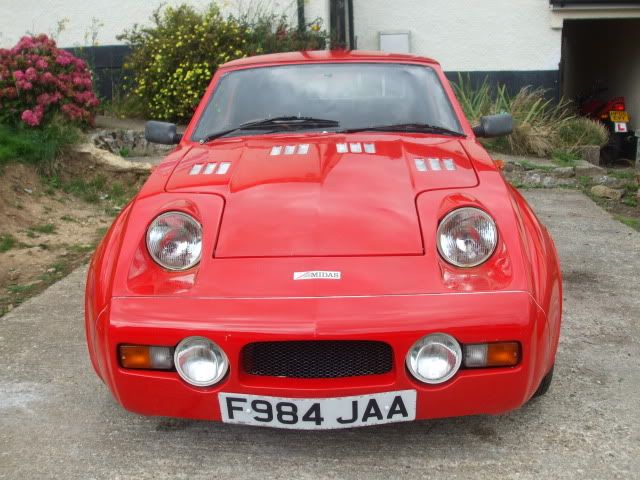
I've just spent a damp hour or two compounding back the finish of my convertible from pink with swirls to red with swirls. I'm going to have to paint the beast at some point in the non too distant future.
When it comes to painting gel coat I'm even further into the unknown than I am with painting steel panels. Would I be right in thinking that I need to abrade the surface of the gel coat prior to priming? If so to what sort of grade?
I'm intending to prime with Jotun PB epoxy primer as I've used the metal version before and it isn't madly priced.
When I get to the top coat I'm into the unknown again for me, what is available for home use these days? I've bought a HVLP set up rather than struggling with my small compressor.
Midas Cars Forum - www.midascarsforum.com
This free forum is for Midas and Midtec Bronze enthusiasts. The Midas is a British car designed as a replacement for the Mini Marcos.
Painting over gel coat.
Moderator: The Midas Forum Staff
7 posts
• Page 1 of 1
Painting over gel coat.
![]() by Rich » Sun Sep 23, 2012 9:31 pm
by Rich » Sun Sep 23, 2012 9:31 pm
-
Rich - Posts: 1250
- Joined: Wed Dec 03, 2008 1:27 am
- Location: Devon
Re: Painting over gel coat.
![]() by Geoff Butcher » Tue Sep 25, 2012 8:18 pm
by Geoff Butcher » Tue Sep 25, 2012 8:18 pm
Yes, you have to get rid of all the gloss or the paint will fall off. It's said to be a high-build primer so I'd probably go for 400 grit. For the top coat there are non-isocyanate 2-packs, although there's something to be said for good old cellulose, as you can splosh plenty on so you can compound it without going through.
Geoff
-

Geoff Butcher - Posts: 751
- Joined: Fri Dec 05, 2008 9:10 pm
- Location: Braintree
Re: Painting over gel coat.
![]() by Rich » Tue Sep 25, 2012 10:12 pm
by Rich » Tue Sep 25, 2012 10:12 pm
Thanks Geoff, would using an orbital sander be acceptable?
-
Rich - Posts: 1250
- Joined: Wed Dec 03, 2008 1:27 am
- Location: Devon
Re: Painting over gel coat.
![]() by manifold » Wed Sep 26, 2012 9:57 am
by manifold » Wed Sep 26, 2012 9:57 am
Rich,
Your better doing it by hand with a rubber rubbing block and wet and dry for a key.
Then you can see your progress.
Your better doing it by hand with a rubber rubbing block and wet and dry for a key.
Then you can see your progress.
Midas Cars Forum & Facebook Page Founder
Midas Gold Convertible: 1380 steel 16v KAD & 5 sp dog box, Titanium mania, KAD fr/rear callipers, CF Steering
Midas Gold Coupe: 1380 7 port xflow, SC/CR gearbox, Titanium mania, CF Steering & seats.
Midas Gold Convertible: 1380 steel 16v KAD & 5 sp dog box, Titanium mania, KAD fr/rear callipers, CF Steering
Midas Gold Coupe: 1380 7 port xflow, SC/CR gearbox, Titanium mania, CF Steering & seats.
-
manifold - Posts: 1724
- Joined: Tue Dec 02, 2008 7:34 pm
- Location: Lancaster, Lancashire
Re: Painting over gel coat.
![]() by Rich » Wed Sep 26, 2012 1:18 pm
by Rich » Wed Sep 26, 2012 1:18 pm
manifold wrote:Rich,
Your better doing it by hand with a rubber rubbing block and wet and dry for a key.
Then you can see your progress.
I had a feeling that would be the case, deep joy as I always get awful pains in my hands from doing stuff like this.
-
Rich - Posts: 1250
- Joined: Wed Dec 03, 2008 1:27 am
- Location: Devon
Re: Painting over gel coat.
![]() by ACourtney » Fri Sep 28, 2012 9:28 am
by ACourtney » Fri Sep 28, 2012 9:28 am
Hi Rich,
I would recommend flatting back with 240grit to give the primer a good key into the gel. I would also suggest getting a sanding board and using Mirka (or similar) self adhesive production paper. The cost of these will be offset by the reduced time and the grips of sanding board are much kinder to the hands than a rubber block.
The usual procedure is:
Make good any obvious damage. Any cracks in the gel should be ground back past the ends of any visible surface cracks, so that they do not reappear, and the edges carefully feathered out, so that you don't get rings or "watermarks" appearing through the paint. If the cracks run into the GRP - they'll show as white lines where the glass and resin have parted - then the GRP will need to be ground back and repaired too.
Flat back with 240grit - any small dips that become obvious can be filled with a good stopping filler like TopStop.
Apply 2 to 3 coats of PU highbuild primer - most surfaces will need 2 coats and some may require 4 or more. Use a mist coat and flat back with 400 grit between each coat. Don't be afraid to flat back to the gel-coat as this stage is about getting the curves and surfaces right. Stopping filler can be used again to raise any shallow surfaces.
Once you're happy that you have all the surfaces right, then a coat of of epoxy will give you a good tough undercoat. Its a lot stronger than the PU primer, which makes it harder work to flat back and yes it needs to be flatted back with 400grit. You can often get the epoxy undercoat in a base colour close to your chosen top coat, which helps to disguise any stone chips later on.
The next step is the top, or colour, coat which shouldn't need flatting back (unless it has run) and then finally a clear lacquer coat. I would suggest applying a lacquer coat, even when the colour coat is solid (non-metallic) as it helps protect the pigment from UV and the paint layer against damage.
We recently had a Gold Coupe sprayed. I only did the GRP repair stage this time, due to time constraints, and got my old mate Mick at Clanfield to do the rest. I've done all the flatting back a couple of times before and can confirm that you need to be prepared for a lot of hard work. The Gold has a few tricky bits where it takes a lot of care to get right (radii around the headlight opening for example) and there are a couple of places where the surfaces sag (the convertible's bootlid always sags where the reinforcement is bonded underneath), but it is worth the effort as the curves always look really great with a new coat of paint. I keep promising to post the photos from this recent paint job. Maybe I'll find time to do it this weekend.
Alistair
-

ACourtney - Posts: 488
- Joined: Thu Dec 04, 2008 12:22 pm
- Location: Oxford
Re: Painting over gel coat.
![]() by Rich » Fri Sep 28, 2012 9:26 pm
by Rich » Fri Sep 28, 2012 9:26 pm
Thank you Alistair,
I'll have a look at the Mirka gear, there's nothing going to happen any time soon as the Midas is my only transport right now. Despite the problems I'm having with the bearings..
I'll have a look at the Mirka gear, there's nothing going to happen any time soon as the Midas is my only transport right now. Despite the problems I'm having with the bearings..
-
Rich - Posts: 1250
- Joined: Wed Dec 03, 2008 1:27 am
- Location: Devon
7 posts
• Page 1 of 1
Who is online
Users browsing this forum: No registered users and 2 guests