Midas Cars Forum - www.midascarsforum.com
This forum is for Midas and Midtec Bronze enthusiasts. The Midas is a British car designed as a replacement for the Mini Marcos.
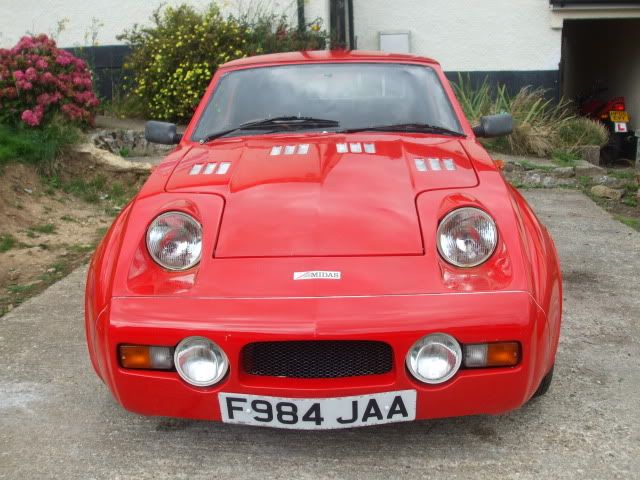
Mk 1 Project Zippy. Looking Like a Car.
Moderator: The Midas Forum Staff
Re: Mk 1 Project Zippy (Picture Heavy!)
![]() by Geoff Butcher » Sun May 12, 2013 8:20 pm
by Geoff Butcher » Sun May 12, 2013 8:20 pm
I think Harold was quite fond of self tappers. I remember being surprised to find the wiper motor was held on by them.
Geoff
-

Geoff Butcher - Posts: 752
- Joined: Fri Dec 05, 2008 9:10 pm
- Location: Braintree
Re: Mk 1 Project Zippy (Picture Heavy!)
![]() by DavidL » Sun May 12, 2013 8:32 pm
by DavidL » Sun May 12, 2013 8:32 pm
Geoff Butcher wrote:I think Harold was quite fond of self tappers. I remember being surprised to find the wiper motor was held on by them.
So it was. However, after 9 years of using my Bronze, neither the wiper motor nor the bumpers ever fell off...
-

DavidL - Posts: 865
- Joined: Tue Mar 01, 2011 10:15 pm
- Location: Tayport, Fife
Re: Mk 1 Project Zippy (Picture Heavy!)
![]() by MrBounce » Sun May 19, 2013 6:38 pm
by MrBounce » Sun May 19, 2013 6:38 pm
Aside from the final 180 grit sanding they'll need before primer, the bumpers are now pretty much complete and have been gently placed somewhere in the garage where I can't see them for a bit. Not much to report other than I did a bit more fibreglassing on the inside of the bulkhead, mainly so I could fill in all the holes engine side & start again. There are too many of them, most of which weren't being used. Therefore when I need to make holes, I can start with a blank canvas.
One of the previous owners has "extended" the battery tray, presumably to fit a standard Mini battery in there? Am not sure because 1) the car didn't come with a battery and 2) I don't have one to hand. They had done a poor job really - it seems they cut the end off, then extended it by a couple of inches holding the end on with some wire and a very thin layer of fibreglass. I have simply made it stronger by covering up the grot - no-one was likely to see it anyway as it will be hidden behind the dahboard so aesthetics are not important here!
Once the bulkhead fibreglassing was dry, I had a good sand down with 80 grit on the engine bay side and then hoovered out all the dust. Holes have now been filled with P40. More sanding will follow - I will probably end up with RSI at this rate!!
I still have to grind out the cracks on the airdam towards the bottom of the car. There are a LOT of them. Still, I now feel like I am starting to get somewhere.
Extended battery box mess cleaned up a bit.

Covering yet more holes from the back.

Nicely sanded bulkhead (well, part of it).

- MrBounce
- Posts: 661
- Joined: Mon May 16, 2011 9:16 pm
- Location: Suffolk
Re: Mk 1 Project Zippy (Picture Heavy!)
![]() by MrBounce » Sun May 19, 2013 6:39 pm
by MrBounce » Sun May 19, 2013 6:39 pm
Holes filled (sorry for poor photo)

Oh goody - loads more cracks to deal with...


Oh goody - loads more cracks to deal with...

- MrBounce
- Posts: 661
- Joined: Mon May 16, 2011 9:16 pm
- Location: Suffolk
Re: Mk 1 Project Zippy (Picture Heavy!)
![]() by Rich » Sun May 19, 2013 9:53 pm
by Rich » Sun May 19, 2013 9:53 pm
What are you going to do with your life when it's finished?
-
Rich - Posts: 1285
- Joined: Wed Dec 03, 2008 1:27 am
- Location: Devon

Re: Mk 1 Project Zippy (Picture Heavy!)
![]() by Rich » Mon May 20, 2013 7:34 pm
by Rich » Mon May 20, 2013 7:34 pm
MrBounce wrote:Buy a GTM Coupe
That's how I started in this lark, looking for one of those! I'd love one but I'm not sure I'd be able to get in and out of one.
-
Rich - Posts: 1285
- Joined: Wed Dec 03, 2008 1:27 am
- Location: Devon
Re: Mk 1 Project Zippy (Picture Heavy!)
![]() by DavidL » Mon May 20, 2013 9:03 pm
by DavidL » Mon May 20, 2013 9:03 pm
MrBounce wrote:Buy a GTM Coupe
I'd also considered a GTM against a Midas when I decided on the Bronze in 1985.
At that time, I think it was the extra practicality of the Midas which swayed me. At age 30! I ought to have been ashamed of myself.
I'd still like a GTM though, I like the idea of having more space for a wider choice of engines...
-
DavidL - Posts: 865
- Joined: Tue Mar 01, 2011 10:15 pm
- Location: Tayport, Fife
Re: Mk 1 Project Zippy (Picture Heavy!)
![]() by MrBounce » Fri Jun 07, 2013 10:09 pm
by MrBounce » Fri Jun 07, 2013 10:09 pm
Well, time for an update - lots of piccies so I will try & keep the writing bit short. The bulkhead is partly sanded (cheers Matt!) and is now hole-free & smooth. I've also finally got to grips with the front end and have ground out every crack I could see which includes under the front airdam. By the time I had finished I looked like I'd been a) flour-bombed and b) like I'd been snorting vast amounts of Columbian marching powder. I then re-glassed the thinning areas underneath, especially around the sidelight areas, behind the bumper corners and where the main impact was. Once the cracks had been dealt with I now had to fill them in. I managed to get 2/3 of it done before time ran out.
Mike came round and we took the doors off. The hinges are very stiff so I will bathe them in oil for a few days to free them off. I had been trying to figure out how to remove the door mirror (only the driver's side on my car) and after a bit of investigation found there was one VERY rusty screw holding it on through the door. Cue the drill and it was off. I was lucky enough to find a Renault 14 being broken on eBay and snaffled the passenger mirror from that for a knockdown price. The mirror is attached to the mounting plate by a pin which goes through a mounting lug on the mirror which is held in place by a metal disc & a hard rubber "doughnut". As I am going to be painting the mirror bodies I needed to separate them. The "new" mirror came apart with no problem; mine needed extra time with the Dremel. Nothing that and the drill couldn't deal with. He also helped me start thinking about where we are going to position the MGF heater. It's a big lump in comparison to the Mini heater; however it will be FAR more efficient. I have only ever experienced problems with the Mini system - the heater unit is ok but it can't breather properly. I intend using all the ventilation pipework from and may even doctor an MGF dashboard - they're a lot nearer in size than I expected so hopefully it'll fit nicely with a bit of modification. Time to find one for as cheap as possible...
Bolts to hold grill hammered from front end. It didn't take much...

Bulkhead starting to look smoother (and less "holy")

All the cracks now ground out. Piece missing was so bad I cut it out. It will be replaced soon I promise!

- MrBounce
- Posts: 661
- Joined: Mon May 16, 2011 9:16 pm
- Location: Suffolk
Re: Mk 1 Project Zippy (Picture Heavy!)
![]() by MrBounce » Fri Jun 07, 2013 10:09 pm
by MrBounce » Fri Jun 07, 2013 10:09 pm
Building up the weak bits behind with fresh fibreglass & resin.

Full of fresh resin etc - lots of sanding and shaping to follow.

Doors gone!


Full of fresh resin etc - lots of sanding and shaping to follow.

Doors gone!

Last edited by MrBounce on Fri Jun 07, 2013 10:14 pm, edited 1 time in total.
- MrBounce
- Posts: 661
- Joined: Mon May 16, 2011 9:16 pm
- Location: Suffolk
Return to Complete Midas rebuild
Who is online
Users browsing this forum: No registered users and 17 guests