Mk 1 Project Zippy. Looking Like a Car.

If you're taking on the task of rebuilding the whole Midas, please put the project in here.

Moderator: The Midas Forum Staff

Re: Mk 1 Project Zippy (Picture Heavy!)

Postby MrBounce » Sun Jul 14, 2013 7:37 pm

Due to multiple work and social committments I have left the little beastie in the garage for 2 weeks and haven't touched it; high time I brought it out for some work. The front end needed more sanding - I spent most of the morning concentrating on sorting out & smoothing the nose area. It's very close now - one more application then a small skim of filler and all will look good. I still have so much to concentrate on - under where the bumper sits still needs a lot of attention, but because it's close to the ground at the moment and the work around the sidelights/indicator recesses is intricate, I will leave it until the car's on its side and it's more accessible. The door apertures are practically complete. The rear numberplate area is done, the badge holes filled in and the rear wheel arch repairs are almost finished. I have also used P40 on the remaining ground out cracks around the bonnet aperture. But I still hate sanding. Hopefully not too much more to do...

I have decided where the dashboard will be modified. It's currently 120mm too wide and I have concluded that the side vents can go. It was either those or some very clever surgery on just the passenger side, and that would give me an offset centre console, not something I wanted at all. There is a separate piece that fits under the top of the dashboard which funnels air to the vents. This will need to be cut and sealed off due to there being no end vents. Saves a bit of weight I suppose! The cowling for the instruments may be slightly offset when it's finished (not by much I doubt) but given that the Mini dials couldn't be seen much either, I don't think it's going to matter too much. I have measured up where I will be cutting and also sorted the curvature of the top of the dashboard so it butts up nicely to the bottom of the windscreen. I knew there was a reason for keeping the original Midas dashtop rail!! Surgery will commence in due course.

Front end looking smoother (not that you can really tell...)

Image

Door apertures looking healthier.

Image

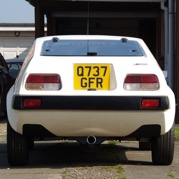
Rear end better, but the foglight holes still need sorting.

Image
MrBounce
 
Posts: 661
Joined: Mon May 16, 2011 9:16 pm
Location: Suffolk

Re: Mk 1 Project Zippy (Picture Heavy!)

Postby MrBounce » Sun Jul 14, 2013 7:37 pm

Dashboard taped up ready to be cut about. Unless I change my mind!

Image

Vent "casting" in preparation for considerable shortening.

Image

The instrument cowling fits nicely. The shade that goes over the top is missing and they're silly money on eBay. I might make one if I can't find one cheaply.

Image
MrBounce
 
Posts: 661
Joined: Mon May 16, 2011 9:16 pm
Location: Suffolk

Re: Mk 1 Project Zippy (Picture Heavy!)

Postby lankyjames » Mon Jul 15, 2013 2:52 pm

I'm looking forward to see how the dash fits once cut, looks like a really nice substitute.
Image
User avatar
lankyjames
 
Posts: 455
Joined: Mon Jan 18, 2010 8:47 pm
Location: Nottingham

Re: Mk 1 Project Zippy (Picture Heavy!)

Postby MrBounce » Sat Jul 20, 2013 4:29 pm

I found myself with a free evening plus the added likelihood of 2 friends round at the same time. As a result I thought it was time to turn the car onto its side so I could spend a bit of time "cleaning up" underneath. James & Matt came over and we first pushed the car out onto the drive on its trolley, then gently rolled it onto its side on the grass.

I clipped all the little bits of wire tying the fuel and brake lines to all the clips then removed them and stored them carefully in the garage. The fuel line can certainly be used again - I will give it a blow through and a good clean up first though. Am tempted to change all the clips as I think the ones on the the car are the originals and therefore 32 year-old brittle plastic. Trouble is there's a lot of them and that's a lot of holes to fill.

Talking of filling holes, there's plenty of that to do underneath; where the old seats used to sit, the old subframe mount holes, the old handbrake mount holes, the old gearbox mount holes and a few other random ones where I can't figure out what they were used for. I have also found a bit of damage (at the middle under the rear valance where an old bolt had rusted away) and I have already trimmed the remains of it away. In the meantime I have pressure washed & degreased the underside. Plenty more to do but all in good time...

One last thing. Am thinking of exhausts, but where to mount them. Seeing that they're heavy buggers, I had wanted to do a centre exit but may change this due to having no idea where to hang it from. Answers on a postcard please.

It's a rollover! Disgusting grease marks removed. Fuel & brake lines now removed. Holes still there...

Image

Thanks to Matt & James, it's now on the trolley. Yes, I did check clearance before putting it back in the garage...

Image
MrBounce
 
Posts: 661
Joined: Mon May 16, 2011 9:16 pm
Location: Suffolk

Re: Mk 1 Project Zippy (Picture Heavy!)

Postby lankyjames » Sat Jul 20, 2013 7:35 pm

Re exhaust mountings there is an excellent post I can't find while on my phone with some handy photos.

In the mean time; people have attached a bracket to the rear lip just behind the fuel tank to hang their mount of choice from. I've just used a basic hanger attached with a screw- temporarily till I have a new exhaust made
Image
User avatar
lankyjames
 
Posts: 455
Joined: Mon Jan 18, 2010 8:47 pm
Location: Nottingham

Re: Mk 1 Project Zippy (Picture Heavy!)

Postby Jon » Sat Jul 20, 2013 10:52 pm

User avatar
Jon
 
Posts: 147
Joined: Wed Dec 03, 2008 9:12 am
Location: Haynes

Re: Mk 1 Project Zippy (Picture Heavy!)

Postby MrBounce » Sun Jul 21, 2013 4:08 pm

Gents thank you for your advice - plans are afoot...

Time to take a look at the underside to see what horrors I have missed so far. There was a spider crack on the underside of the valance which has been ground out along with some cracking by the bolt holes for the handbrake. I also sorted the damage in the middle of the valance by removing the very broken gelcoat & adding a small strip of fibreglass, then P40 over the top. It was then, rather distressingly, that I turned my attention to the front end.

I can only say one thing. The person who did the "repairs" to the bodywork on this car is a total muppet (I sometimes wish that forums were not swear free zones as you might get an idea of how frustrated I am - let's just say the garage turned blue. A lot.). When I was sorting out the problems on the nose, I didn't pay particular attention to the underside of it. Should have done really. It was ALL body filler. I could have cried. And the looking closer at the under bumper area on the nearside side showed more ugly bits. And a truckload more filler. And guess what? More cracks!!

I did the only thing I could do. Out came the hammer & chisel for the filler under the nose, and the angle grinder with wire brush attachment for the under bumper bit. I also found that a bit near the indicator surround was all filler. I cut it out using the Dremel. I now need more resin and fibreglass. Now what was I thinking of? Oh yeah, that's right. Yee-haa.

Spider cracks on valance ground out.

Image

Damage to rear valance halfway through being corrected.

Image

More cracks where handbrake bolts through.

Image
MrBounce
 
Posts: 661
Joined: Mon May 16, 2011 9:16 pm
Location: Suffolk

Re: Mk 1 Project Zippy (Picture Heavy!)

Postby MrBounce » Sun Jul 21, 2013 4:08 pm

Muppetry. I hammered it out.

Image

Lumpy bits. Time to remove...

Image

Half removed showing cracks and general ugliness. Angle grinders are useful. Although mine is now white...

Image
MrBounce
 
Posts: 661
Joined: Mon May 16, 2011 9:16 pm
Location: Suffolk

Re: Mk 1 Project Zippy (Picture Heavy!)

Postby MrBounce » Sun Jul 21, 2013 4:09 pm

And the rest of it. I don't know exactly how they thought it was "fixed"...

Image

Piece removed. All filler - with a tiny bit of fibreglass attached...

Image

There's a hole in my car. Again...

Image
MrBounce
 
Posts: 661
Joined: Mon May 16, 2011 9:16 pm
Location: Suffolk

Re: Mk 1 Project Zippy (Picture Heavy!)

Postby MrBounce » Sun Jul 21, 2013 4:09 pm

Starting to right the wrongs. For the umpteenth time.

Image
MrBounce
 
Posts: 661
Joined: Mon May 16, 2011 9:16 pm
Location: Suffolk

PreviousNext

Return to Complete Midas rebuild

Who is online

Users browsing this forum: No registered users and 7 guests