The next step is indeed to laminate some strips of glass CSM over the top of the join. The new section may have got a good bond, but only from one side. I wanted to be sure that the roof was as strong as, if not stronger than the original, so I had to take the angle grinder to the top surface and created a tapered area around 3 inches wide either side of the join line to allow additional glass to be laminated on top.

- Roof join ground back in preparation for laminating in additional CSM strips
- Roof ground back again.jpg (215.68 KiB) Viewed 9721 times
To achieve a good smooth taper, I start with a flexible grinding disc in the angle grinder, probably P80 grit. Once I have roughed out the taper I smooth it off using P120 production paper on my trusty old 3M body file. It is important to achieve a smoothly blended edge to the old gelcoat so that the new filler blends into it gently. Otherwise sudden changes between gelcoat and filler can show through the paint as shadows.
The sharp eyed will have noticed that I also tapered back around the bolt holes. These were filled from both sides with bridging filler (glass loaded polyester, such as Isopon P40).
Two layers of CSM strips were then laminated across the join, starting with one layer about 4inch wide and then a layer at 6 inch wide. Once that had set hard it was time to apply the filler.
I prefer to use aluminium powder filled bodyfiller, such as Metalik or Chemical metal. My preference is based on experience gained over the years and is probably a bit of overkill for a GRP body. Most bodyfillers, such as P38 and Easy Sand use talcum powder as the filler agent. It is cheap and makes sanding easy. However, it is hydrophillic, i.e. it attracts and holds water. This is why repairs on steel panels with talc based bodyfiller can rust through and start to lift. On GRP panels if the talc based filler isn't sealed properly it will take in moisture and expand leading to ripples and bumps. Having said that, part of our paint process is a layer of epoxy undercoat which is strong, flexible and pretty impervious to water, petrol etc. So maybe my expensive taste in bodyfiller is just overkill.
The filler stage is where the efforts of making a good mould and getting it fitting tightly to the roof really paid off. Having the new roof section perfectly aligned to the old roof section minimised the amount of filler required and the amount of flatting back with the bodyfile. Not only does that make it easier work it makes for a better job all round.
At this stage we had a minor family crisis which meant that I couldn't get to the workshop much for a couple of months. I also got out of the habit of photographing every step, so there were no more photos until the car was in the spray booth. However, one side benefit of my slowed process was that it gave the new section a few months to settle down and release excess styrene. One problem when painting newly moulded GRP panels is that they continue to release styrene for some time - hence the "newly moulded" styrene smell that comes free with every Midas kit - and the styrene can create micro-bubbles in the newly applied paint. The usual treatment is to place the car or panels in a low bake paint booth overnight to speed up the aging process, but leaving it to stand for a fews months can only help.
Well the next stage was getting it all painted, but I'll save that for another time.
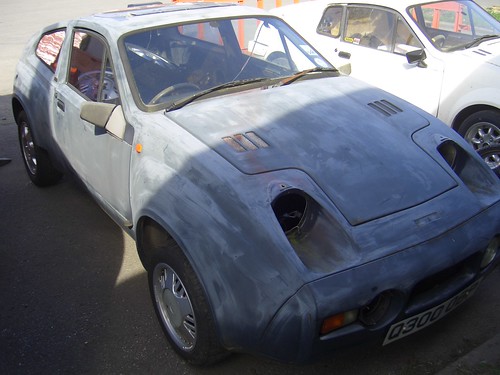 Pic004 by Alistair Courtney, on Flickr Before starting work.