This weekend I have mostly been playing with chemicals, removing rust and painting. A light touch of the Dremel's cutting disc was all that was needed to make the broken bolt move again, this time under the power of a flat-blade screwdriver. After a tiny bit of cleaning I could actually see the pinhole in the side of the tank so it was time to deal with it. I taped up the pinhole, fuel sender & fuel hose holes and got to work with the Marine Clean part of the petrol tank repair kit. This stuff is evil, even if you only use 2 pints of it, mixed half & half with warm water. Although they say in their instructions to "tape up any holes in the tank", Marine Clean of course is used to remove the built up gum & deposits from fuel. This includes glue on Gaffa tape. A little seepage was ok to deal with, although I did have to replace it quite regularly whenever I moved the tank around. I re-used the sender unit & gasket after the first "seepage" incident. You are advised to keep this evil concoction in there for 24 hours, regularly rotating the tank. Although I have no pictures to show what it can do (can't get my SLR inside the tank!) it is AMAZING stuff.
Whilst I was waiting for the Marine Clean to do its stuff, I realised I had only removed the bearings from one of the rear hubs. So I got on with the other one complete with all the surface rust and its nasty gummed up bearing. Some of the grease inside was black. The old bearings were quickly drifted out and binned. I cleaned the hubs up in the parts washer and gave them a coat of fresh paint as well as cleaning up the threads on the studs.
I also had a quick look at the old coilover shocks from the rear of the car. A bit of searching showed they're Spax units with the number "EF 377" stamped into them. I have no idea what this means, although couldn't find much on a quick Google search. Anyone got any ideas?
My calipers (which are just plain ugly) desperately need a refurb, being covered in bad black paint and rust. I managed to get the pistons out using a combination of a punch, hammer & molegrips - given the state of them it looks like the calipers were painted badly as there's paint on the exposed parts of the pistons. I shall deal with them later...
After 24 hours I drained the Marine Clean and got a frothy brown liquid which looked a bit like real ale. It did NOT smell like it... I then rinsed the tank 4 times and used the Prep & Ready rust remover. This went in neat and only needed to stay in for an hour or so. Bonus is, it's reusable (although not as strong the more times you use it). Given the seepage from the pinhole, its rust removing capabilities are pretty good. Once more the tank was rinsed.
Then, finally, it was time to seal the tank. The instructions suggest only doing this when the tank is completely dry, and you can only do this using either a heat gun or hairdryer. I don't have a heat gun, so I managed to convince Mrs Bounce to lend me her hairdryer. Luckily she doesn't use it too much, so I jammed it in the filler neck and left it on high for a while until every last patch of damp had been dried out. I then poured in the sealant, rotating the tank so it got a really good coverage, especially around the pinhole area. After draining it out the excess out, it has to be left for 96 hours to set properly. Thumb twiddling time!!
*Pictures will follow but they won't upload to this forum.
Midas Cars Forum - www.midascarsforum.com
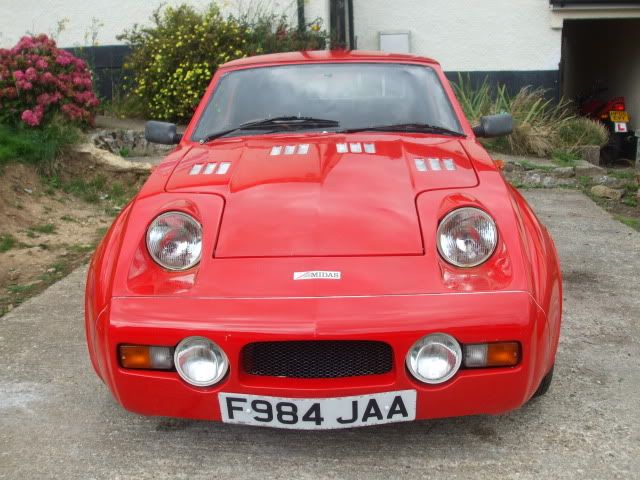
This forum is for Midas and Midtec Bronze enthusiasts. The Midas is a British car designed as a replacement for the Mini Marcos.
Mk 1 Project Zippy. Looking Like a Car.
Moderator: The Midas Forum Staff
Re: Mk 1 Project Zippy (Picture Heavy!)
![]() by MrBounce » Tue Apr 16, 2013 4:32 pm
by MrBounce » Tue Apr 16, 2013 4:32 pm
- MrBounce
- Posts: 661
- Joined: Mon May 16, 2011 9:16 pm
- Location: Suffolk
Re: Mk 1 Project Zippy (Picture Heavy!)
![]() by Hans Efde » Wed Apr 17, 2013 9:48 am
by Hans Efde » Wed Apr 17, 2013 9:48 am
I made the mistake of first doing the tank from the outside, paintwork etc and then use the chemical stuff to clean the inside from muck and rust. I had also leakage thanks to the tape on the holes loosening and it damaged the paintwork. At least you didn't make that mistake.
-

Hans Efde - Posts: 1732
- Joined: Sat Dec 06, 2008 10:11 pm
- Location: IJlst, Netherlands
Re: Mk 1 Project Zippy (Picture Heavy!)
![]() by MrBounce » Sun Apr 21, 2013 3:35 pm
by MrBounce » Sun Apr 21, 2013 3:35 pm
Tested the tank with water yesterday. It is leak free! 
Not much more to report this weekend (had a wedding to go to) apart from the tank has had its first coat of paint.

Not much more to report this weekend (had a wedding to go to) apart from the tank has had its first coat of paint.

- MrBounce
- Posts: 661
- Joined: Mon May 16, 2011 9:16 pm
- Location: Suffolk
Re: Mk 1 Project Zippy (Picture Heavy!)
![]() by Rich » Sun Apr 21, 2013 6:54 pm
by Rich » Sun Apr 21, 2013 6:54 pm
MrBounce wrote:Tested the tank with water yesterday. It is leak free!
Not much more to report this weekend (had a wedding to go to) apart from the tank has had its first coat of paint.
Word of warning, give it at least a couple of weeks before trying any fuel in it. If the sealant isn't completely cured you can end up with rubbery mess clogging up your filter. That said, I don't expect you'll be putting fuel in this for a bit longer than two weeks...
-
Rich - Posts: 1285
- Joined: Wed Dec 03, 2008 1:27 am
- Location: Devon
Re: Mk 1 Project Zippy (Picture Heavy!)
![]() by MrBounce » Mon Apr 22, 2013 4:40 pm
by MrBounce » Mon Apr 22, 2013 4:40 pm
Ha ha Rich! Good sense of humour you have there 
- MrBounce
- Posts: 661
- Joined: Mon May 16, 2011 9:16 pm
- Location: Suffolk
Re: Mk 1 Project Zippy (Picture Heavy!)
![]() by MrBounce » Sun Apr 28, 2013 5:02 pm
by MrBounce » Sun Apr 28, 2013 5:02 pm
Once able to get back into garage I have finished off the rear hubs - they now have their bearings and are sat inside my tool cupboard in a box so they don't end up with loads of crap in them... I then had a little think about what to do next. I have LOADS of bodywork to do I know, but I thought I would avoid that by checking out the front bumper instead. I am not entirely sure this was a wise thing to do as I found some evil stuff.
It's now well known that the guy who did the bodywork on the car after its smack on the front end can best be described as a bodge merchant. This bumper is no different, especially as it was the first thing that took the impact. It seems he has done his usual: chuck a load of filler in it then paint over the top. The matt black paint he'd used was thick & nasty and had cracked all over where there were cracks in the fibreglass, but the 80-grit 3M sandpaper I had made relatively short work of it. Sadly the cracks are fairly deep so I am going to have to grind them out. Whoop-di-doo.
There were also some repairs to the back, with a huge wodge of "new" fibreglass at the right front and in the middle, plus also an enormous lump on the underside of the bumper on the far left. And of course there was filler; but not as much as in the bodywork. Still enough to really annoy me though. Most of it is now out, leaving a hole the size of a 5p piece on the front right corner. Repairs will follow.
I also looked at the rear bumper, hoping to see no cracks as I don't believe the car has been rear-ended as well (thankfully). Still the same horrid black paint, but a lot less in the way of damage. I still have to scoop out the foam left in it though.
- MrBounce
- Posts: 661
- Joined: Mon May 16, 2011 9:16 pm
- Location: Suffolk
Re: Mk 1 Project Zippy (Picture Heavy!)
![]() by MrBounce » Sun Apr 28, 2013 5:07 pm
by MrBounce » Sun Apr 28, 2013 5:07 pm
I would happily be adding photos from the same account I have been uploading since I started this project but for some reason I now can't do it and it is INFURIATING. So if you want to see the pics, please view the same text, but with added visual stimulation here: 
http://www.ppcmag.co.uk/forum/viewtopic.php?f=7&t=9105
http://www.ppcmag.co.uk/forum/viewtopic.php?f=7&t=9105
- MrBounce
- Posts: 661
- Joined: Mon May 16, 2011 9:16 pm
- Location: Suffolk
Re: Mk 1 Project Zippy (Picture Heavy!)
![]() by Hans Efde » Sun Apr 28, 2013 5:40 pm
by Hans Efde » Sun Apr 28, 2013 5:40 pm
Why? It's so easy.
Upload the pics to photobucket or take them from your present PPC mag forum, right click on the pic and select : copy image location.
Paste in your message like here:
http://i511.photobucket.com/albums/s353 ... 1bd5eb.jpg
This is already good, but not yet visible.
But then press the IMG button and put the [img]and[/img] fore and aft of the link and presto!
-
Hans Efde - Posts: 1732
- Joined: Sat Dec 06, 2008 10:11 pm
- Location: IJlst, Netherlands
Re: Mk 1 Project Zippy (Picture Heavy!)
![]() by MrBounce » Sun Apr 28, 2013 8:54 pm
by MrBounce » Sun Apr 28, 2013 8:54 pm
Hans that is EXACTLY the way I have been doing it - it just won't do it on this system for some reason 
- MrBounce
- Posts: 661
- Joined: Mon May 16, 2011 9:16 pm
- Location: Suffolk
Re: Mk 1 Project Zippy (Picture Heavy!)
![]() by lankyjames » Sun Apr 28, 2013 9:14 pm
by lankyjames » Sun Apr 28, 2013 9:14 pm
- Code: Select all
[IMG]http://i511.photobucket.com/albums/s353/MrBounce38/Midas/Midas509_zpsef7ea37d.jpgl[/IMG]
=


-

lankyjames - Posts: 455
- Joined: Mon Jan 18, 2010 8:47 pm
- Location: Nottingham
Return to Complete Midas rebuild
Who is online
Users browsing this forum: No registered users and 37 guests