Mk 1 Project Zippy. Looking Like a Car.

If you're taking on the task of rebuilding the whole Midas, please put the project in here.

Moderator: The Midas Forum Staff

Re: Mk 1 Project Zippy (Picture Heavy!)

Postby MrBounce » Tue Apr 30, 2013 10:31 am

Hubs finished

Image

Cracks, cracks & more cracks. In the paint and in the fibreglass.

Image

Top, Middle or Bottom? Doesn't matter, it's ALL awful...
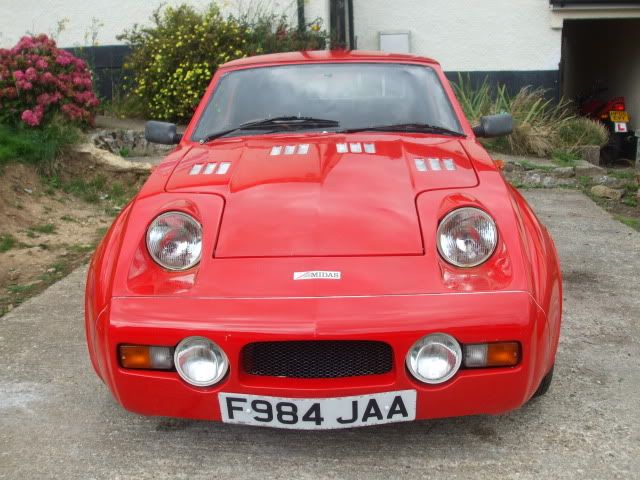
Image
MrBounce
 
Posts: 661
Joined: Mon May 16, 2011 9:16 pm
Location: Suffolk

Re: Mk 1 Project Zippy (Picture Heavy!)

Postby MrBounce » Tue Apr 30, 2013 10:31 am

There's filler in here. What a surprise.

Image

Here, too.

Image

Bottom left corner. A "step" of 2-3mm. Gotta love this guy's attention to detail.

Image
MrBounce
 
Posts: 661
Joined: Mon May 16, 2011 9:16 pm
Location: Suffolk

Re: Mk 1 Project Zippy (Picture Heavy!)

Postby MrBounce » Tue Apr 30, 2013 10:32 am

Repair" job in the middle

Image

Worst of the filler removed.

Image

Rear bumper. Better than the front.

Image
MrBounce
 
Posts: 661
Joined: Mon May 16, 2011 9:16 pm
Location: Suffolk

Re: Mk 1 Project Zippy (Picture Heavy!)

Postby MrBounce » Tue Apr 30, 2013 5:28 pm

I attacked the bumpers this afternoon. I took the Dremel to the cracks on the front bumper (there were a LOT!). I am now covered in a mountain of fibreglass dust. I am eternally grateful for my "Bane" mask complete with filters that kept all that out of my lungs. Once I had finished being evil on the outside, there was a hole on one end and very thin fibreglass the other. So I cracked out the new fibreglass kit and patched those up from the inside. The outside has now been repaired with a varied mix of resin and P40. I have the lovely job of sanding to follow. It's my intention to use "hidden" captive nuts on brackets so I can use bolts on the inside of the car - a much tidier idea than the wood screws poking through the bodywork with the heads exposed on the outside of the bumper.

While the front was drying out, I scooped out the foam in the rear bumper. This took ages. And unfortunately, because the foam itself was not sealed into the bumper, it was partly damp. Yuk. The end bits where the screws went were covered with fibreglass, so these were Dremel'd off revealing a very rotten piece of wood underneath. These fell apart almost instantly as they'd been damage by the damp. Eventually it was all out so tomorrow I will have the delight of preparing them for any repairs they'll need. And getting rid of that awful matt black paint.

Nasty end of the front bumper...

Image

...and the other one

Image

Repairs on the inside at one end

Image
MrBounce
 
Posts: 661
Joined: Mon May 16, 2011 9:16 pm
Location: Suffolk

Re: Mk 1 Project Zippy (Picture Heavy!)

Postby MrBounce » Tue Apr 30, 2013 5:29 pm

...and the other end.

Image

Wood in rear bumper. This was rotten.

Image

All this came out. It's now in the bin.

Image
MrBounce
 
Posts: 661
Joined: Mon May 16, 2011 9:16 pm
Location: Suffolk

Re: Mk 1 Project Zippy (Picture Heavy!)

Postby MrBounce » Wed May 01, 2013 5:09 pm

Sorry to bore everyone, but it's more bumpers today. I gave the front bumper a sand down after attacking it with resin & P40, but there were still a few low spots. As such I had another go and utilised the lovely bright sunshine to dry it out. This meant I could have a look at and sand down the rear bumper.

On first glance, this looked really quite good. After 5 minutes with a block and some 80 grit, less so. The horrid matt black paint hid a multitude of sins and I was left with some cracks, a couple of holes and an interesting bit of middle in the middle where the two halves had originally been joined together. So once again it was out with the resin and CSM. I reinforced where the cracks were and drizzled some resin into the holes having ground out & feathered the edges. More sanding tomorrow no doubt...

Front bumper drying in the sun

Image

Obvious join in the middle of the rear bumper

Image

Paint hid such niceties as this

Image
MrBounce
 
Posts: 661
Joined: Mon May 16, 2011 9:16 pm
Location: Suffolk

Re: Mk 1 Project Zippy (Picture Heavy!)

Postby MrBounce » Wed May 01, 2013 5:10 pm

Resin applied

Image

Repairs made to one corner...

Image

...and also to the middle

Image

I have decided I like working with fibreglass again...
MrBounce
 
Posts: 661
Joined: Mon May 16, 2011 9:16 pm
Location: Suffolk

Re: Mk 1 Project Zippy (Picture Heavy!)

Postby Rich » Wed May 01, 2013 5:31 pm

Would you be as well getting a decent surface on it and using it to make a mould?
User avatar
Rich
 
Posts: 1285
Joined: Wed Dec 03, 2008 1:27 am
Location: Devon

Re: Mk 1 Project Zippy (Picture Heavy!)

Postby MrBounce » Wed May 01, 2013 9:48 pm

Not at my level Rich. It's my first time working with fibreglass...
MrBounce
 
Posts: 661
Joined: Mon May 16, 2011 9:16 pm
Location: Suffolk

Re: Mk 1 Project Zippy (Picture Heavy!)

Postby Rich » Wed May 01, 2013 10:10 pm

I think by the time you've got a surface you'll have had plenty of practice!

I take it these bumpers were filled with foam to provide a bit more protection? Or is the foam in yours an owner addition?
User avatar
Rich
 
Posts: 1285
Joined: Wed Dec 03, 2008 1:27 am
Location: Devon

PreviousNext

Return to Complete Midas rebuild

Who is online

Users browsing this forum: No registered users and 2 guests