Good on you mate, I hope all goes well.
I must admit I don't fancy venturing into the footwells, my servo and MC were replaced before I got my hands on it but the bolts leak rain water, trouble is I don't think I can physically fit in to get at them,
I pity the poor devil who had to laminate these cars
Midas Cars Forum - www.midascarsforum.com
This forum is for Midas and Midtec Bronze enthusiasts. The Midas is a British car designed as a replacement for the Mini Marcos.
J171 NJO Cortez / 2+2 rebuild and modifications
Moderator: The Midas Forum Staff
Re: J171 NJO Cortez / 2+2 rebuild and modifications
![]() by Jin » Sat Jul 18, 2015 10:43 am
by Jin » Sat Jul 18, 2015 10:43 am
https://easywider.co.uk/ universal flexible wheel arch extensions
- Jin
- Posts: 454
- Joined: Fri Aug 01, 2014 10:33 pm
Re: J171 NJO Cortez / 2+2 rebuild and modifications
![]() by Jin » Mon Aug 03, 2015 11:50 pm
by Jin » Mon Aug 03, 2015 11:50 pm
More progress 
Left off last time with the carpet pretty much finished along with the rear seat base.
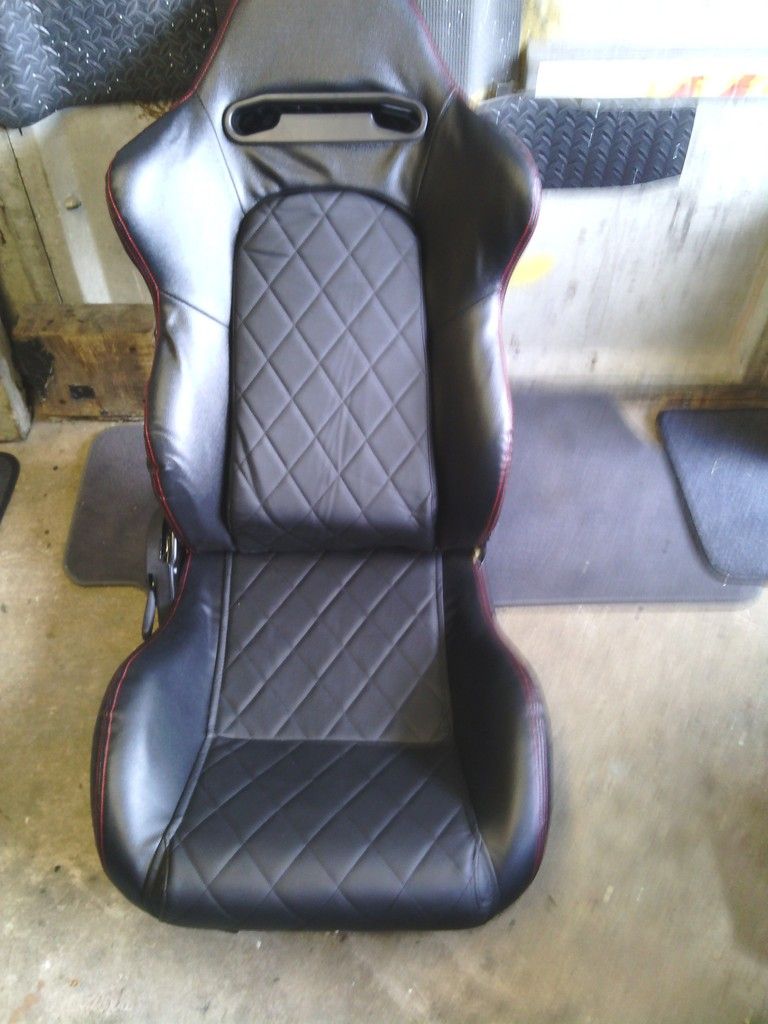
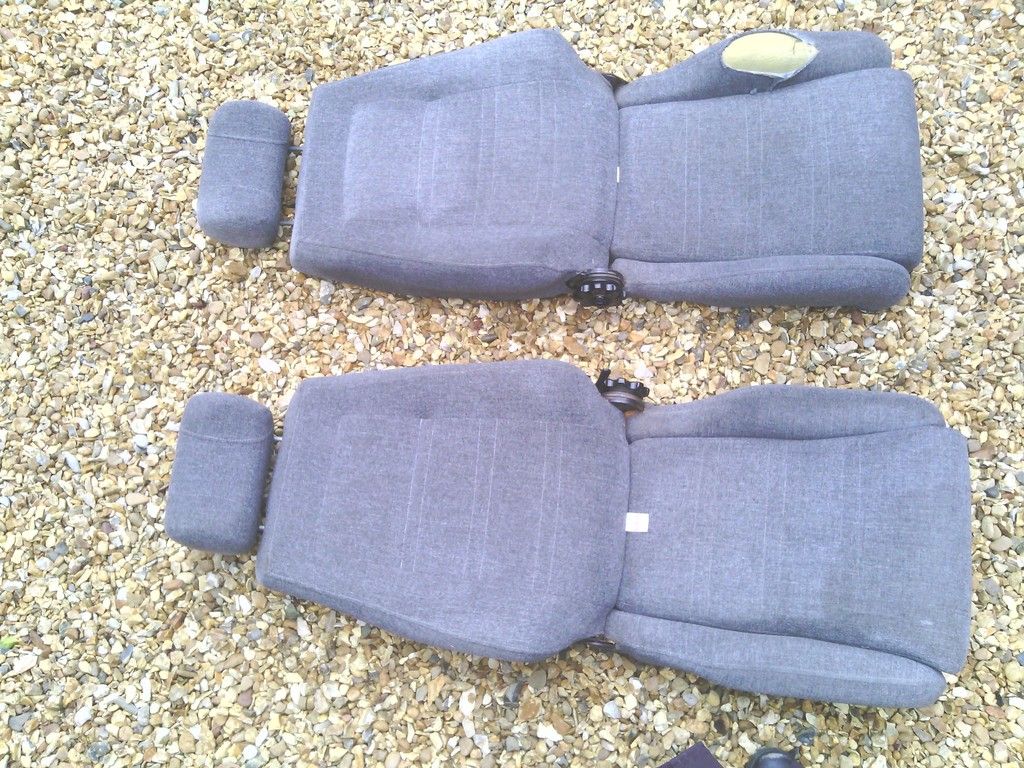
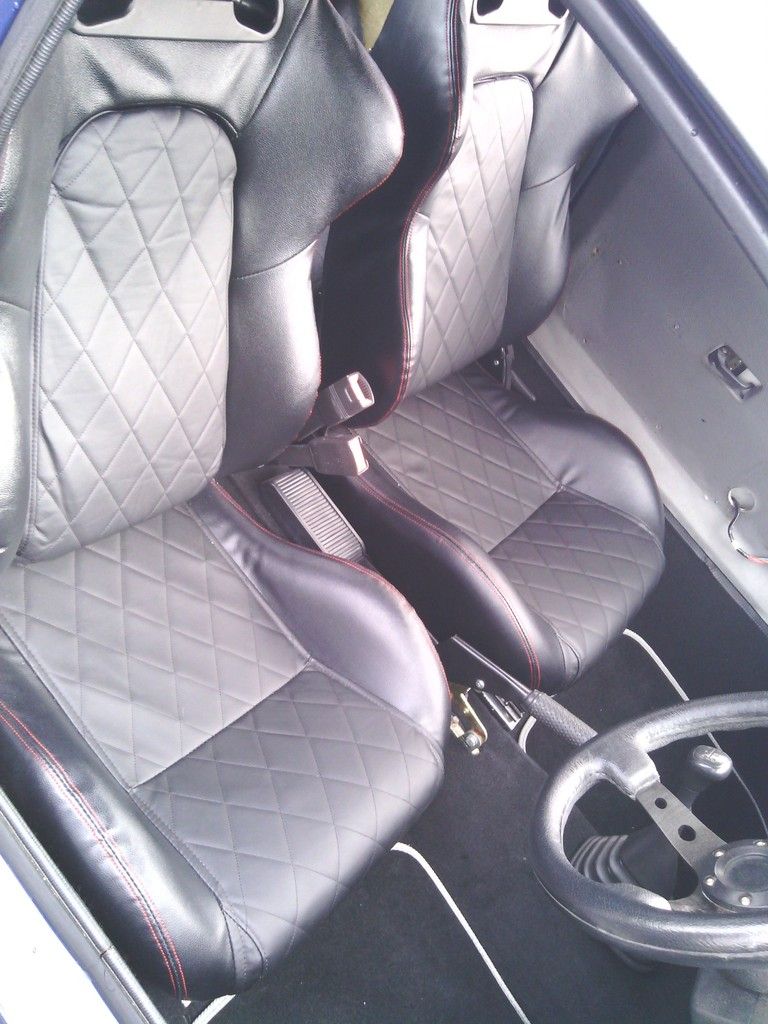
In between these jobs I had been on the lookout for some new front seats, preferably vinyl / leather bucket seats.
After many weeks searching I happened upon some new ones on eBay bought in error by the seller and re-listed half price, I recognised the type from when I had the Quantum and I wanted a set for that, just couldn’t justify the £350 asking price when I had a perfectly good pair already fitted – no such dilemma in the Midas, the current seats were awful to the point I considered recovering them in bin bags they were that bad, so £150 shelled out and they were on my doorstep 24 hours later
48 hours later I sold the runners from them for £45 so these have become a bit of a bargain.
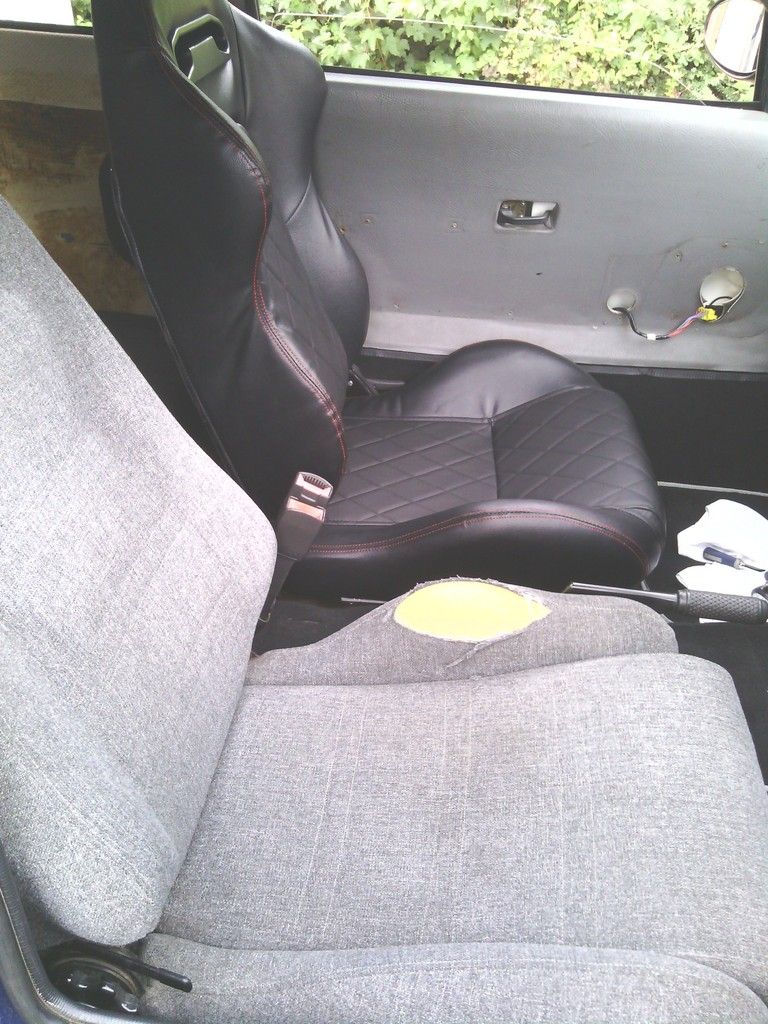
All excitedly I bolted one in with minor adjustments to the home made sub frame and subsequently plonked my arse on them only to find the combo of seat / me and the car didn’t work together – oh pooh
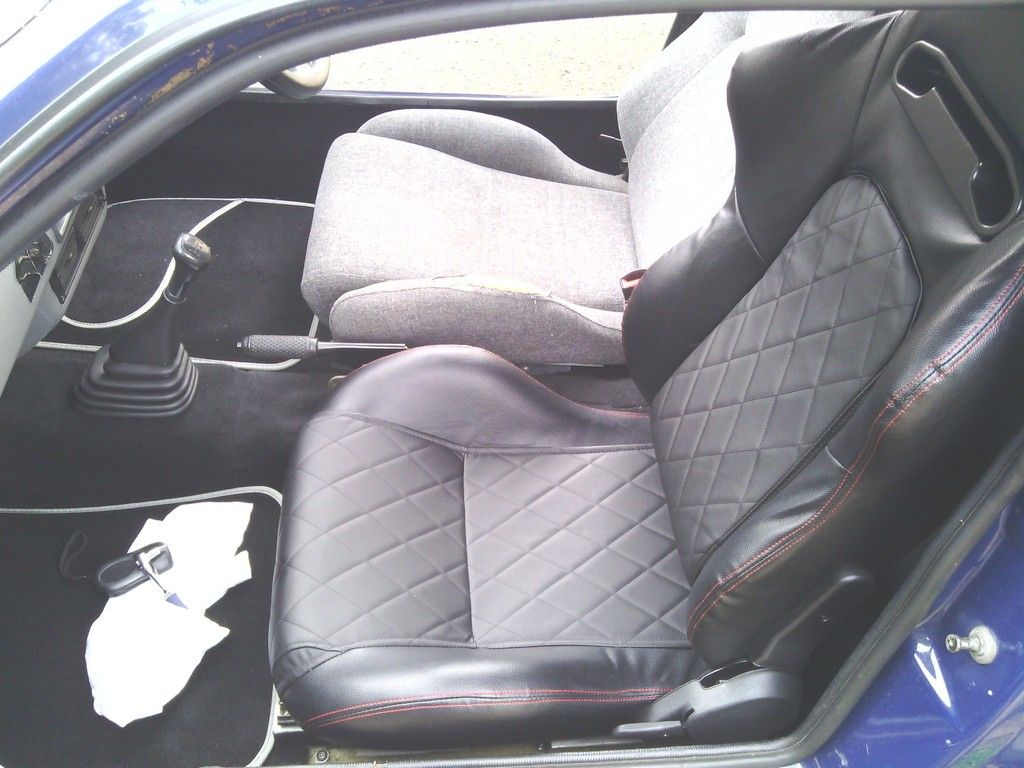
Looking at it the seat base is much thicker on the new seats so I sat around 40mm higher – may not sound like much but with only 10mm headroom to start with I need to loose 30mm off the top of my head, not only that but the rear backrest was a bit of an odd shape all padded at the lower back and the foam was made from wood (or what felt like it ) which pushed me further towards the dash further exaggerating the lack of room, the cherry on the cake was not being able to close the door due to the top section being 100mm wider for the shoulder supports and the Midas tapering in towards the top.
Feeling a bit droopy I kicked the cat and sulked inside the house for a while.
Once id picked my chin up off the floor I browsed the online seating retailers for an alternative and the pickings were slimmer than a racing snake especially if I wanted to recline them, so with nothing left for it I went back in the garage with the view to modify them to fit perfectly or ruin a perfectly good set of new seats.
First job the height of the seat base,
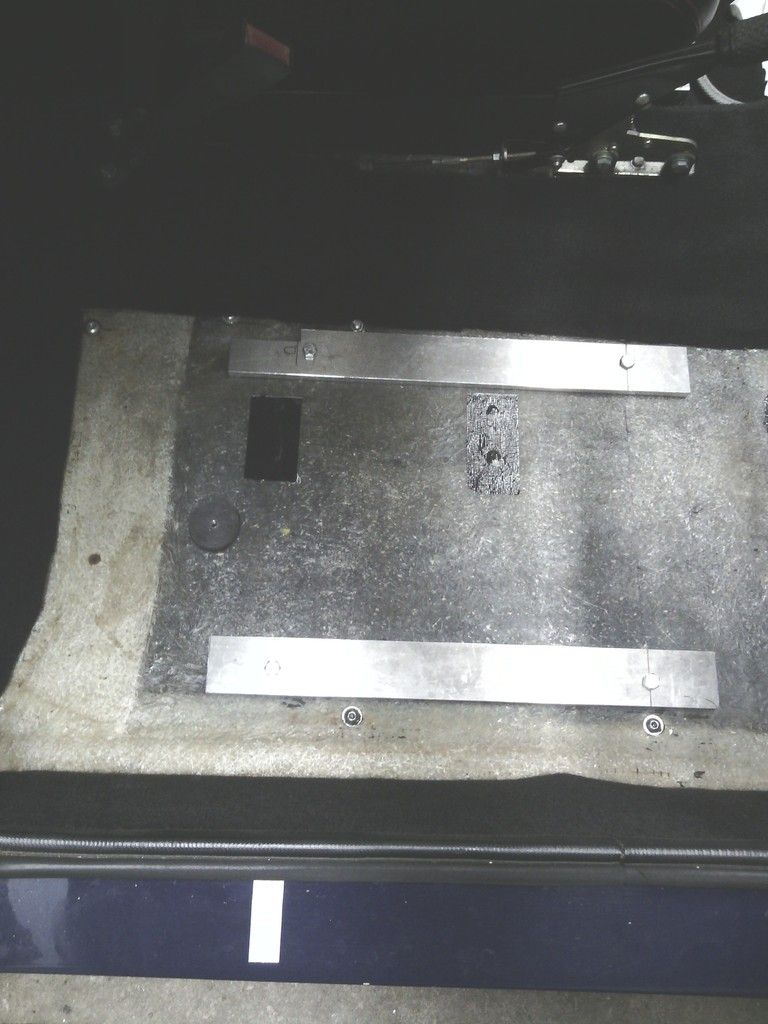
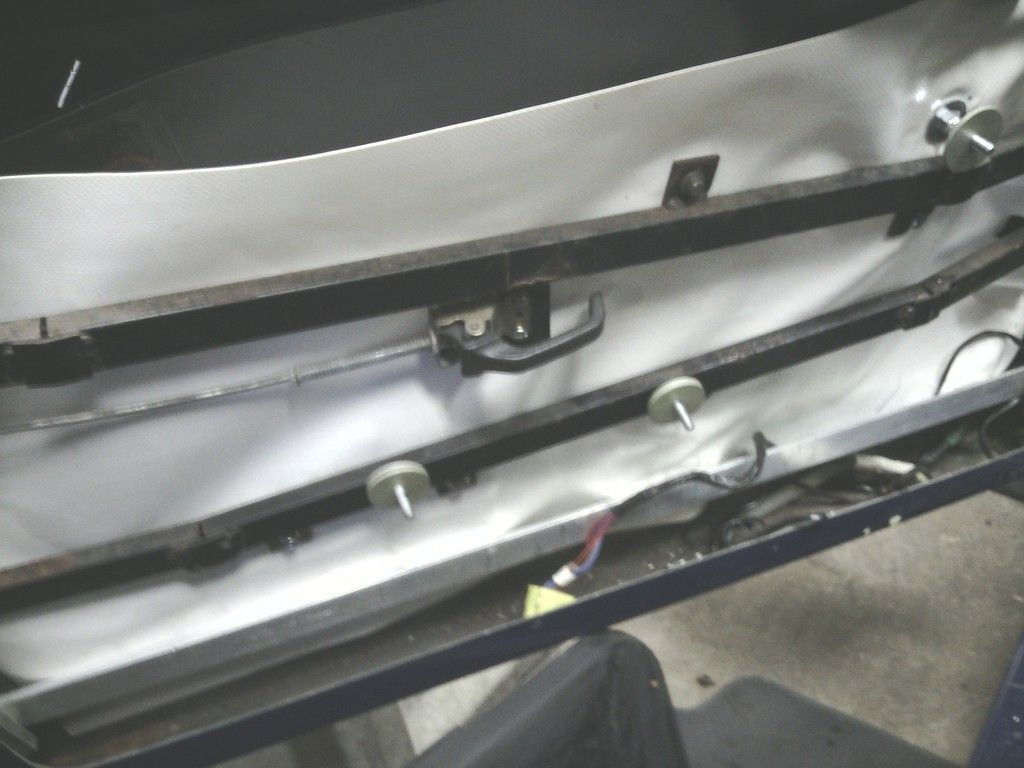
The standard runners were 40mm deep which I copied in better steel when the originals fell apart upon buying the car, not only that but they weren’t positioned in the car well enough considering I had the seat pushed further back due to being 6’ 2”, the white marker on the sill shows the centre of the seat base position in the position I require for driving in relation to the runner supports.
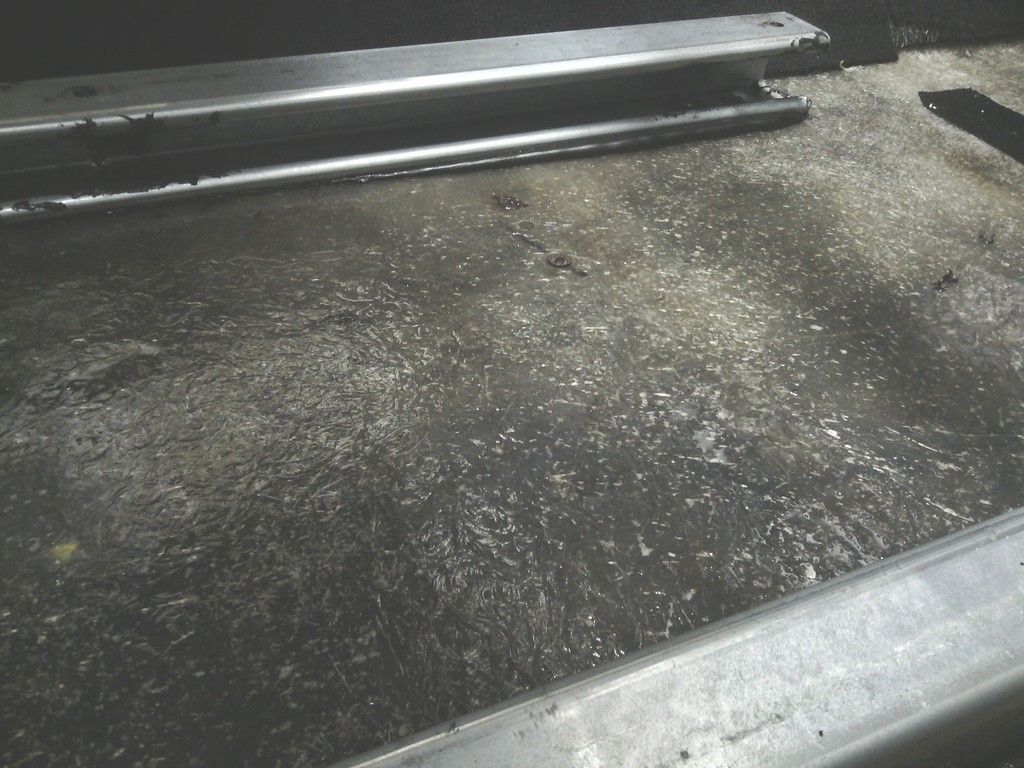
Not ideal, there was some floor flex,
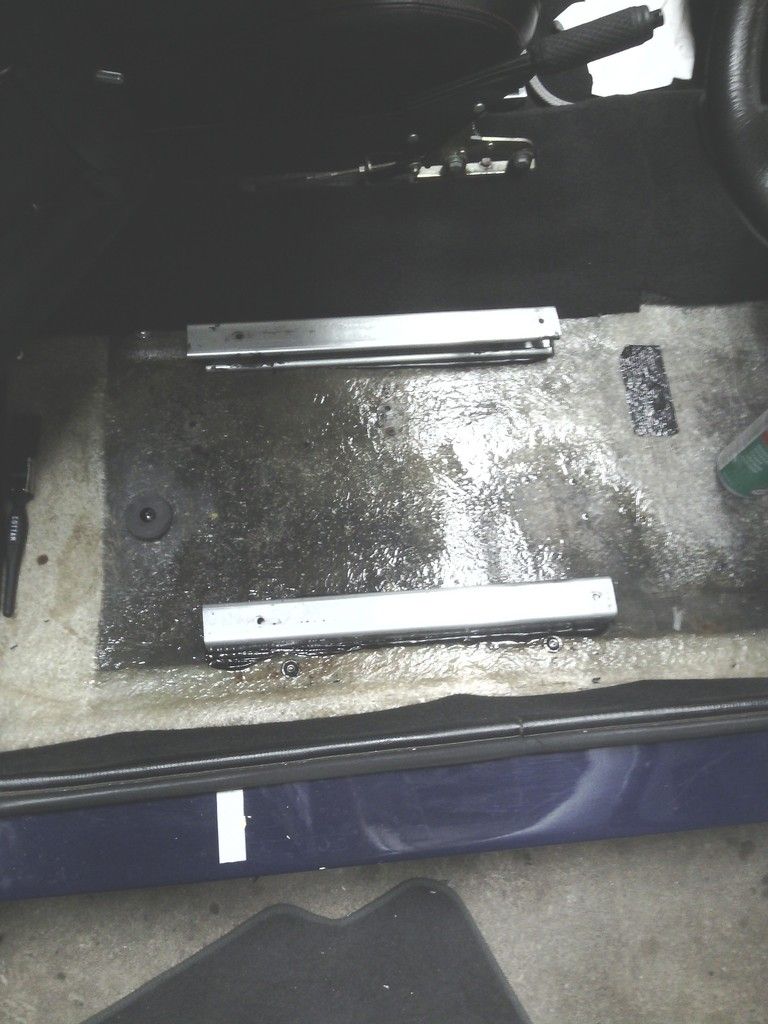
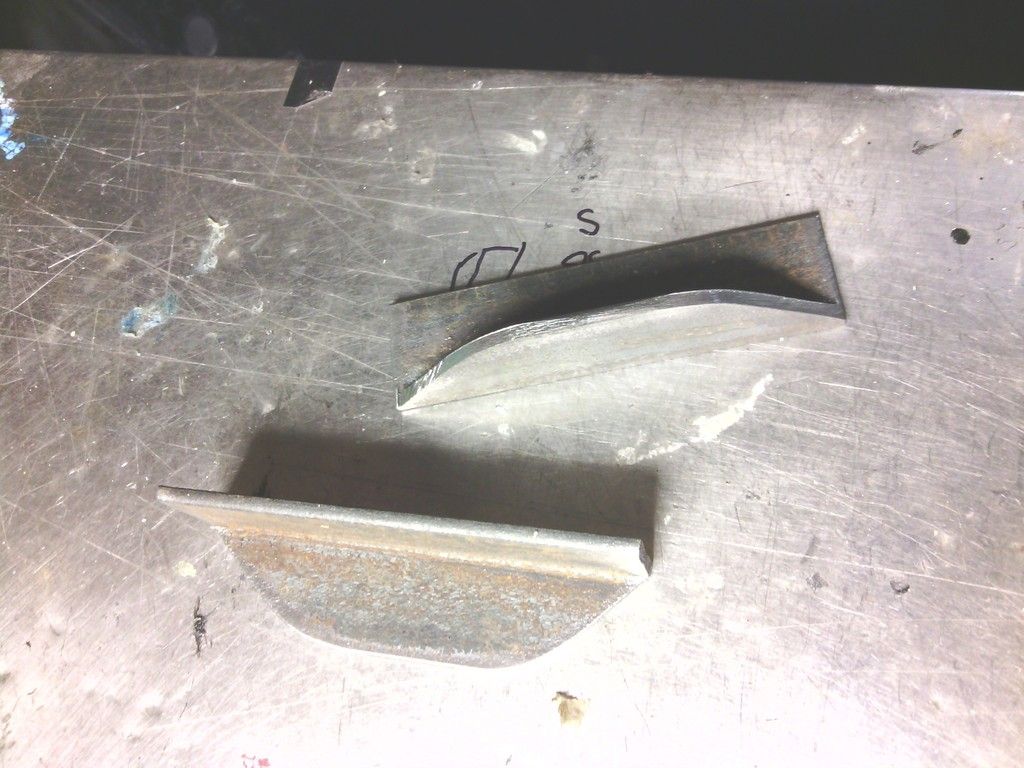
So 2 new runner supports were made from 50mm wide aluminium plate which is better than the standard 40mm wide ones and they were extended 50mm further back down the car to spread the load
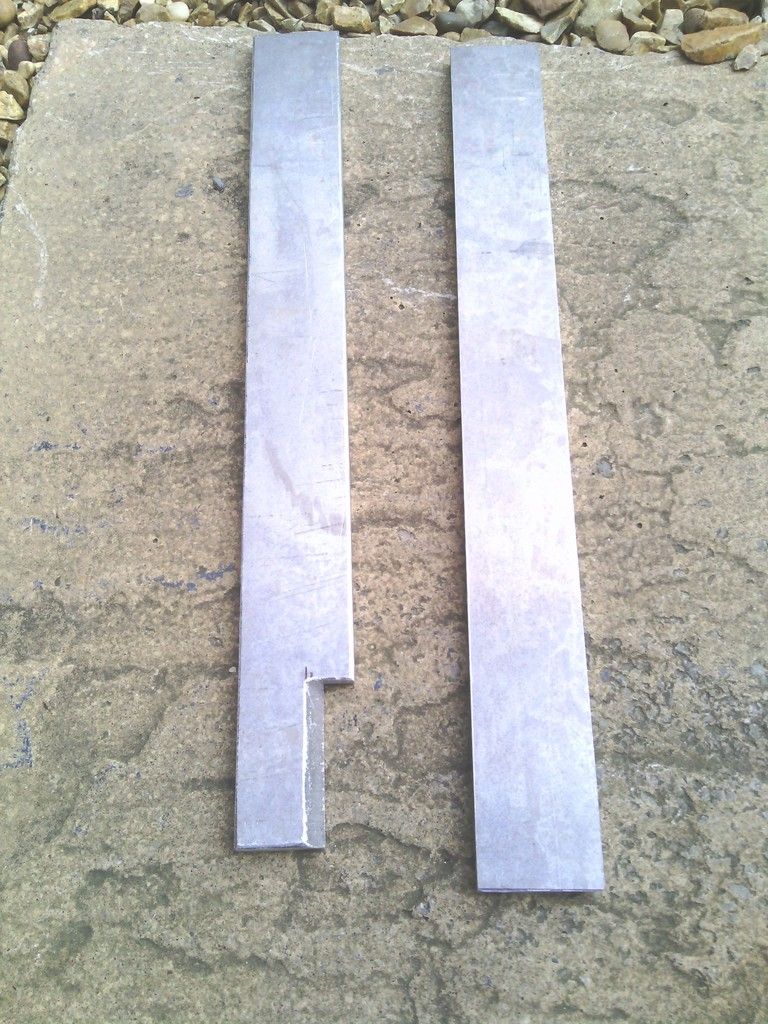
That’s better, the new supports are 10mm thick giving 30mm extra head room, 10mm is the limit as this is the thickness of the sound deadening of the carpet anyway.
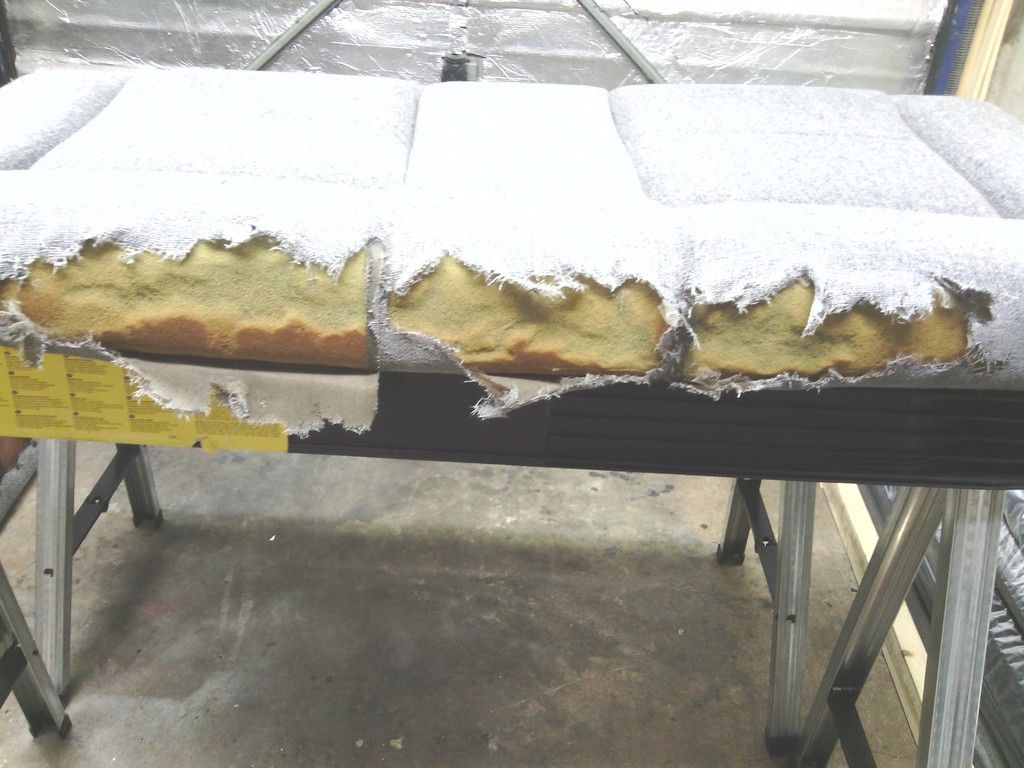
Second job, the backrest.
I unpicked the cover and extracted the foam from within
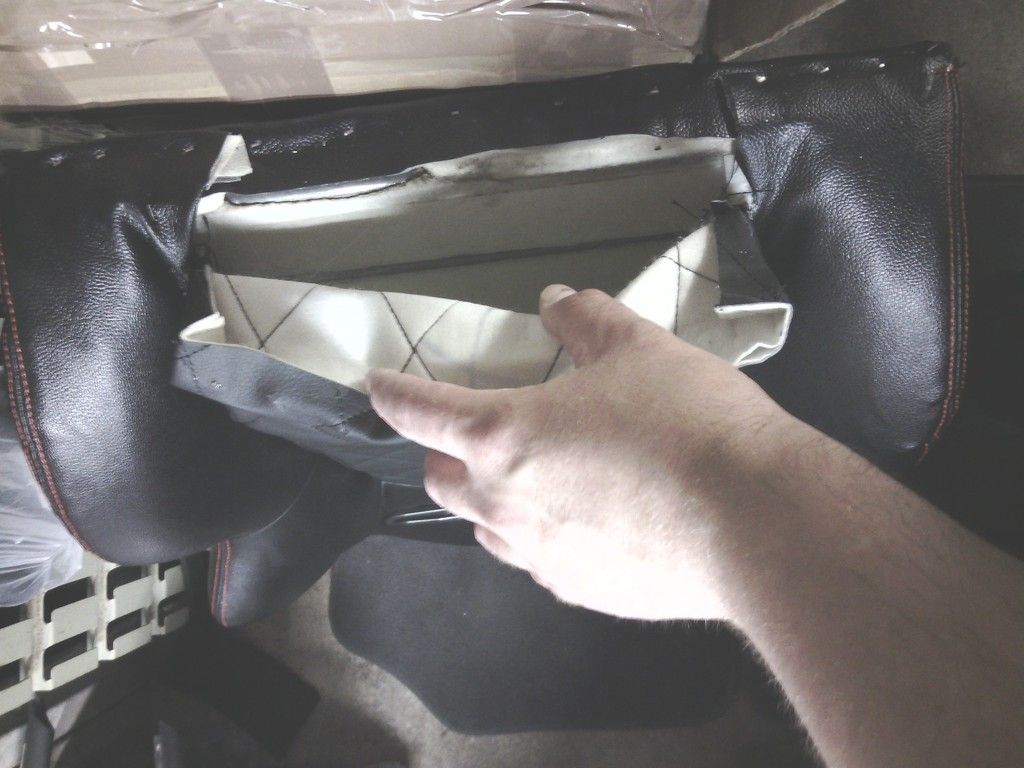
I’ve sat on comfier brick walls and its far too thick at 2” , so now to find some soft foam to re-do it.
But not as easy as you would think, trying to describe squishiness over the phone aint easy.
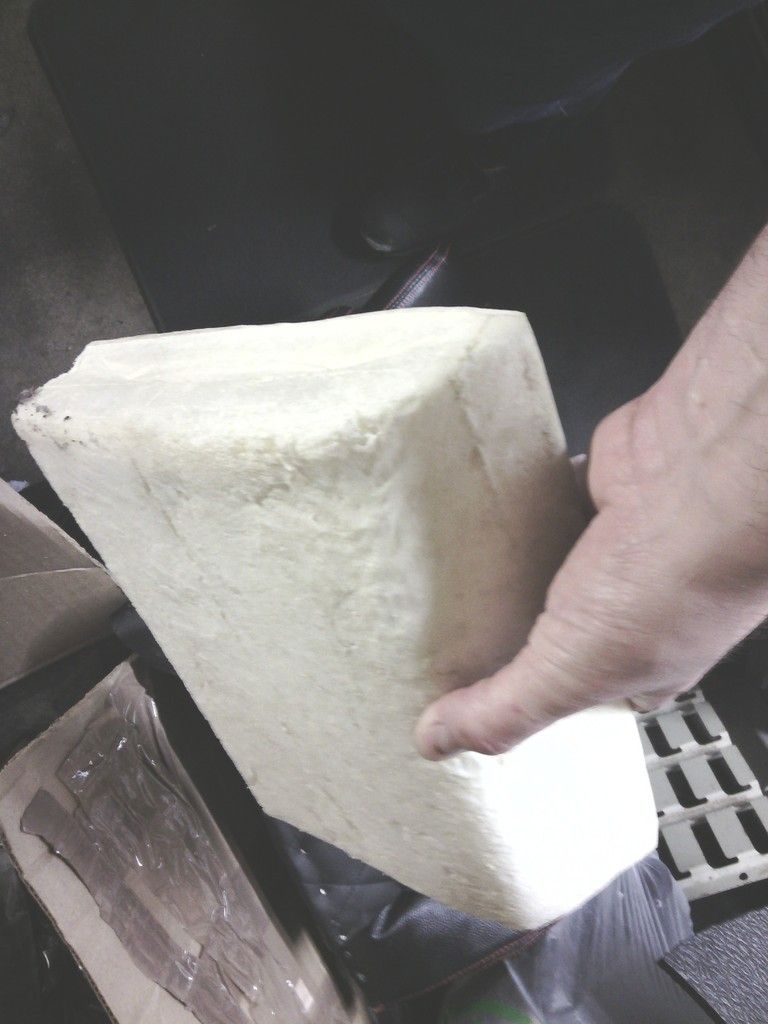
until a chance trip out for baby supplies one day threw up this
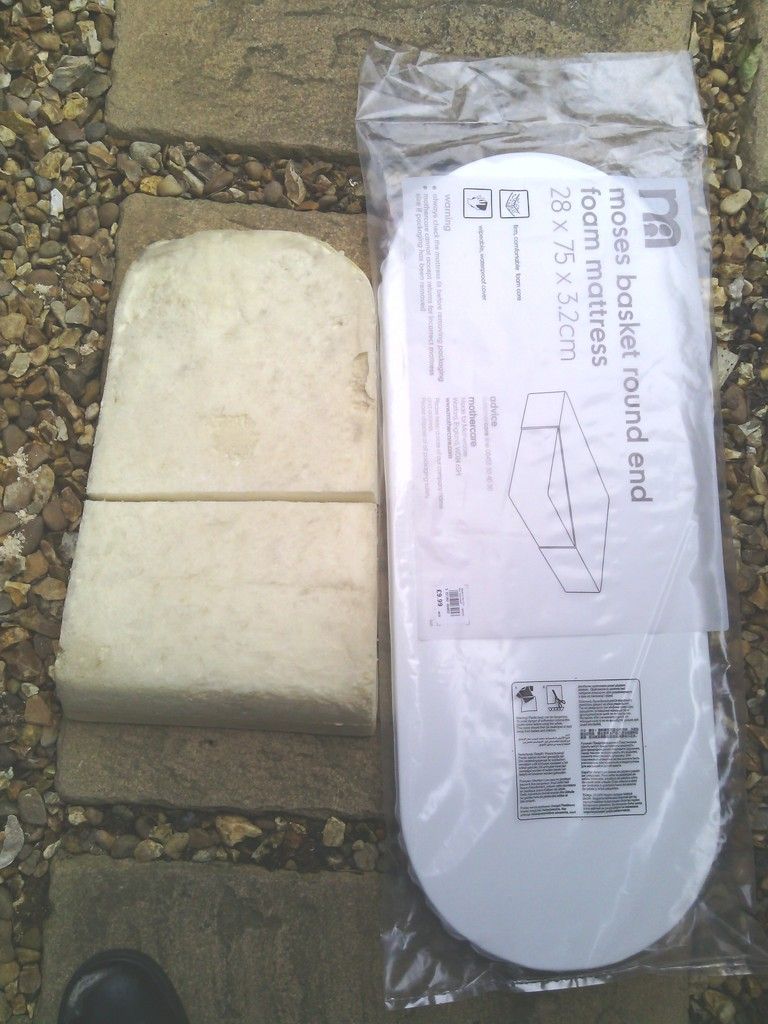
Don’t worry; im not all selfish I’ve given the little un some old car mats to sleep on instead.
Soft enough for a baby to kip on so perfect for me, chopped to shape and glued in and the transformation is complete, the shape is re retained but the size deforms back to lose the 2” in use rectifying that problem – comfy too.
Lastly the width, I’ve considered a few options but for now I’ve chocked up the outer 2 bolts with 5mm spacers, not too much to effect driver position but enough to cant the top edge in to within the door line of the car, as soon as I get chance in the next fortnight ill remove the top cover and tweak the shoulder supports in by 50mm each side to be the same width as the old seats.
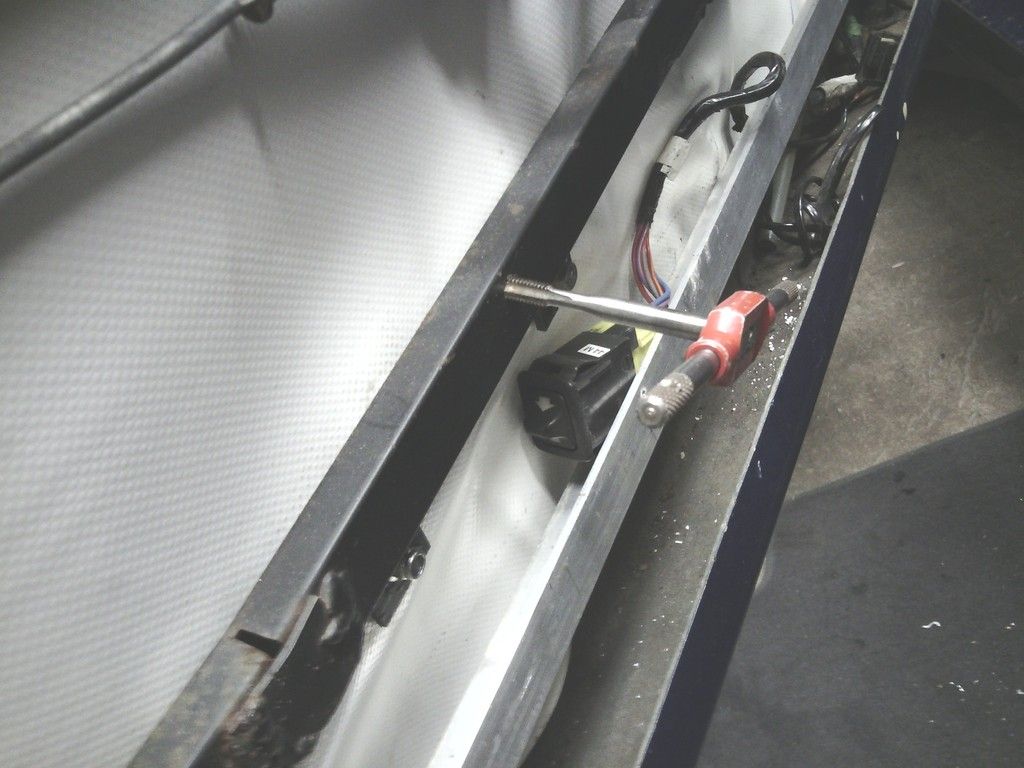
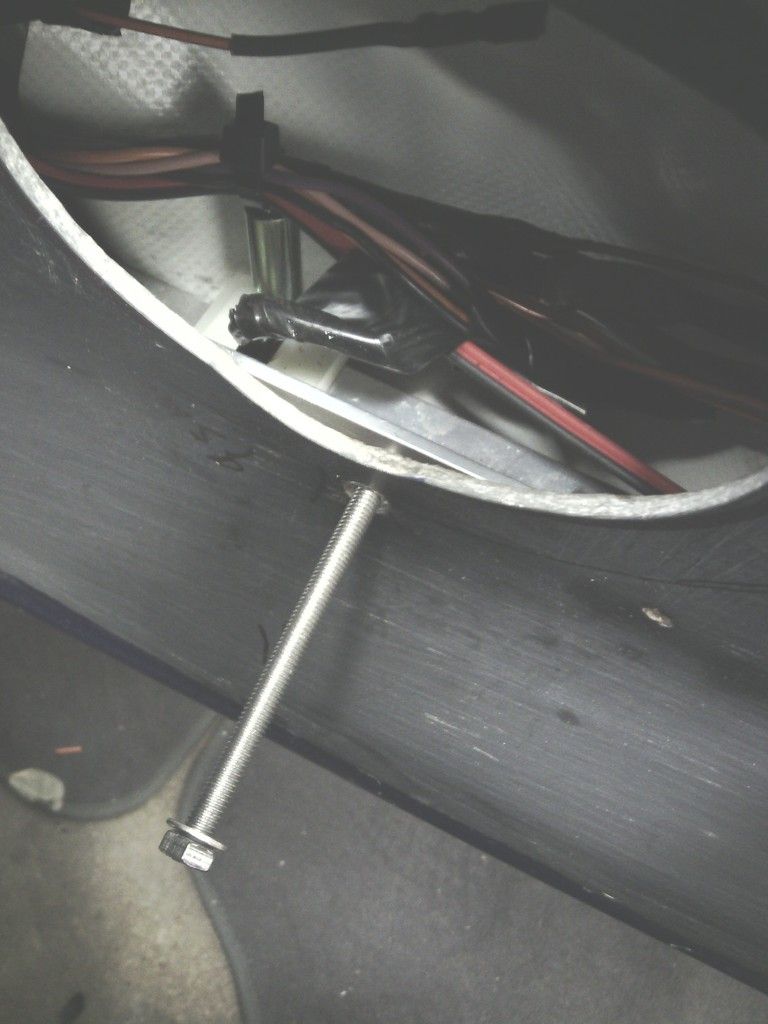
Regarding the fitting, a tip I wish I carried out on the Quantum was to replace the seat sub frame bolts with studs, makes locating and removal so much easier.

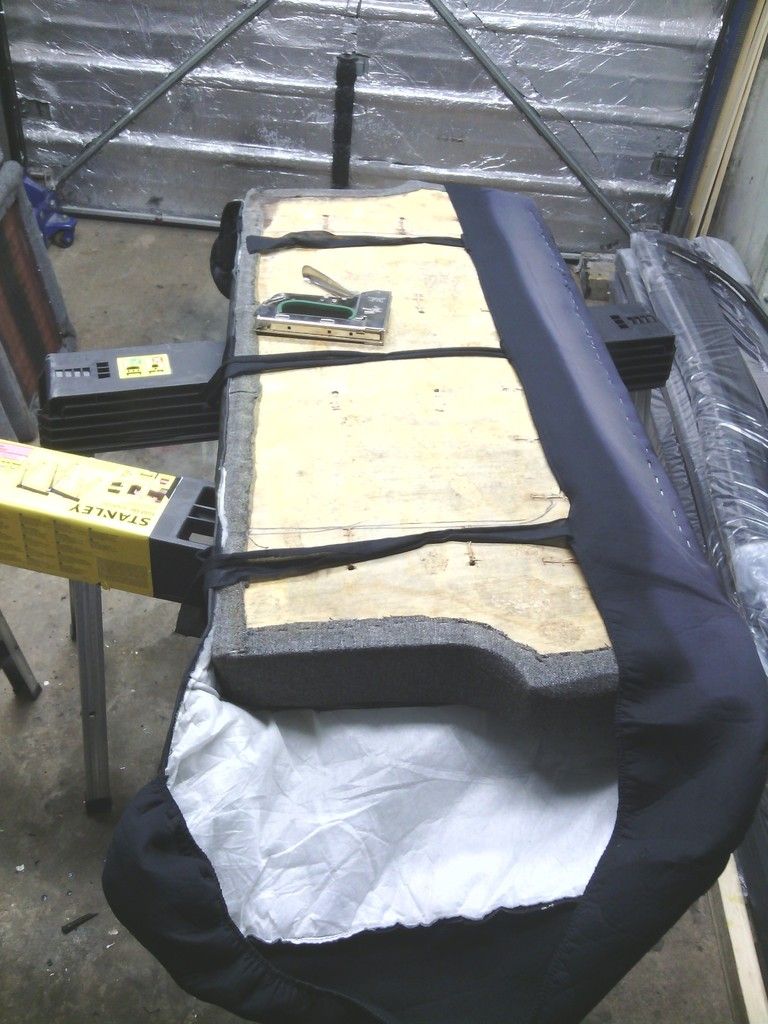
I was glad to get these out the car – dread to think what some of those stains are
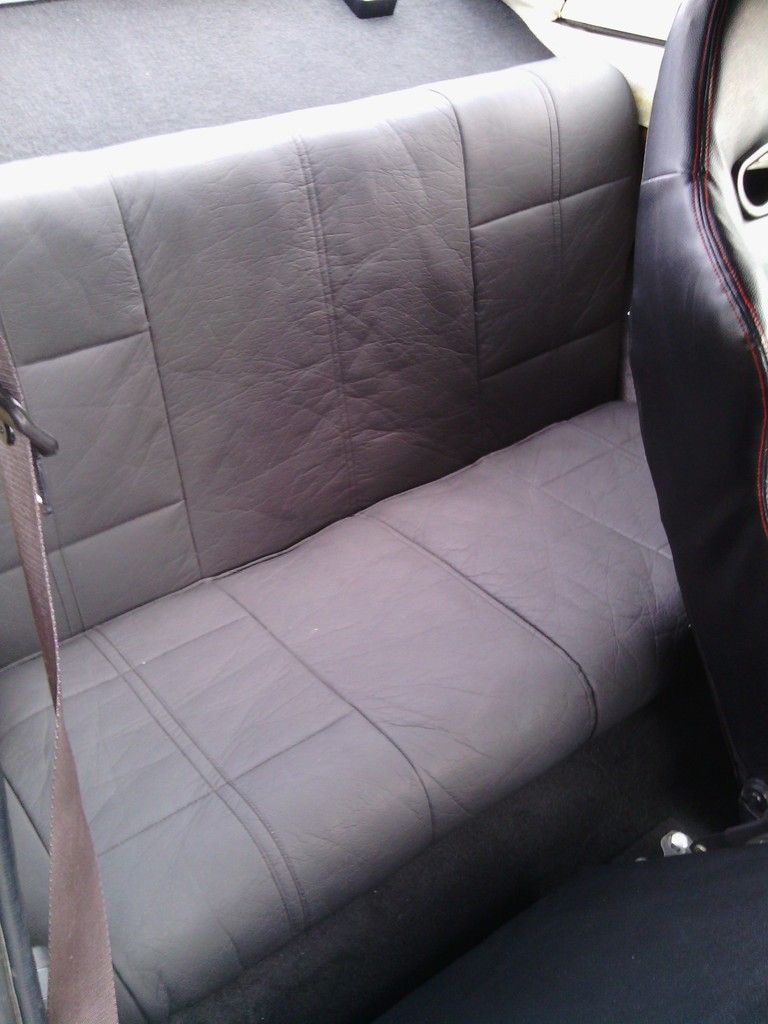
Rear seat back re-trimmed as per the base and that little lot is not looking too bad now, the old back ret looked like it was host to a wrestling match between a rabid badger and a psychotic bear
Old rotten fabric trimmed off

Trimmed up
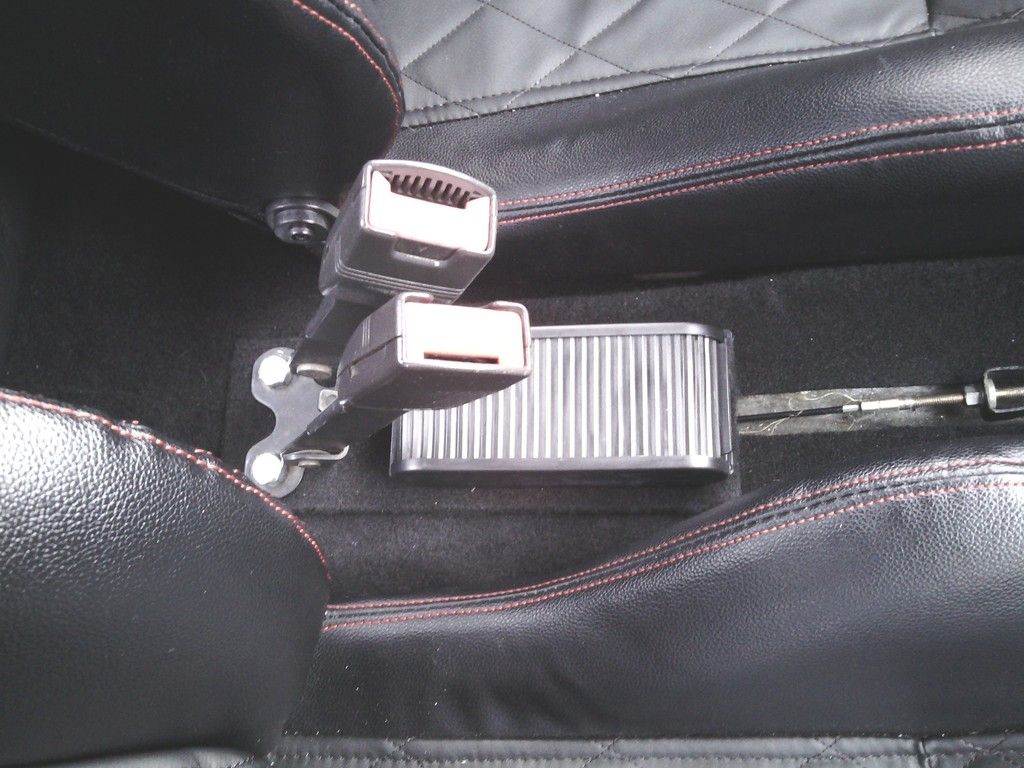
At Stoneleigh I found a nifty roll top storage box on the CBS stand
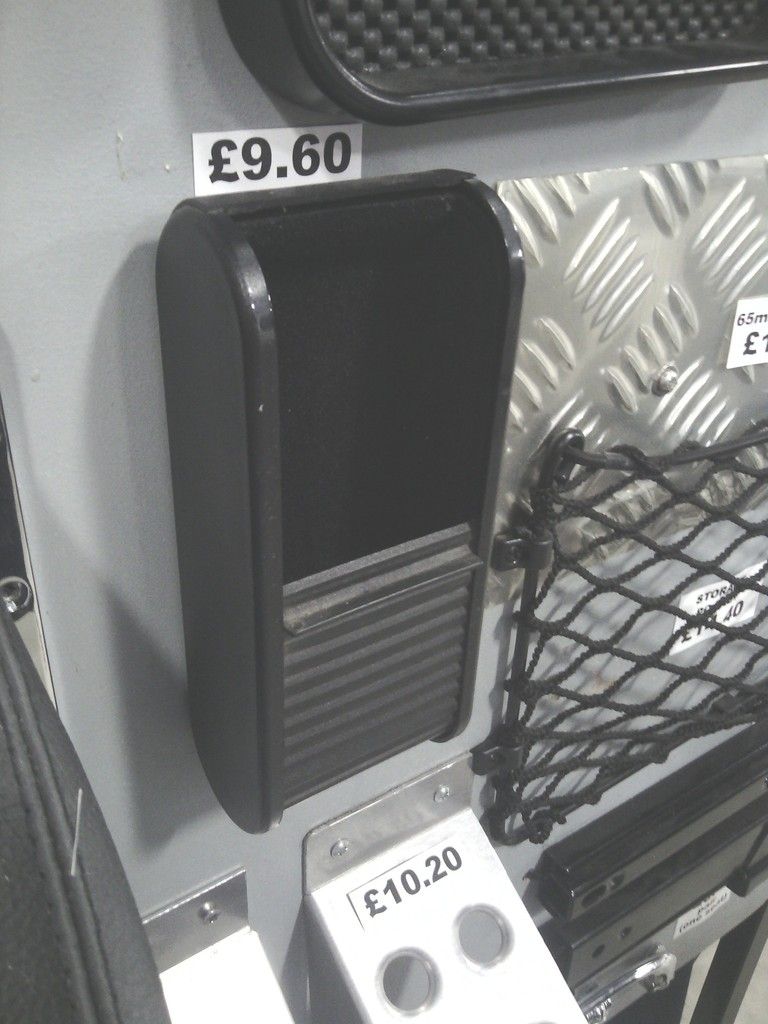
Great idea especially since storage space is at a premium limited to a downward sloping ill-fitting glove box that spits its contents out on the passenger floor when you hit a speed bump so this will come in handy
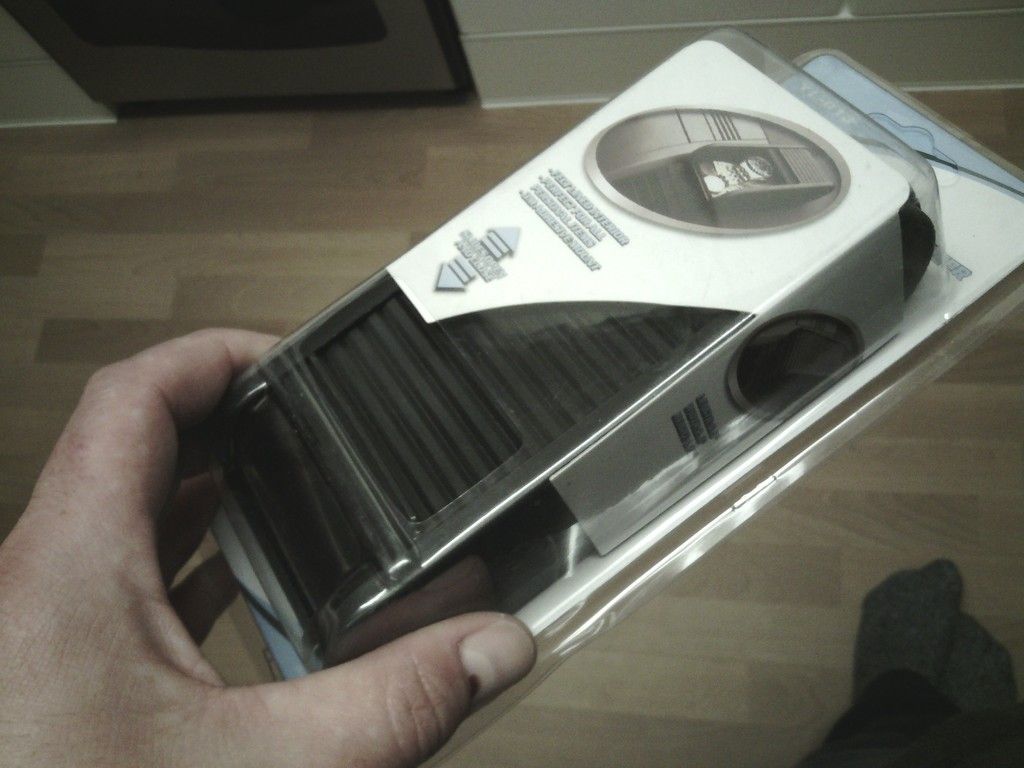
£2.50 delivered from eBay HK
Fitted on its own custom mount
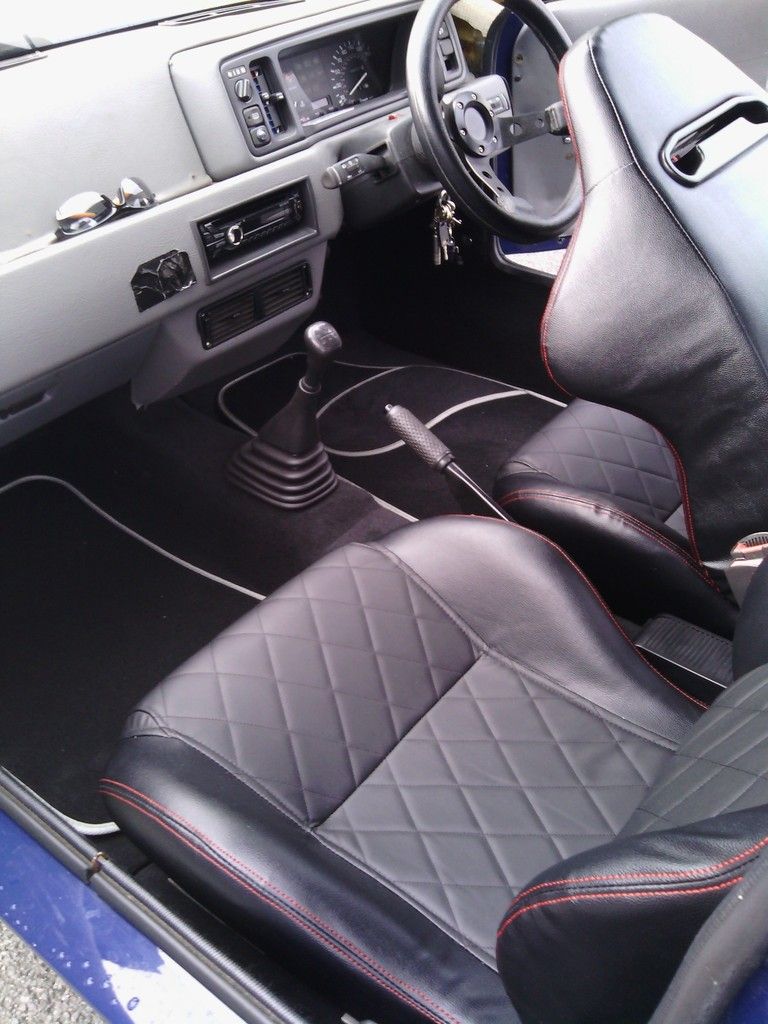

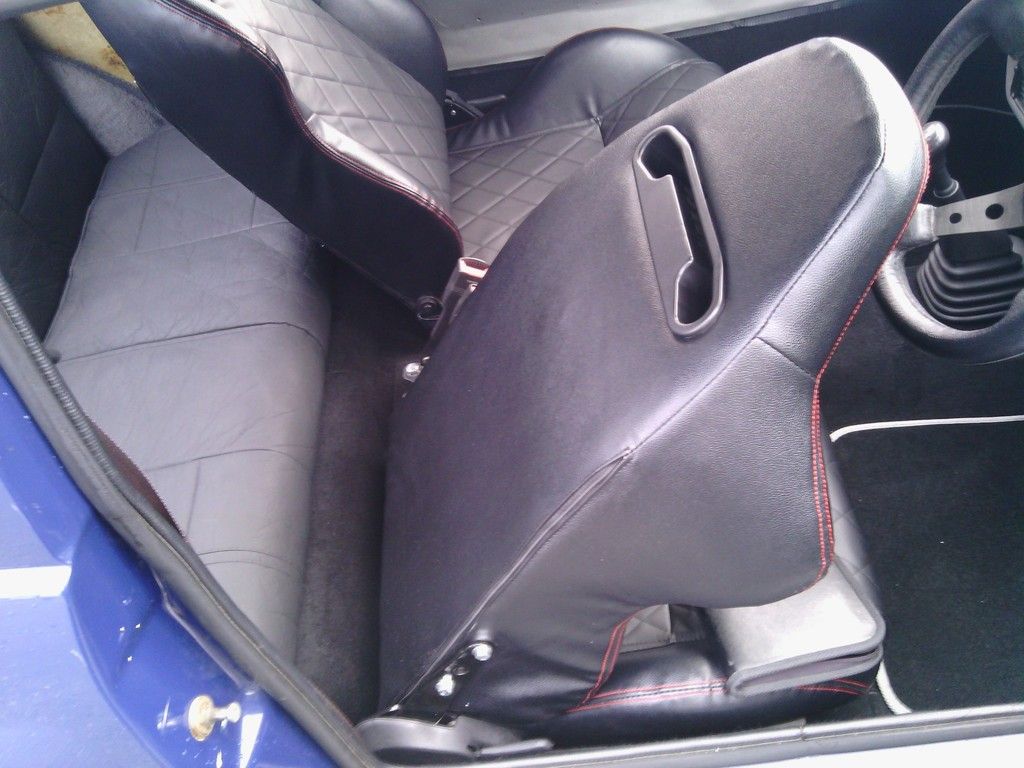
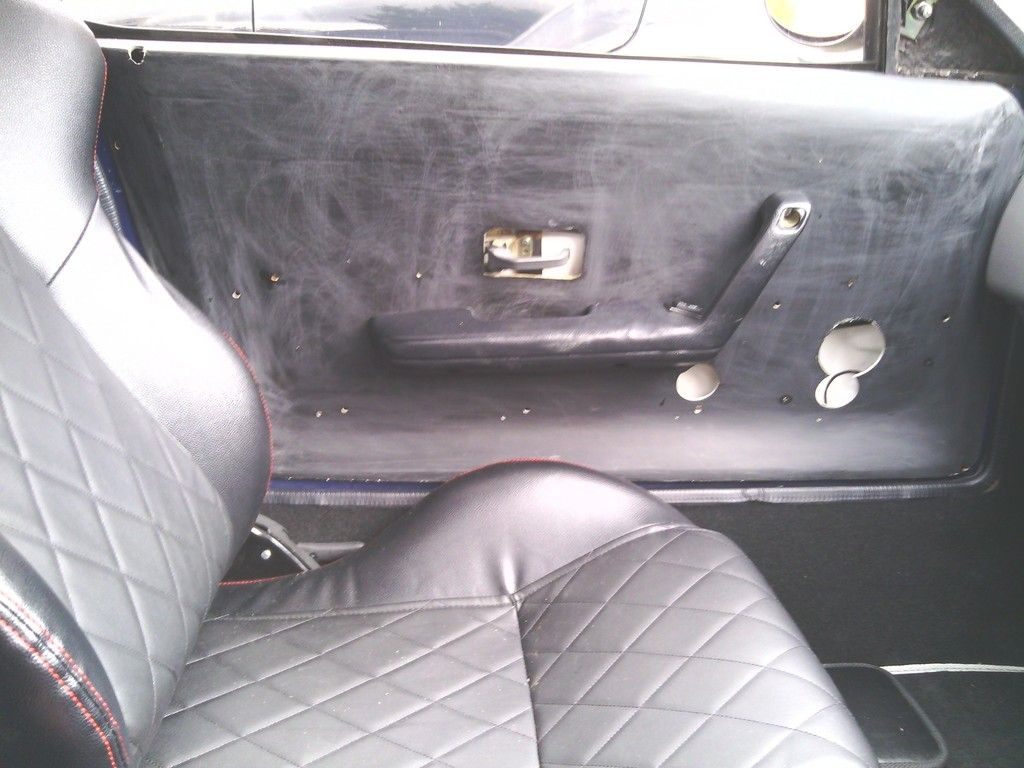
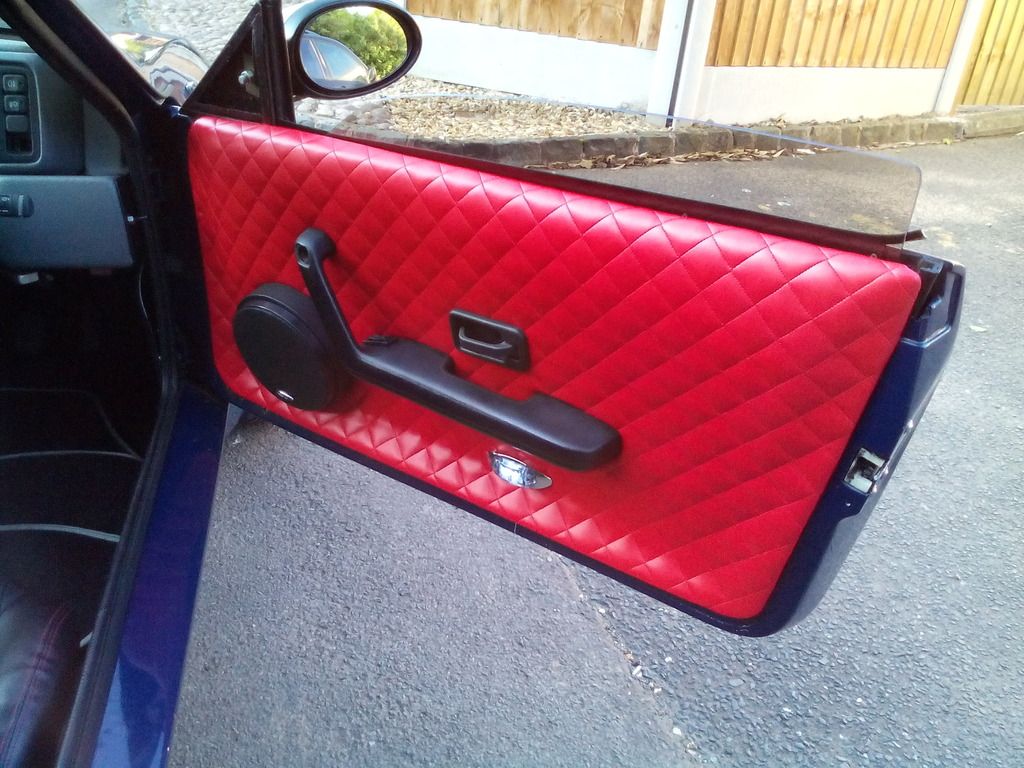
So that’s the seats and carpet almost done – onto the door cards
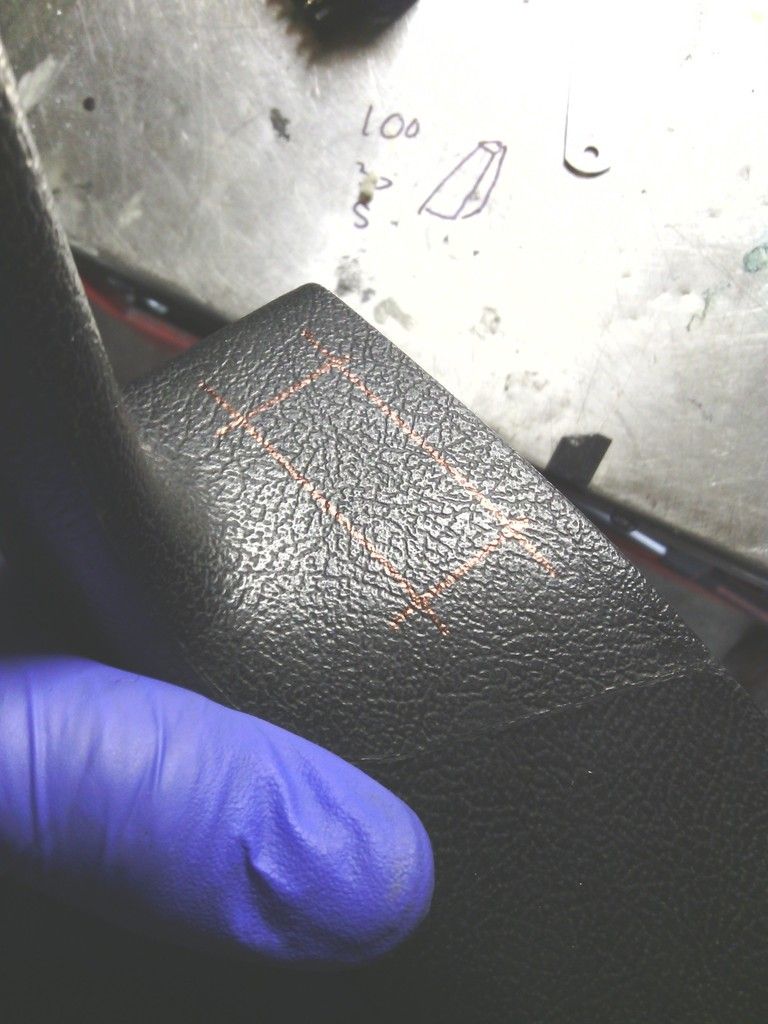
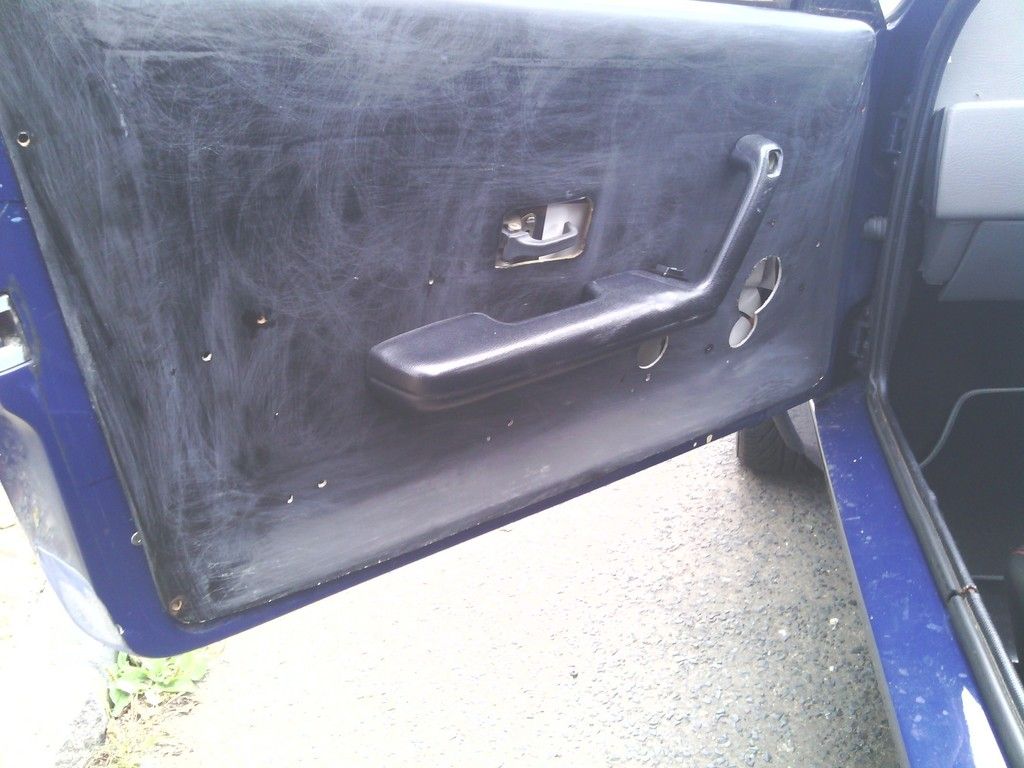
These have given me a headache since I pretty much bought the car, not only were they too deep and got trapped in the door shut but the fit was terrible,
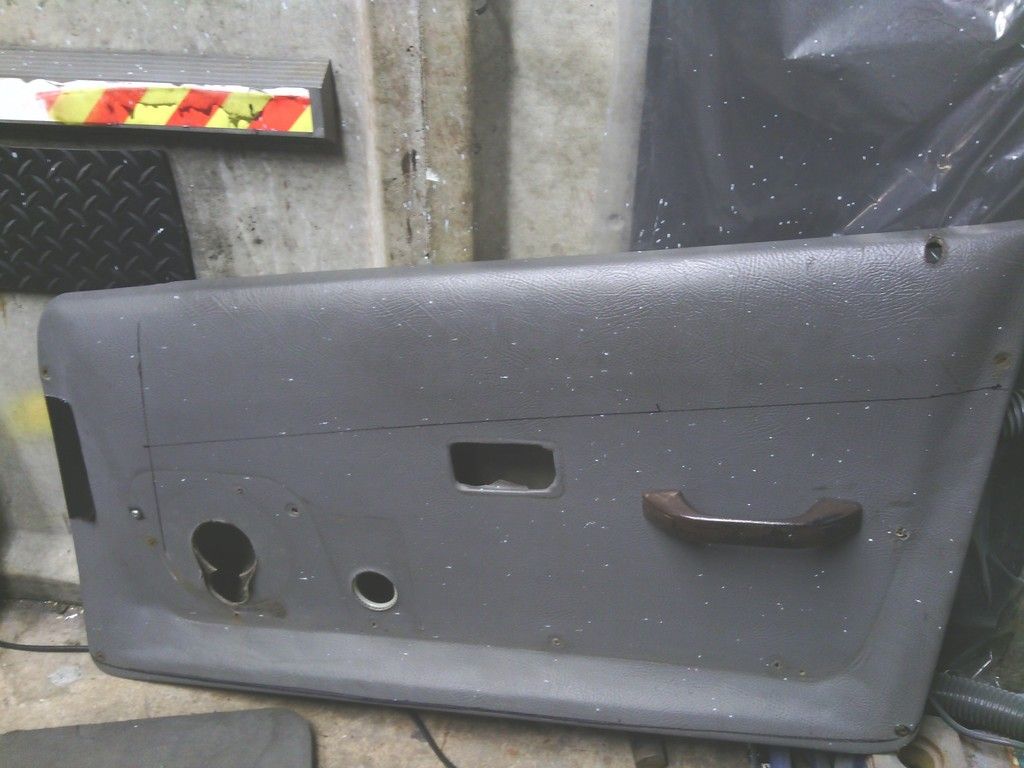
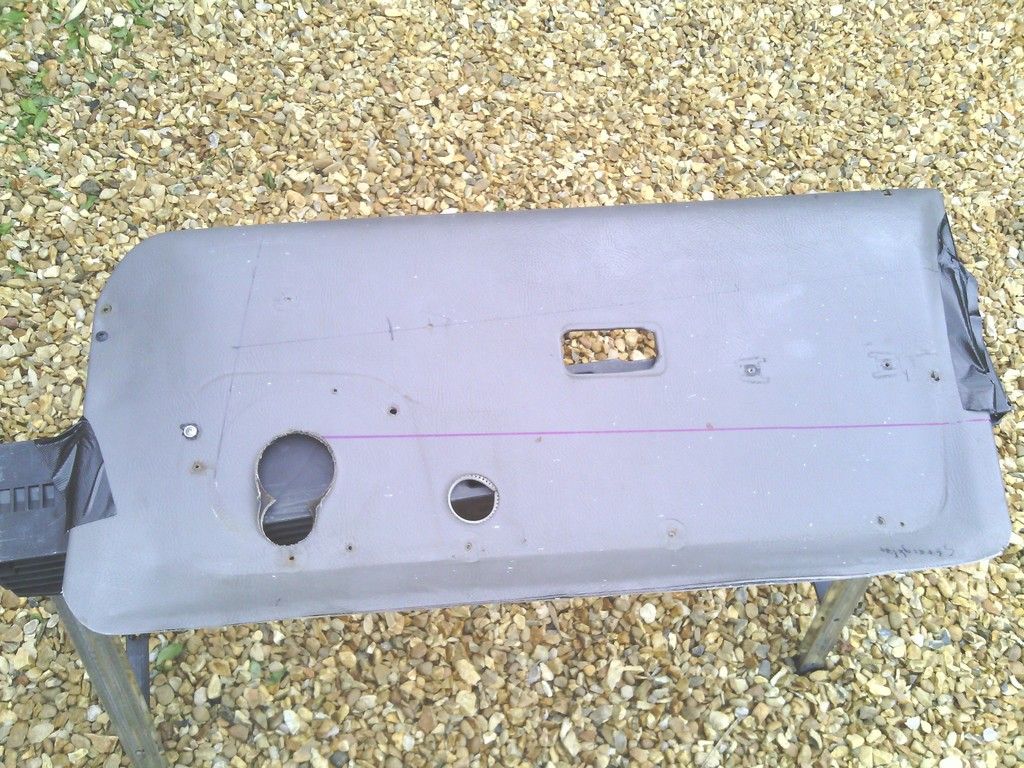
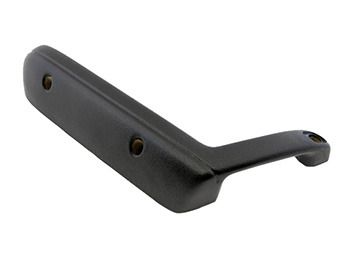
After trimming off the excess marked at the base I set about making some adjustments, first to go was the door pockets, they didn’t fit anyway due to the contoured nature of the Midas door cards leaving gaps all round and the old ones were in such a state id need to replace them anyway, so they got binned, so did the old land rover door pull handle that you had to be a contortionist to use to close the door anyway so this was no hardship, I marked out where the steel frame sat behind the door card with the idea being to secure the door card on using concealed fasteners to do away with the series of self-tappers currently holding on (and not in some places) the periphery of the door card,
A couple more adjustments made to clear the door glass
And some tweaking of the card itself, there was a 20mm gap at the widest point in the middle where the card didn’t sit flush to the door
Must be an age thing, so I corrected it by clamping it with wood at the base and weighting the card to pull the bottom lip in tight to the door, a fan heater was left on all night to soften the fiberglass to allow bending,
Don’t worry, full safety precautions were taken regarding the heater –I made sure the wife was out for the weekend first….
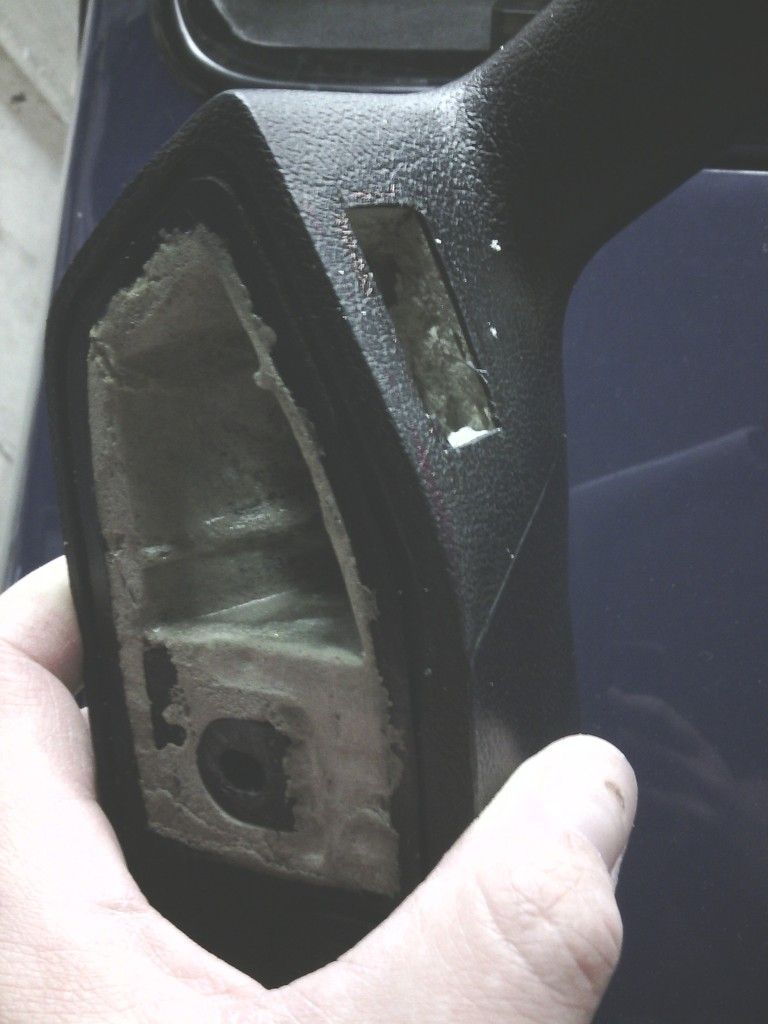
That sorted I had to find new inner handles, I wanted something more modern looking so opted for some MX5 units,
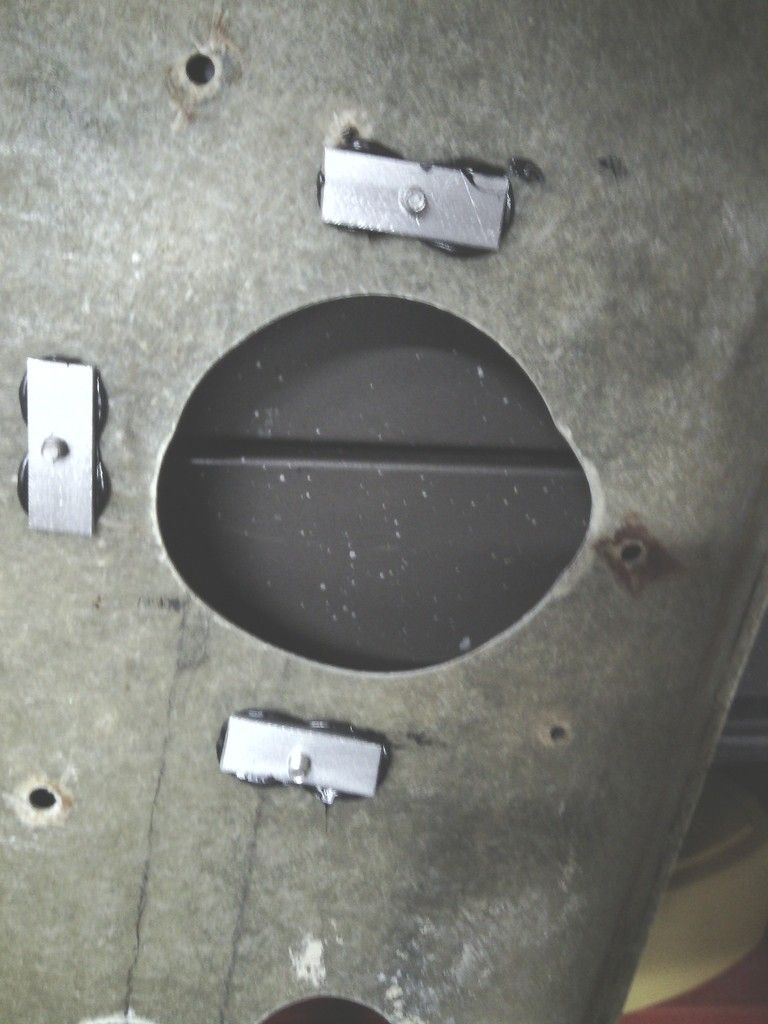
3 fixing bolts are used on these so I marked out and drilled into the steel frame inside the door through the door card then tapped the hole M6
Fitted studs to them to reduce strain on the fixing and locate the door card easier, the upper handle bolt needed a small bracket making to tie in to the inner door frame
All 3 fixings in place
This set up looked better and offered an arm rest, something I was lacking, but left no space for a door pocket, not much of a hardship because with the new seats I’m lucky to close the door anyway but the old pockets also housed the speakers and electric window switches,
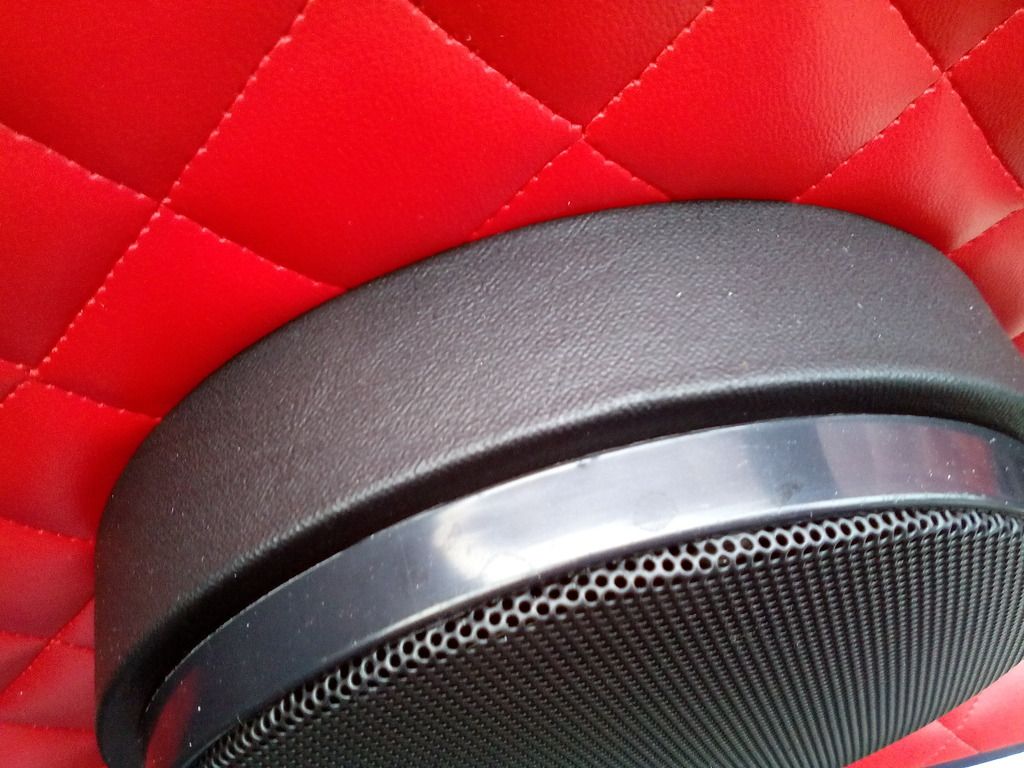
The speakers won’t be too much of a problem, I’ve ordered some 5.25” units that match my rears with their own grills so all good there, the plan is to use one of the speaker grill screws to secure the lower front corner of the door card to the alloy frame I made some time ago to secure the door card
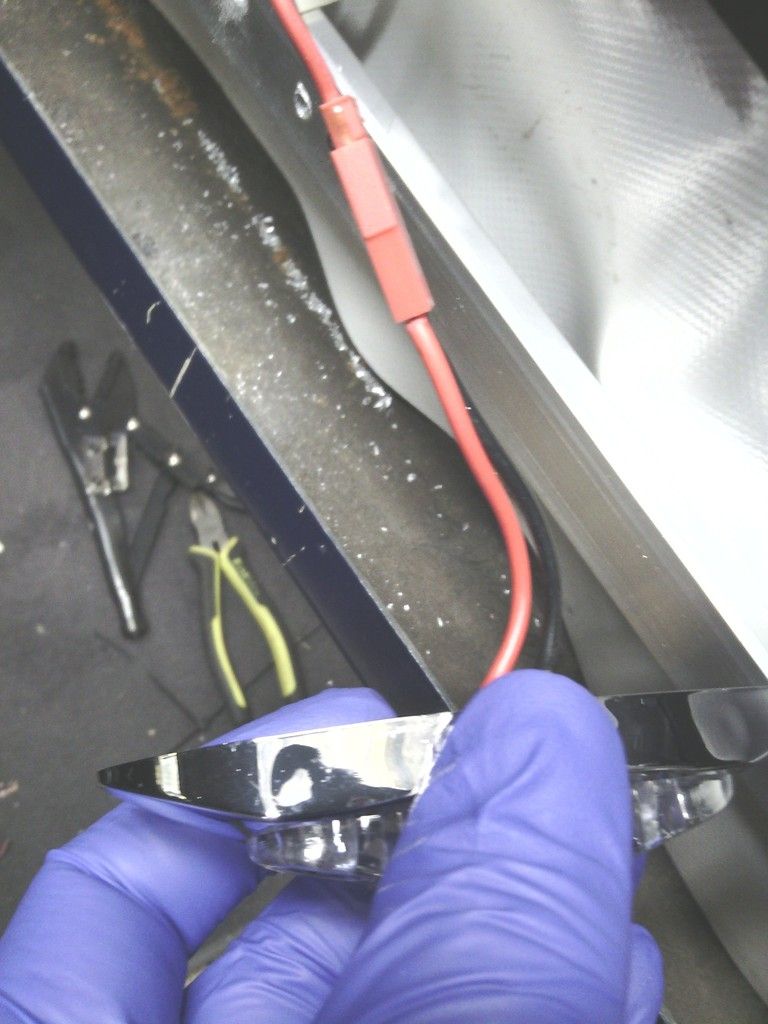
Again a subtle fixing, but the electric window switches needed some thinking.
Then I noticed the MX5 handles were hollow so a plan was hatched to mount the switches within
The old ones were too tall to fit in the small space inside
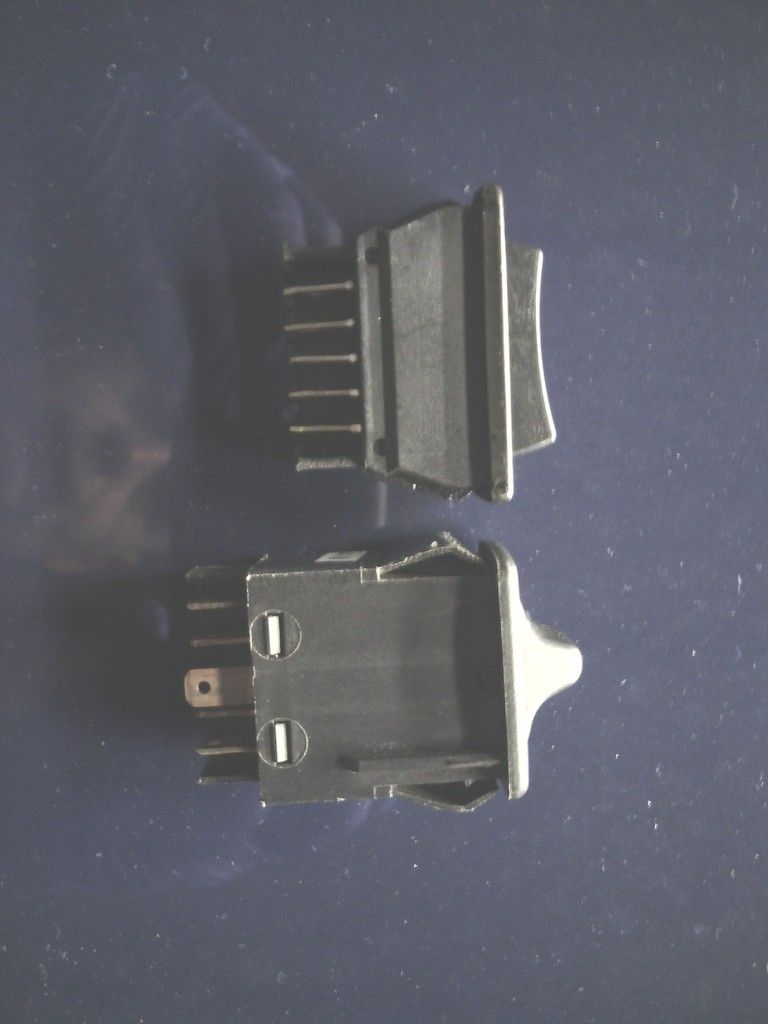
I bought some replacements with the intention to rewire them into the car but much to my amazement with a small modification to the new switch the rover plug fits straight on – so totally reversible if needed
The handle was hollowed out with Stanley knives and nerves of steel; I almost lost 11 fingers –
Plugged in and all fitted on the whole assembly is much neater.
It would have been nice to keep the double switch on the drivers side but there was not enough room in the MX5 handle to do so, anyway since I can reach the passenger side door without fully extending my arm I don’t think its too much of an issue.
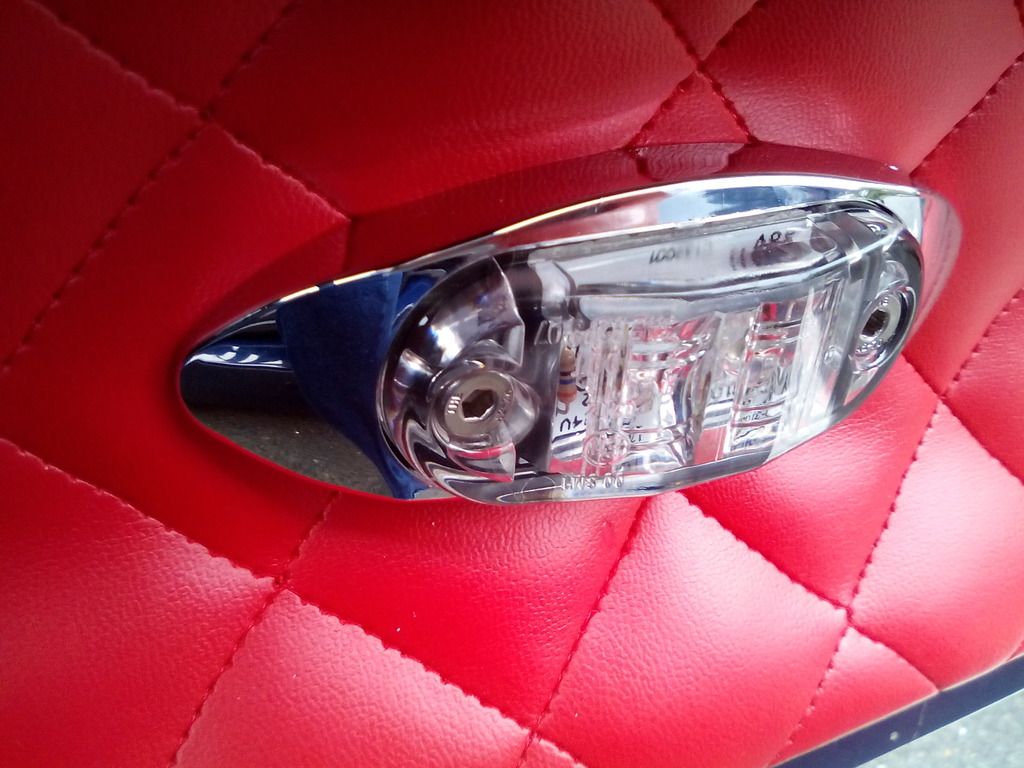
I’ve ordered a small LED courtesy light to fit to the rear of each door to offer more lighting but more importantly to secure the rear lower corner of the door card to the door but to be honest such is the amount of work carried out to make them fit better they fit perfect with just the handle screws, any more is just a bonus.
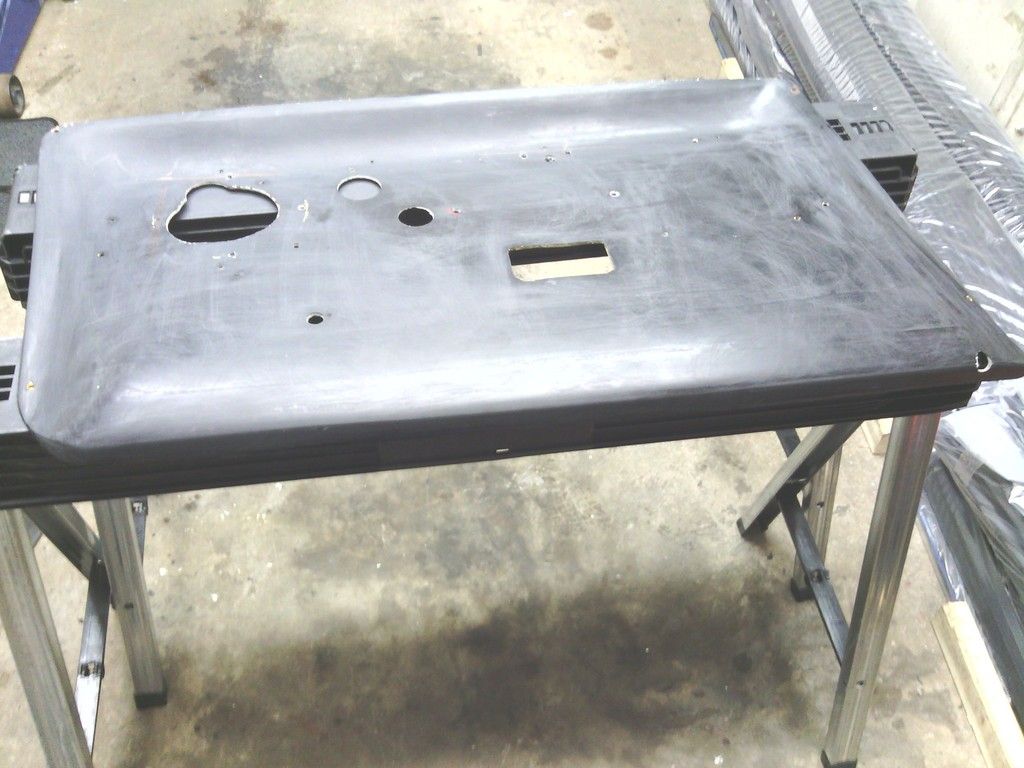
Next to do – re-cover the cards and fit speakers and rear inner side panels – retrim the dash….
Left off last time with the carpet pretty much finished along with the rear seat base.
In between these jobs I had been on the lookout for some new front seats, preferably vinyl / leather bucket seats.
After many weeks searching I happened upon some new ones on eBay bought in error by the seller and re-listed half price, I recognised the type from when I had the Quantum and I wanted a set for that, just couldn’t justify the £350 asking price when I had a perfectly good pair already fitted – no such dilemma in the Midas, the current seats were awful to the point I considered recovering them in bin bags they were that bad, so £150 shelled out and they were on my doorstep 24 hours later

48 hours later I sold the runners from them for £45 so these have become a bit of a bargain.
All excitedly I bolted one in with minor adjustments to the home made sub frame and subsequently plonked my arse on them only to find the combo of seat / me and the car didn’t work together – oh pooh

Looking at it the seat base is much thicker on the new seats so I sat around 40mm higher – may not sound like much but with only 10mm headroom to start with I need to loose 30mm off the top of my head, not only that but the rear backrest was a bit of an odd shape all padded at the lower back and the foam was made from wood (or what felt like it ) which pushed me further towards the dash further exaggerating the lack of room, the cherry on the cake was not being able to close the door due to the top section being 100mm wider for the shoulder supports and the Midas tapering in towards the top.
Feeling a bit droopy I kicked the cat and sulked inside the house for a while.
Once id picked my chin up off the floor I browsed the online seating retailers for an alternative and the pickings were slimmer than a racing snake especially if I wanted to recline them, so with nothing left for it I went back in the garage with the view to modify them to fit perfectly or ruin a perfectly good set of new seats.
First job the height of the seat base,
The standard runners were 40mm deep which I copied in better steel when the originals fell apart upon buying the car, not only that but they weren’t positioned in the car well enough considering I had the seat pushed further back due to being 6’ 2”, the white marker on the sill shows the centre of the seat base position in the position I require for driving in relation to the runner supports.


Not ideal, there was some floor flex,
So 2 new runner supports were made from 50mm wide aluminium plate which is better than the standard 40mm wide ones and they were extended 50mm further back down the car to spread the load


That’s better, the new supports are 10mm thick giving 30mm extra head room, 10mm is the limit as this is the thickness of the sound deadening of the carpet anyway.
Second job, the backrest.
I unpicked the cover and extracted the foam from within


I’ve sat on comfier brick walls and its far too thick at 2” , so now to find some soft foam to re-do it.
But not as easy as you would think, trying to describe squishiness over the phone aint easy.
until a chance trip out for baby supplies one day threw up this

Don’t worry; im not all selfish I’ve given the little un some old car mats to sleep on instead.
Soft enough for a baby to kip on so perfect for me, chopped to shape and glued in and the transformation is complete, the shape is re retained but the size deforms back to lose the 2” in use rectifying that problem – comfy too.

Lastly the width, I’ve considered a few options but for now I’ve chocked up the outer 2 bolts with 5mm spacers, not too much to effect driver position but enough to cant the top edge in to within the door line of the car, as soon as I get chance in the next fortnight ill remove the top cover and tweak the shoulder supports in by 50mm each side to be the same width as the old seats.
Regarding the fitting, a tip I wish I carried out on the Quantum was to replace the seat sub frame bolts with studs, makes locating and removal so much easier.

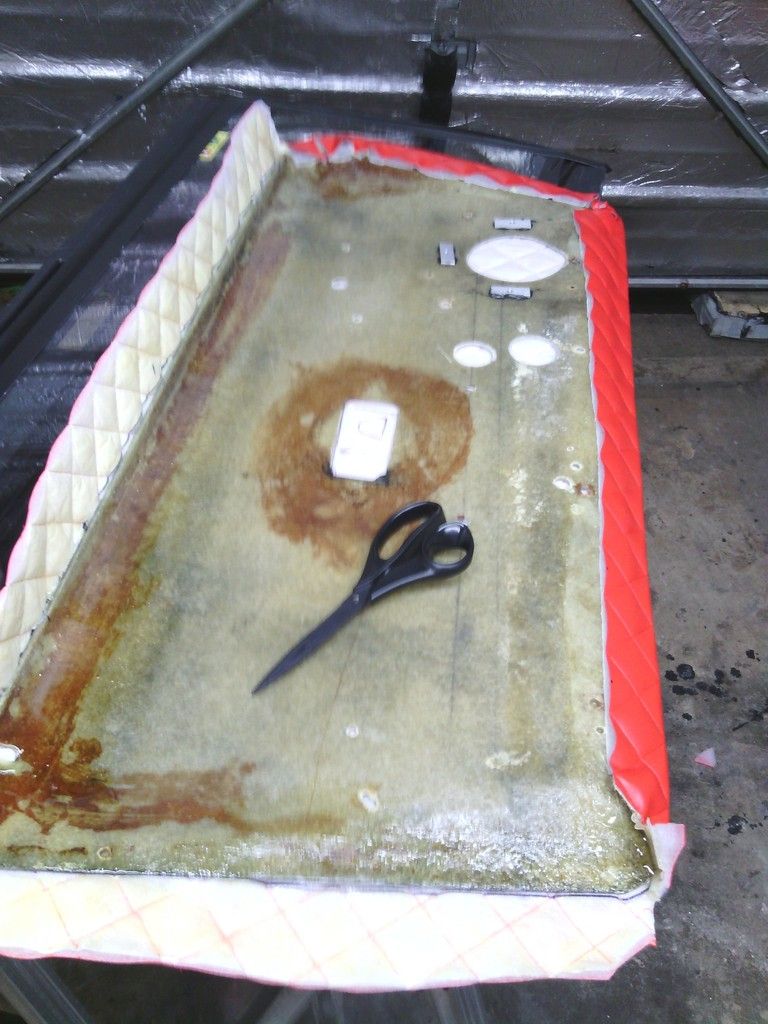
I was glad to get these out the car – dread to think what some of those stains are

Rear seat back re-trimmed as per the base and that little lot is not looking too bad now, the old back ret looked like it was host to a wrestling match between a rabid badger and a psychotic bear

Old rotten fabric trimmed off

Trimmed up


At Stoneleigh I found a nifty roll top storage box on the CBS stand

Great idea especially since storage space is at a premium limited to a downward sloping ill-fitting glove box that spits its contents out on the passenger floor when you hit a speed bump so this will come in handy

£2.50 delivered from eBay HK
Fitted on its own custom mount


So that’s the seats and carpet almost done – onto the door cards
These have given me a headache since I pretty much bought the car, not only were they too deep and got trapped in the door shut but the fit was terrible,

After trimming off the excess marked at the base I set about making some adjustments, first to go was the door pockets, they didn’t fit anyway due to the contoured nature of the Midas door cards leaving gaps all round and the old ones were in such a state id need to replace them anyway, so they got binned, so did the old land rover door pull handle that you had to be a contortionist to use to close the door anyway so this was no hardship, I marked out where the steel frame sat behind the door card with the idea being to secure the door card on using concealed fasteners to do away with the series of self-tappers currently holding on (and not in some places) the periphery of the door card,

A couple more adjustments made to clear the door glass

And some tweaking of the card itself, there was a 20mm gap at the widest point in the middle where the card didn’t sit flush to the door
Must be an age thing, so I corrected it by clamping it with wood at the base and weighting the card to pull the bottom lip in tight to the door, a fan heater was left on all night to soften the fiberglass to allow bending,
Don’t worry, full safety precautions were taken regarding the heater –I made sure the wife was out for the weekend first….
That sorted I had to find new inner handles, I wanted something more modern looking so opted for some MX5 units,

3 fixing bolts are used on these so I marked out and drilled into the steel frame inside the door through the door card then tapped the hole M6

Fitted studs to them to reduce strain on the fixing and locate the door card easier, the upper handle bolt needed a small bracket making to tie in to the inner door frame

All 3 fixings in place

This set up looked better and offered an arm rest, something I was lacking, but left no space for a door pocket, not much of a hardship because with the new seats I’m lucky to close the door anyway but the old pockets also housed the speakers and electric window switches,
The speakers won’t be too much of a problem, I’ve ordered some 5.25” units that match my rears with their own grills so all good there, the plan is to use one of the speaker grill screws to secure the lower front corner of the door card to the alloy frame I made some time ago to secure the door card
Again a subtle fixing, but the electric window switches needed some thinking.
Then I noticed the MX5 handles were hollow so a plan was hatched to mount the switches within
The old ones were too tall to fit in the small space inside

I bought some replacements with the intention to rewire them into the car but much to my amazement with a small modification to the new switch the rover plug fits straight on – so totally reversible if needed
The handle was hollowed out with Stanley knives and nerves of steel; I almost lost 11 fingers –


Plugged in and all fitted on the whole assembly is much neater.


It would have been nice to keep the double switch on the drivers side but there was not enough room in the MX5 handle to do so, anyway since I can reach the passenger side door without fully extending my arm I don’t think its too much of an issue.
I’ve ordered a small LED courtesy light to fit to the rear of each door to offer more lighting but more importantly to secure the rear lower corner of the door card to the door but to be honest such is the amount of work carried out to make them fit better they fit perfect with just the handle screws, any more is just a bonus.
Next to do – re-cover the cards and fit speakers and rear inner side panels – retrim the dash….
https://easywider.co.uk/ universal flexible wheel arch extensions
- Jin
- Posts: 454
- Joined: Fri Aug 01, 2014 10:33 pm
Re: J171 NJO Cortez / 2+2 rebuild and modifications
![]() by Jin » Fri Sep 11, 2015 9:15 pm
by Jin » Fri Sep 11, 2015 9:15 pm
Hi folks
Firstly let me apologise for such a delay in reporting, I’ve not been slacking just very busy but mostly on the car which is no real bad thing.
I left off last time having almost finished the fitting and trimming of the door cards which I’m happy to report now fit perfectly, while on to the fitting, I did mention the intention to utilise the lower speaker bolt to secure the door card to the alloy frame I made inside the door, the 3 remaining speaker bolt holes had tapped M5 threaded plates bonded on
And the lower one fitted up and worked a treat
I also mentioned the LED interior lights that would also act as a securing point for the lower middle section of the door card; these were wired in with some nifty JST connectors
The 2 mounting holes for these also fit into the inner alloy frame I made inside the door
These 2 improvements now mean the door card sits nice and tight to the door and there are no visible fixings holding the door cards on at all.
With all the fitting done it was time for trimming, I pondered this for ages, strong contenders were white, cream , tan and even light blue,
I certainly didn’t want dull grey or black, but in the end I kept coming back to red in my head, helped in part by the red stitching on the seats too, I got loads of samples to look through.
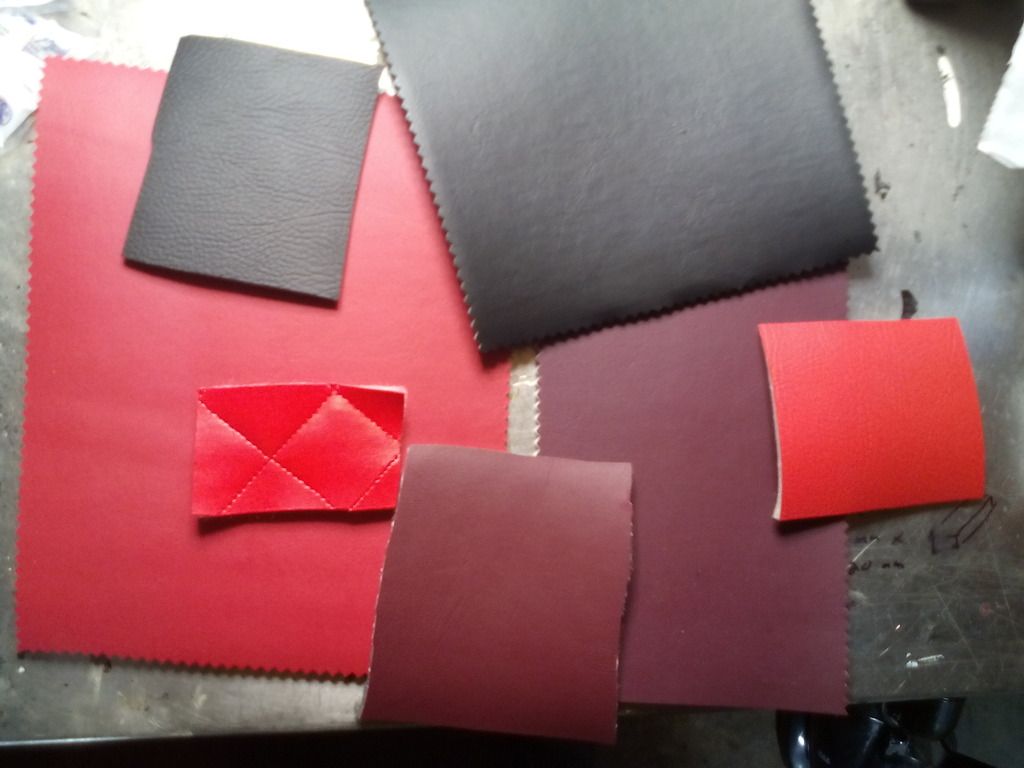
And I’m glad I did because the quality varied widely, I had decided from the outset I wanted foam backed vinyl because it would hide imperfections and help fill in the gaps around the fittings, one of my gripes with the original door cards was the wonky nature around the edges and gaps around the handles, the padding will also add to the quality feel.
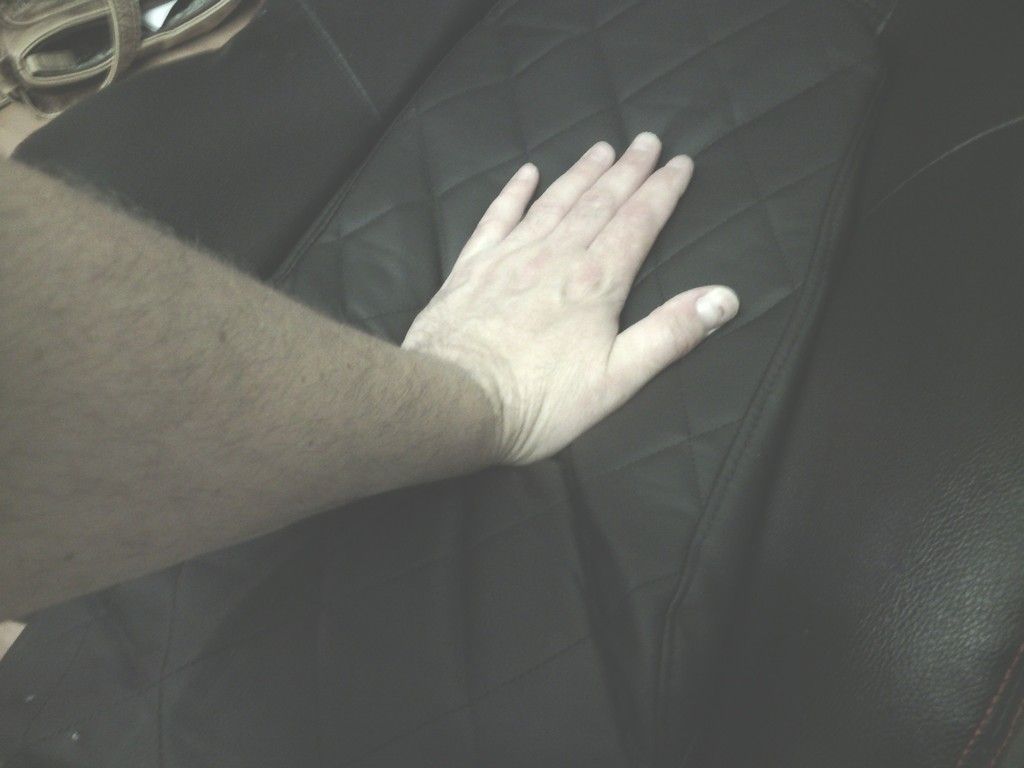
I couldn’t find a red I liked easily, some were too dark with an antique look to them, some were salmon pink in some lights, and it was risky that plain red by itself may seem a bit much, but working with the diamond stitching on the seats I thought I’d follow that through to the door cards also, so a few meters of diamond stitched vinyl on a 3mm backing was ordered
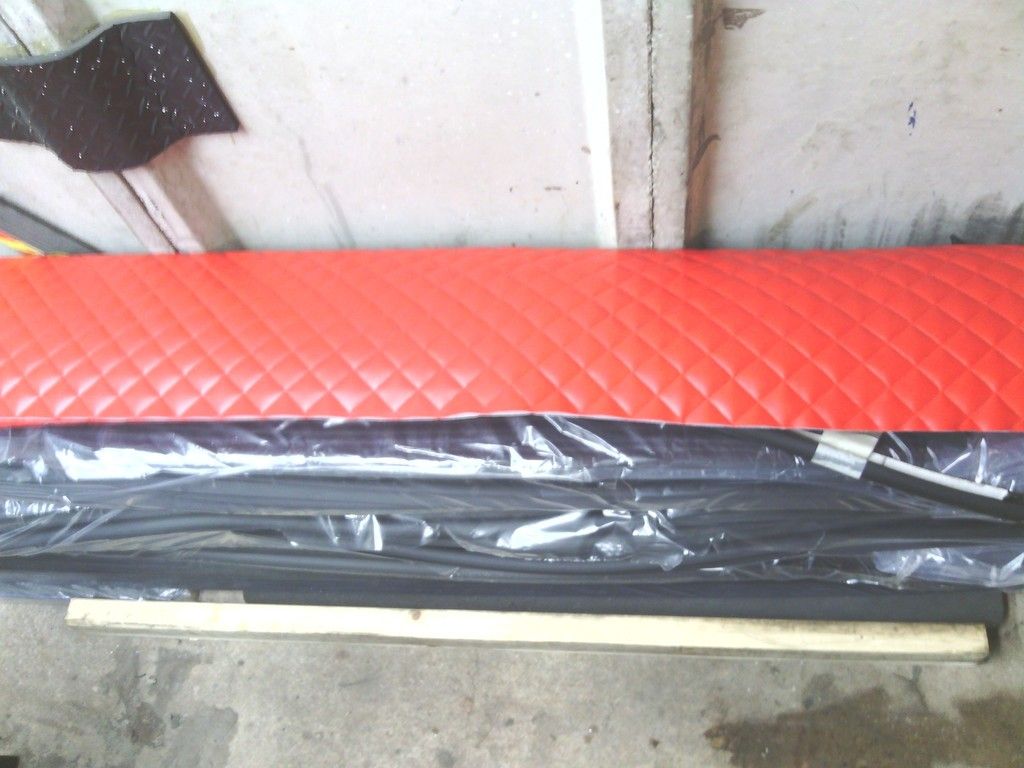
And I set to work
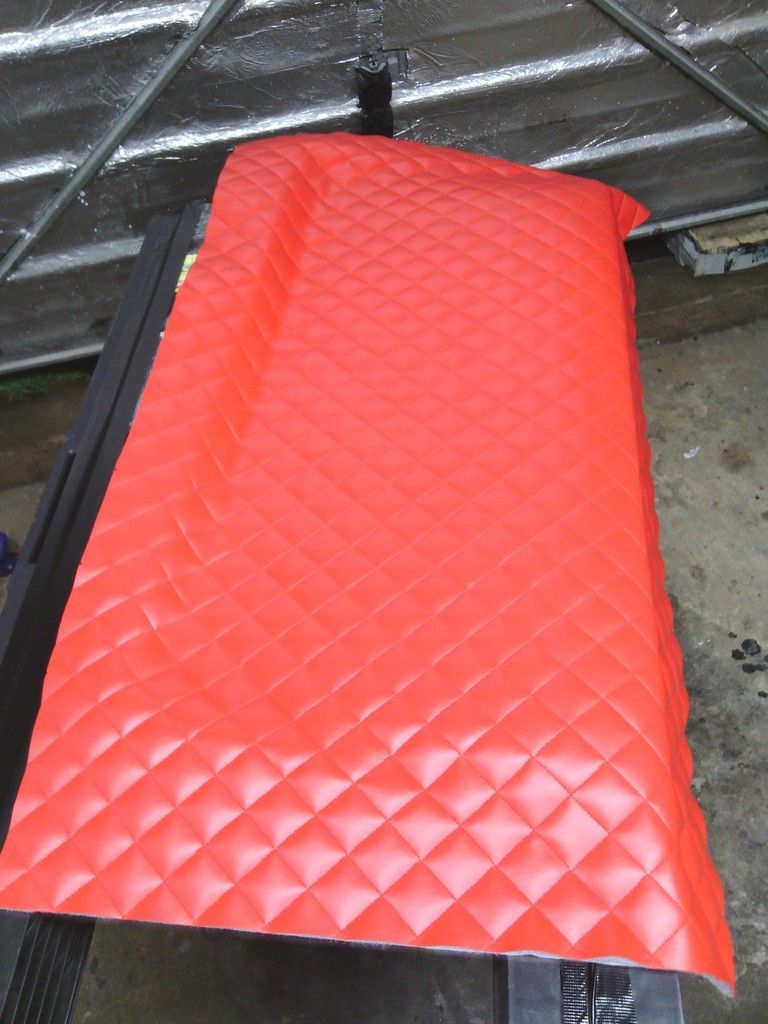
Bonding this stuff is a bit of a pain since it’s not foam backing that’s bonded on it’s a stitched on wadding which delaminates itself as you glue it, I got through a fair bit of evostik in the process but the result was worth the effort
The speakers didn’t fit flush to the door card due to the steel frame inside so I bought some mdf 30mm spacers and covered them in nice stretchy vinyl
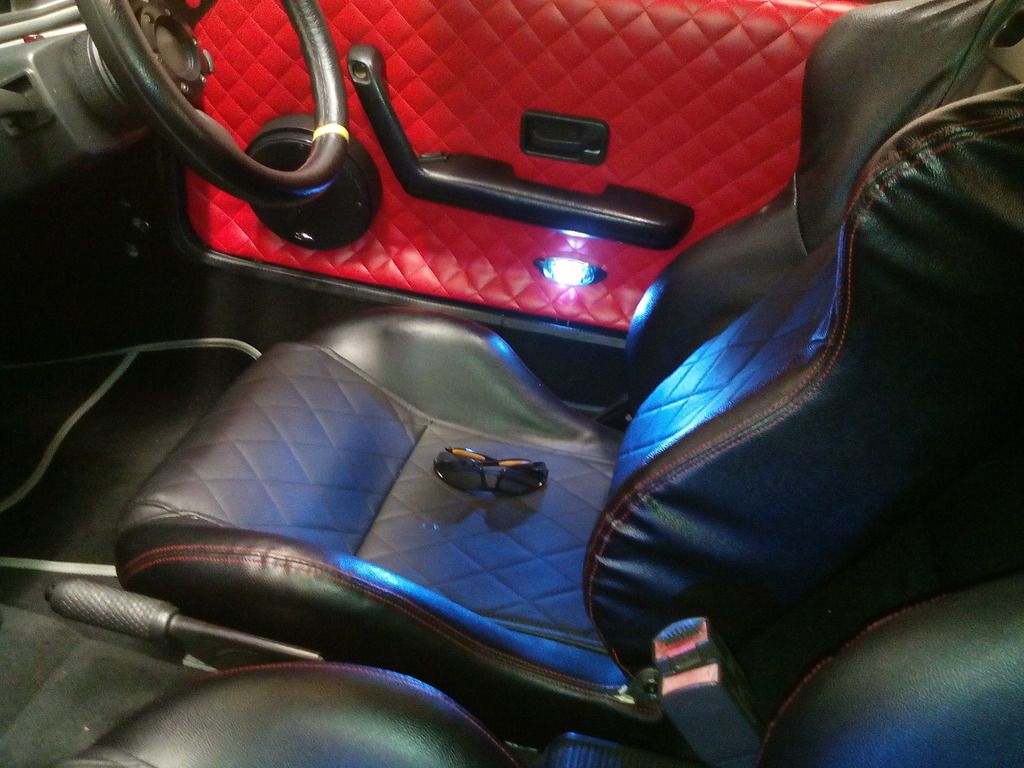
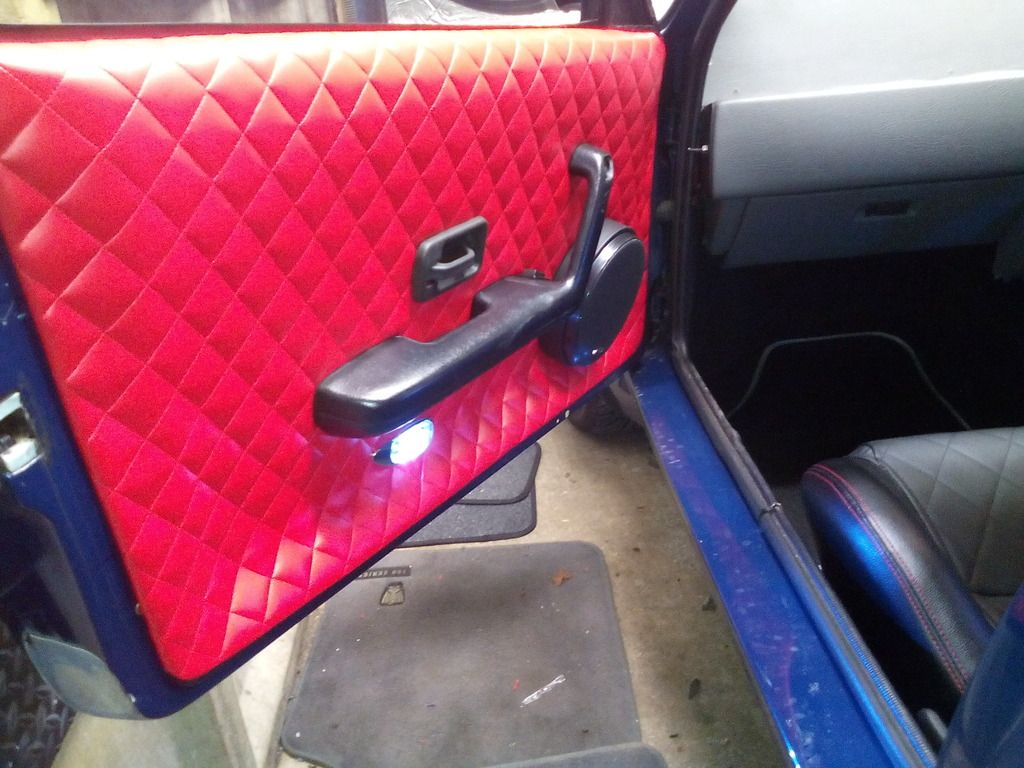
The result is better than I imagined, the illumination from the led lights is amazing too, with those and the mirror lights the car is very well lit up now – a far cry from no illumination at all when I bought it,
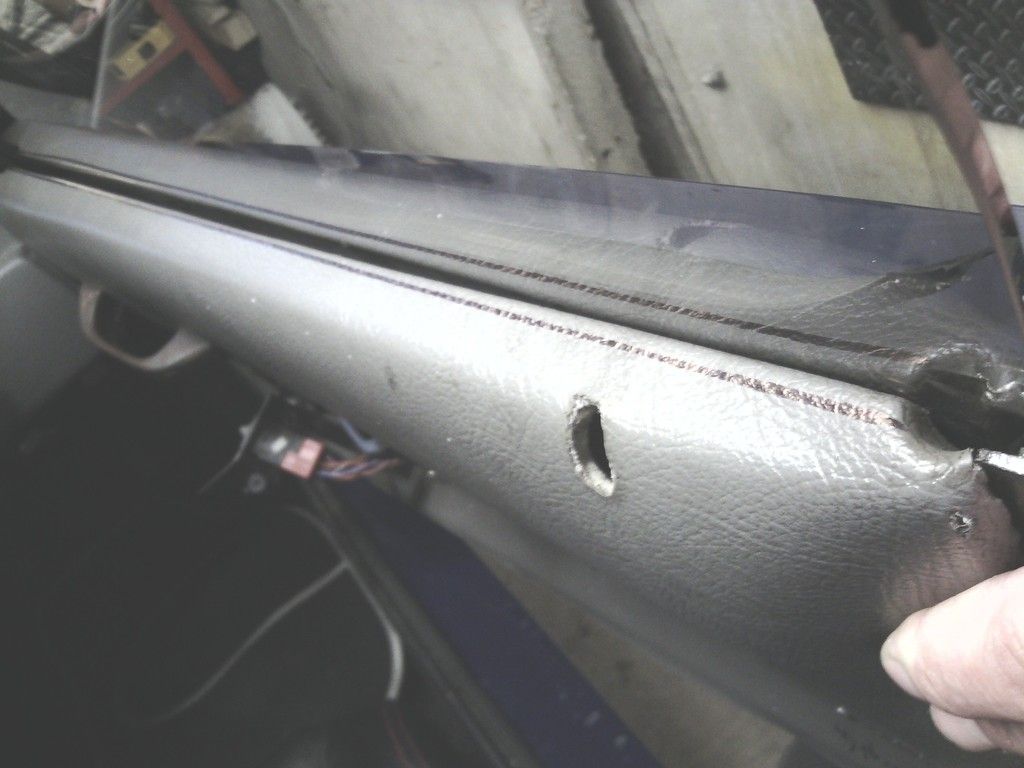
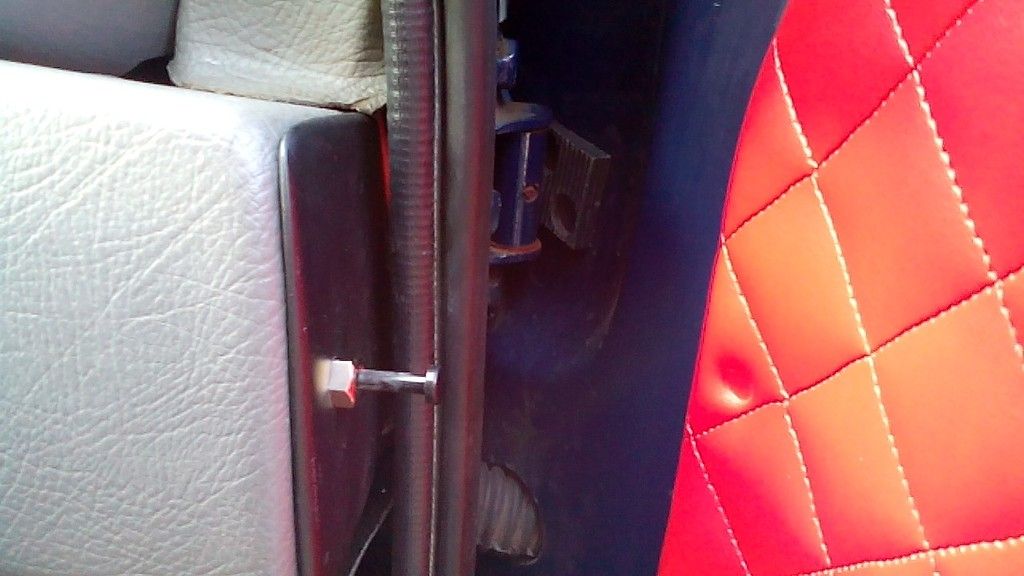
finding a good location for the door switches was a bit of a headache, I didn’t want to drill the A pillar to allow another route for leaks, drilling the doors would be equally tricky an maybe not successful due to the profiled shape of the A pillar the switch would have to bear against as its stepped and could cause the switch prong to snap, in the end I went against convention and added them inside the door line on the ends of the dashboard sides, these have the added bonus of holding the end caps on as opposed to them being glued on as before – handy since I’ll be removing these soon to trim the dash, you can’t see them with the doors closed either – job done.
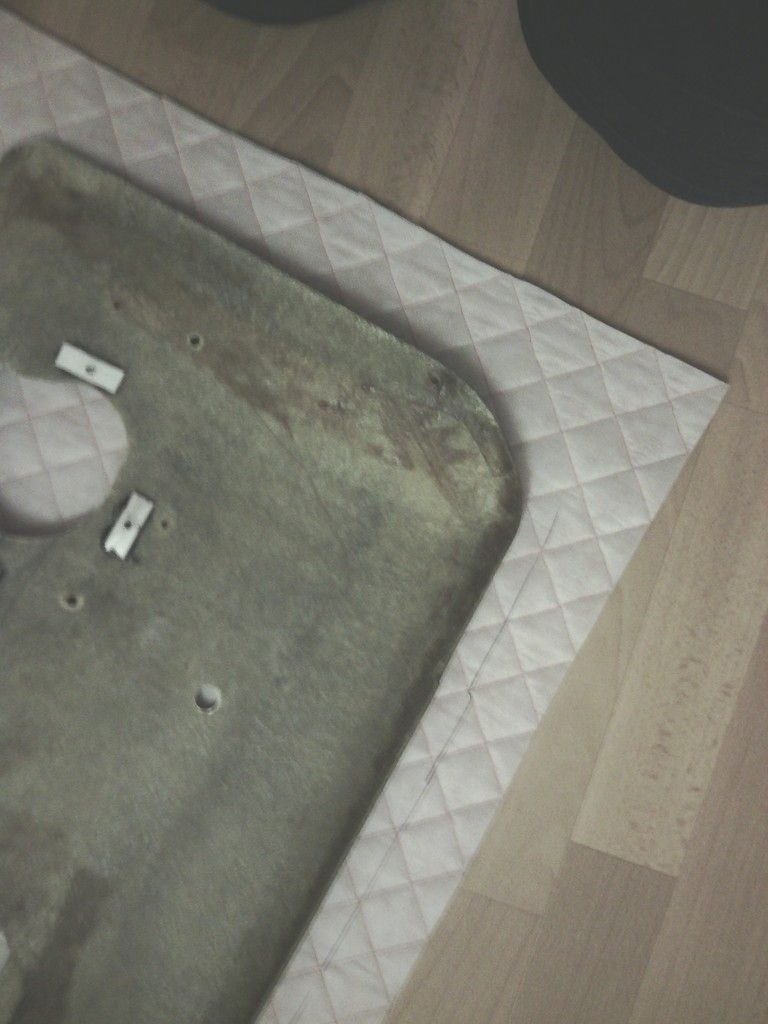
I’ve even made the rear panels, the originals were just carpeted and glued on, I didn’t want to do this as its seems a bit of a short cut, so with all the rear stripped-down I made the first template
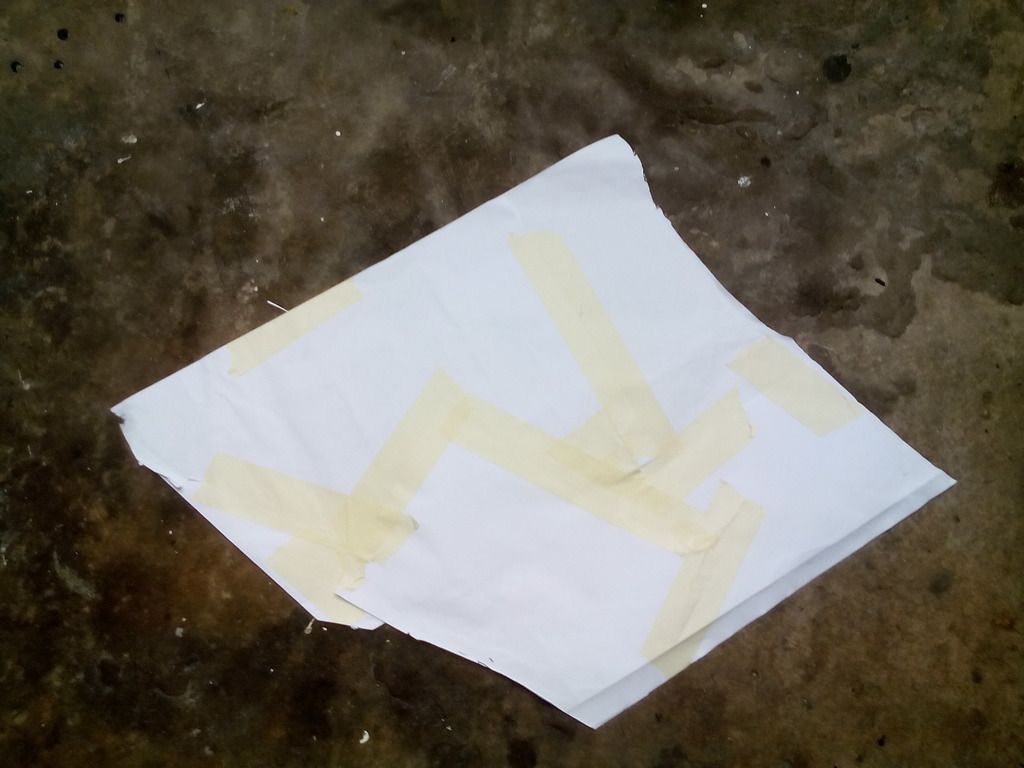
And the first panel
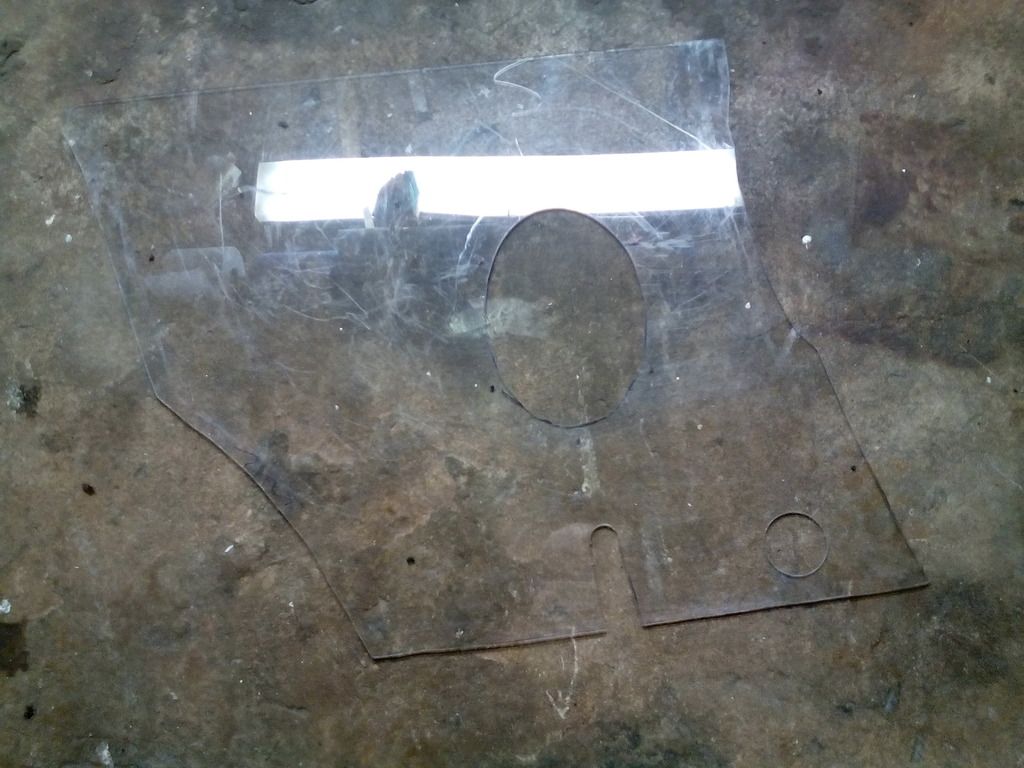
, I chose the thinnest sheet I could get while still retaining strength, this was due to the small nature of the car anyway and every mm would count. I chose clear polycarbonate because is strong, wont rot or wear but the big bonus with it being clear is it makes marking out the fixings behind such as the speaker holes (which incidentally will be used to fix the panel to the car) and seatbelt mounts a doddle,
Both are made now and ready for covering, more to come soon…..
Firstly let me apologise for such a delay in reporting, I’ve not been slacking just very busy but mostly on the car which is no real bad thing.
I left off last time having almost finished the fitting and trimming of the door cards which I’m happy to report now fit perfectly, while on to the fitting, I did mention the intention to utilise the lower speaker bolt to secure the door card to the alloy frame I made inside the door, the 3 remaining speaker bolt holes had tapped M5 threaded plates bonded on

And the lower one fitted up and worked a treat

I also mentioned the LED interior lights that would also act as a securing point for the lower middle section of the door card; these were wired in with some nifty JST connectors

The 2 mounting holes for these also fit into the inner alloy frame I made inside the door
These 2 improvements now mean the door card sits nice and tight to the door and there are no visible fixings holding the door cards on at all.
With all the fitting done it was time for trimming, I pondered this for ages, strong contenders were white, cream , tan and even light blue,
I certainly didn’t want dull grey or black, but in the end I kept coming back to red in my head, helped in part by the red stitching on the seats too, I got loads of samples to look through.

And I’m glad I did because the quality varied widely, I had decided from the outset I wanted foam backed vinyl because it would hide imperfections and help fill in the gaps around the fittings, one of my gripes with the original door cards was the wonky nature around the edges and gaps around the handles, the padding will also add to the quality feel.
I couldn’t find a red I liked easily, some were too dark with an antique look to them, some were salmon pink in some lights, and it was risky that plain red by itself may seem a bit much, but working with the diamond stitching on the seats I thought I’d follow that through to the door cards also, so a few meters of diamond stitched vinyl on a 3mm backing was ordered

And I set to work


Bonding this stuff is a bit of a pain since it’s not foam backing that’s bonded on it’s a stitched on wadding which delaminates itself as you glue it, I got through a fair bit of evostik in the process but the result was worth the effort


The speakers didn’t fit flush to the door card due to the steel frame inside so I bought some mdf 30mm spacers and covered them in nice stretchy vinyl

The result is better than I imagined, the illumination from the led lights is amazing too, with those and the mirror lights the car is very well lit up now – a far cry from no illumination at all when I bought it,
finding a good location for the door switches was a bit of a headache, I didn’t want to drill the A pillar to allow another route for leaks, drilling the doors would be equally tricky an maybe not successful due to the profiled shape of the A pillar the switch would have to bear against as its stepped and could cause the switch prong to snap, in the end I went against convention and added them inside the door line on the ends of the dashboard sides, these have the added bonus of holding the end caps on as opposed to them being glued on as before – handy since I’ll be removing these soon to trim the dash, you can’t see them with the doors closed either – job done.

I’ve even made the rear panels, the originals were just carpeted and glued on, I didn’t want to do this as its seems a bit of a short cut, so with all the rear stripped-down I made the first template

And the first panel

, I chose the thinnest sheet I could get while still retaining strength, this was due to the small nature of the car anyway and every mm would count. I chose clear polycarbonate because is strong, wont rot or wear but the big bonus with it being clear is it makes marking out the fixings behind such as the speaker holes (which incidentally will be used to fix the panel to the car) and seatbelt mounts a doddle,
Both are made now and ready for covering, more to come soon…..
https://easywider.co.uk/ universal flexible wheel arch extensions
- Jin
- Posts: 454
- Joined: Fri Aug 01, 2014 10:33 pm
Re: J171 NJO Cortez / 2+2 rebuild and modifications
![]() by Jin » Thu Sep 17, 2015 8:06 pm
by Jin » Thu Sep 17, 2015 8:06 pm

pair of brand spanking head lights for less than 30 quid delivered
https://easywider.co.uk/ universal flexible wheel arch extensions
- Jin
- Posts: 454
- Joined: Fri Aug 01, 2014 10:33 pm
Re: J171 NJO Cortez / 2+2 rebuild and modifications
![]() by Hans Efde » Thu Sep 17, 2015 8:57 pm
by Hans Efde » Thu Sep 17, 2015 8:57 pm
Great progress, no doubt food for thought for many other improvers. I saw you tapping new holes for the doorcards. I forgot to mention that in case of the Gold the doorcard has to be mounted under stress to keep the door in shape with the body. The trick is to bend the lower edge of the door inwards, then locate the holes for the doorcards and drill. When the doorcards are in place they pull the lower edge of the doors inwards, compensating for the outwards force of the door rubbers. Without prestressed doors they will stick out. I don't know if that is necessary for the Cortez but maybe something to keep in mind if you have trouble with sticking out doors.
-

Hans Efde - Posts: 1732
- Joined: Sat Dec 06, 2008 10:11 pm
- Location: IJlst, Netherlands
Re: J171 NJO Cortez / 2+2 rebuild and modifications
![]() by ACourtney » Fri Sep 18, 2015 9:34 am
by ACourtney » Fri Sep 18, 2015 9:34 am
On the later cars, with steel door frames, the door frame can be used to adjust the door shape. Jin's car was GTM's original demonstrator and the door frames look a bit "prototype" judging from the photos showing bits of steel bridging corners, so they may not have all the brackets on that I now fit.
On my current door frame design there is a bracket at the bottom of the rear upright (glass channel) that sits just behind the lower lip of the door moulding and allows you to push, or pull, the bottom of the door in, or out. If you so have an issue then I'd be happy to post up a photo, but I don't remember that your door stuck out particularly, when I saw it at Stoneleigh, so you may already have the bracket and packers in place.
On my current door frame design there is a bracket at the bottom of the rear upright (glass channel) that sits just behind the lower lip of the door moulding and allows you to push, or pull, the bottom of the door in, or out. If you so have an issue then I'd be happy to post up a photo, but I don't remember that your door stuck out particularly, when I saw it at Stoneleigh, so you may already have the bracket and packers in place.
-

ACourtney - Posts: 488
- Joined: Thu Dec 04, 2008 12:22 pm
- Location: Oxford
Re: J171 NJO Cortez / 2+2 rebuild and modifications
![]() by Jin » Fri Sep 18, 2015 11:39 am
by Jin » Fri Sep 18, 2015 11:39 am
ACourtney wrote:Jin's car was GTM's original demonstrator and the door frames look a bit "prototype" judging from the photos showing bits of steel bridging corners, so they may not have all the brackets on that I now fit.
you’re not kidding buddy
i tackled all that back here totally rebuilding everything and making new parts to suit
viewtopic.php?f=14&t=2178&start=50
as for my door cards, they have been manipulated to fit flush around the periphery and just pulled in enough by the handle / speaker / light fixing bolts and so far all is well.
the other method you mention sounds like the Quantum where the outer door shell is held square by bonding on a flat inner panel that sits just behind the aesthetic door card, the manual states to twist the door shell to shape then drill and bond the inner panel to make a single box structure - clever enough but with no steel in the doors the fixing especially the window mechs flex quite a bit, im happy to report the Midas units close with a satisfying "clonk" - not quite like a Golf but maybe a late 80s Audi
https://easywider.co.uk/ universal flexible wheel arch extensions
- Jin
- Posts: 454
- Joined: Fri Aug 01, 2014 10:33 pm
Re: J171 NJO Cortez / 2+2 rebuild and modifications
![]() by cortezkeeper » Fri Sep 18, 2015 3:34 pm
by cortezkeeper » Fri Sep 18, 2015 3:34 pm
Sunroof. Alistair is correct re the sunroof - our white Cortez has one fitted from new with no problems whatsoever. As I recall (so don't take my geriatric word for it !) the sunroof was from the then-current Fiesta, which means the model from 10 or so years ago. All being well, the car will be on the Midas O C stand at the November Shepton Mallett Resto show, so please come and have a look.
Michael.
Michael.
- cortezkeeper
- Posts: 151
- Joined: Sat Dec 06, 2008 4:35 pm
Re: J171 NJO Cortez / 2+2 rebuild and modifications
![]() by Jin » Fri Sep 18, 2015 3:57 pm
by Jin » Fri Sep 18, 2015 3:57 pm
cortezkeeper wrote:Sunroof. Alistair is correct re the sunroof - our white Cortez has one fitted from new with no problems whatsoever. As I recall (so don't take my geriatric word for it !) the sunroof was from the then-current Fiesta, which means the model from 10 or so years ago. All being well, the car will be on the Midas O C stand at the November Shepton Mallett Resto show, so please come and have a look.
Michael.
ive done some reaserch on your sunroof since i swa it at stonleigh, its actually a britax / webasto 100 model , it took a fair while to find that out which explains why it fits a kit car so well.
compare the square plastic fixing covers, none of the fiestas had those which has been confirmed by the fiesta OC
http://www.webasto.com/fr-ch/produits-m ... basculant/
good because i now what its from, bad because the chance of finding one in a scrappy is nil
- Attachments
-
- IMG_20150503_153545.jpg (478.16 KiB) Viewed 26395 times
https://easywider.co.uk/ universal flexible wheel arch extensions
- Jin
- Posts: 454
- Joined: Fri Aug 01, 2014 10:33 pm
Re: J171 NJO Cortez / 2+2 rebuild and modifications
![]() by Jin » Sun Sep 20, 2015 11:33 pm
by Jin » Sun Sep 20, 2015 11:33 pm
More progress.
Both rear panels made and covered, which was no easy task since to minimise thickness I had to trim back the padding on the return edge all round
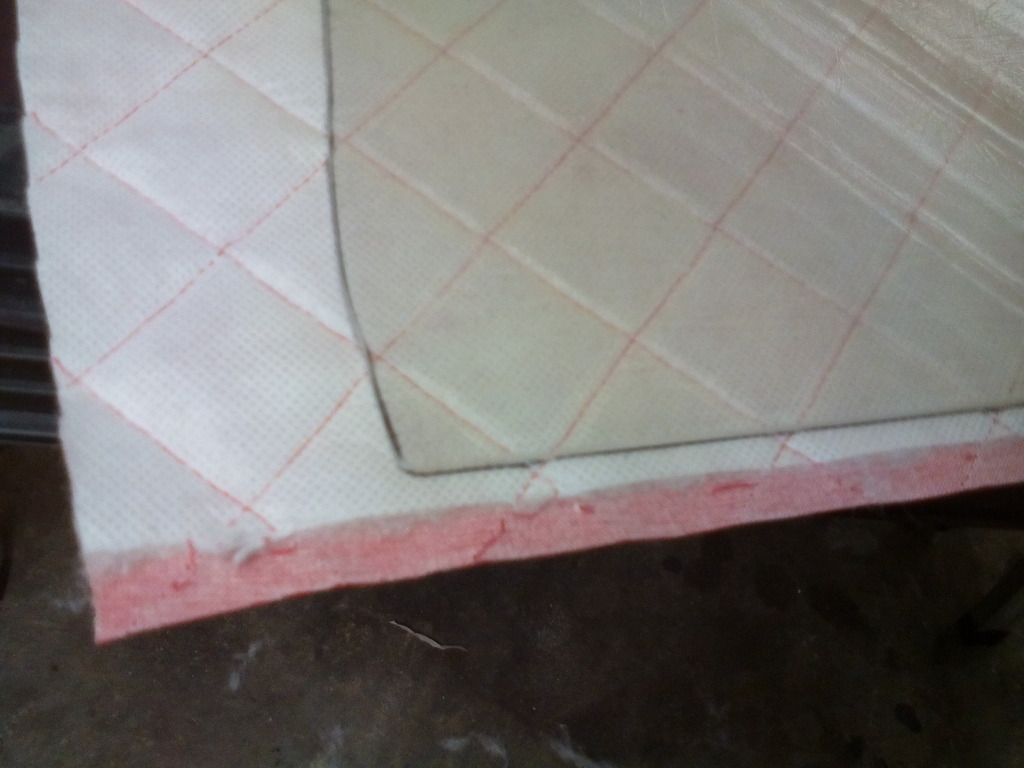
Then each run of stitching had to be sealed with a dab of superglue to stop it fraying - took forever
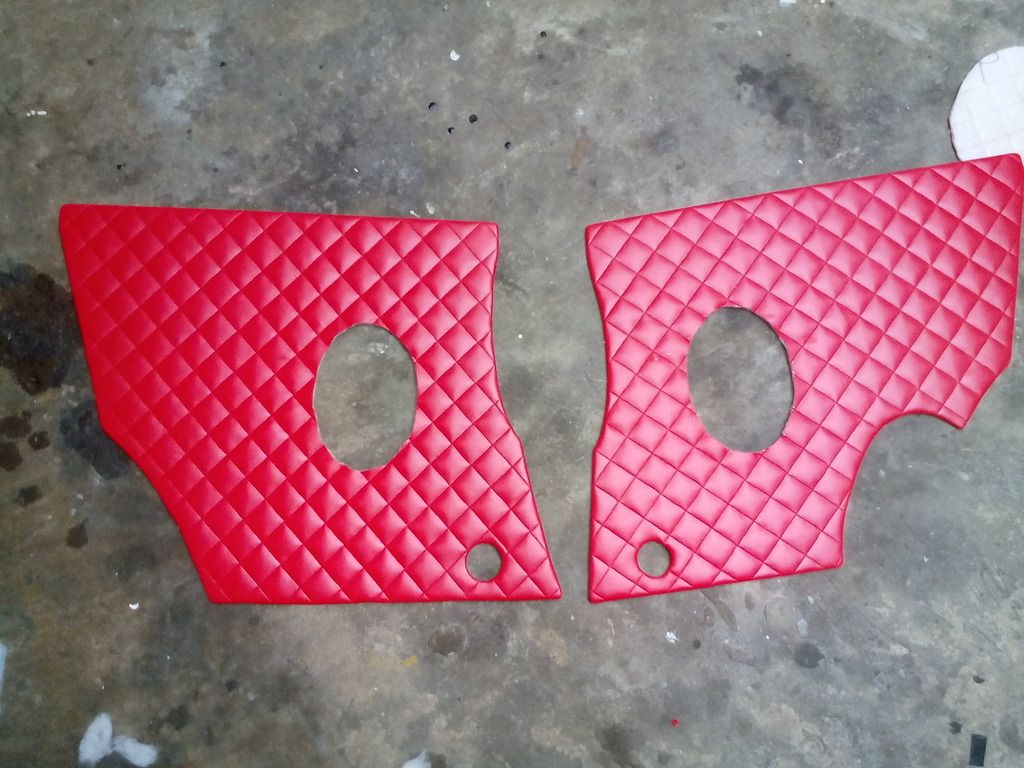
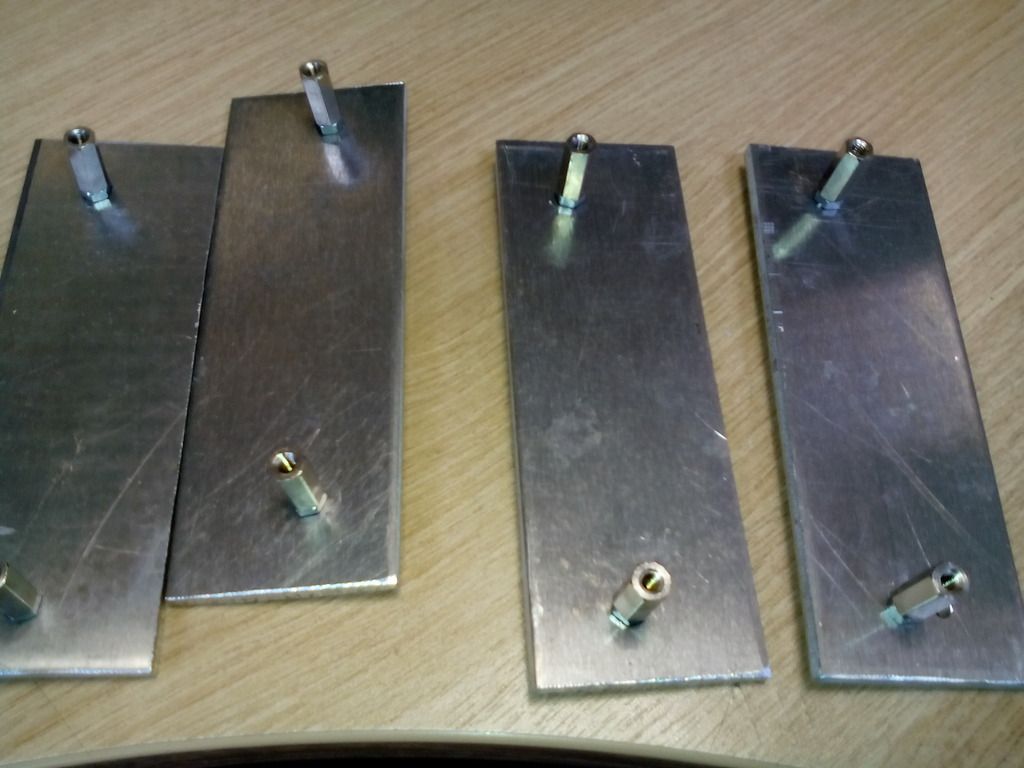
I made some substantial brackets for the speakers which will ultimately be holding the panels on.
All done I got round to the initial fitting
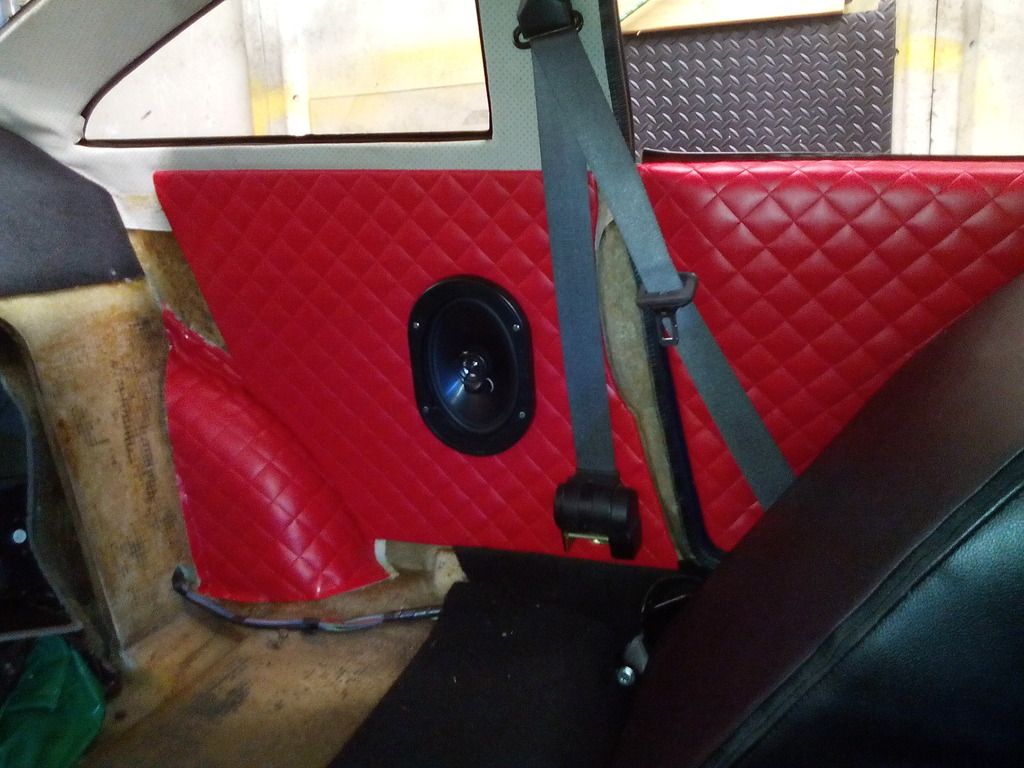
Other side to do plus some extra trimming but alls going to plan, I've ordered another pair of led lights too to aid lighting and further secure the rear of each panel.
Both rear panels made and covered, which was no easy task since to minimise thickness I had to trim back the padding on the return edge all round

Then each run of stitching had to be sealed with a dab of superglue to stop it fraying - took forever

I made some substantial brackets for the speakers which will ultimately be holding the panels on.

All done I got round to the initial fitting

Other side to do plus some extra trimming but alls going to plan, I've ordered another pair of led lights too to aid lighting and further secure the rear of each panel.
https://easywider.co.uk/ universal flexible wheel arch extensions
- Jin
- Posts: 454
- Joined: Fri Aug 01, 2014 10:33 pm
Return to Complete Midas rebuild
Who is online
Users browsing this forum: Google [Bot] and 12 guests