Midas Cars Forum - www.midascarsforum.com
This forum is for Midas and Midtec Bronze enthusiasts. The Midas is a British car designed as a replacement for the Mini Marcos.
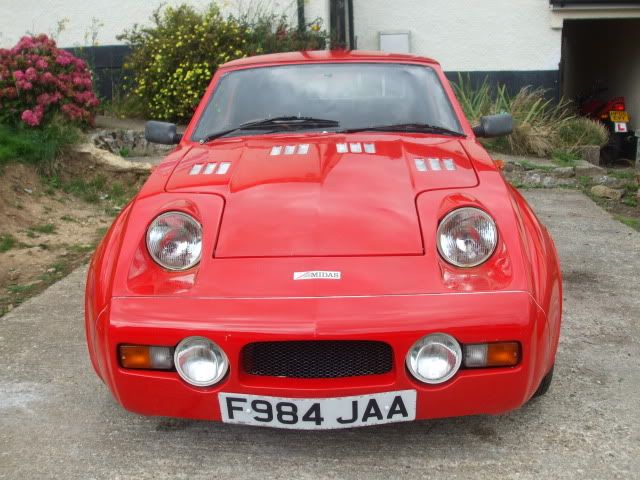
Mk 1 Project Zippy. Looking Like a Car.
Moderator: The Midas Forum Staff
Re: Mk 1 Project Zippy (Picture Heavy!)
![]() by Rich » Mon Apr 11, 2016 9:16 am
by Rich » Mon Apr 11, 2016 9:16 am
While you've got it in bits I'd be very tempted to swap what look like standard rebound rubbers for silicone ones, they aren't expensive and don't fall apart in minutes like the originals.
-
Rich - Posts: 1285
- Joined: Wed Dec 03, 2008 1:27 am
- Location: Devon
Re: Mk 1 Project Zippy
![]() by MrBounce » Wed May 04, 2016 4:53 pm
by MrBounce » Wed May 04, 2016 4:53 pm
It appears I have had a massive upturn in fortune. I have been a bit down and disheartened due to my inability to get the captive bolts for the right front shock mount in place. It's very possibly the most inaccessible place on a Mk1 as the only way to get to it is though the big bolt hole for the subframe on the crossmember. In theory you can cut a hole under the dash and go in through there, but I really didn't want to cut the car about. I went into the garage today with a "Never-say-die" attitude, full of intentions to make the thing fit.
I decided to grind some of the excess metal away on the bolt plate (I thought that it was snagging on the edges), taking all the corners off using the Dremel. It still wouldn't play ball, so I did some more "adjustments". After 2 1/4 hours' of patiently fiddling about in a dark hole, it suddenly slotted into place. I quickly jammed a screwdriver down there to stop the plate moving back, put the shock mount in place and nipped up the nuts. FINALLY I had SUCCESS! And if anyone thinks I'm taking it off, you can forget it!!
There were a couple of other little things I completed today which thankfully didn't need anything like the effort required for the shock mount. I had no holes for the windscreen washers and no windscreen washers themselves. I secured a couple from eBay for buttons and drilled holes for them, having taken careful measurements (the original holes had been filled in as a) I wasn't sure what type I'd be using and b) I don't like the original Mini ones. The final thing I did was to pop the captive bolts in for the throttle pedal. Thankfully I could see what I was doing for this one...
Windscreen washer. These will be taken out before I spray the final coats.

Captive nut plate for the throttle pedal now in place. Will be hidden behind subframe tower.

You have no idea how happy I am to see those nuts done up... SHOCK MOUNT IS ON!!!

- MrBounce
- Posts: 661
- Joined: Mon May 16, 2011 9:16 pm
- Location: Suffolk
Re: Mk 1 Project Zippy (Picture Heavy!)
![]() by MrBounce » Thu May 05, 2016 10:55 pm
by MrBounce » Thu May 05, 2016 10:55 pm
Back in the Manroom again today and it was time to re-do a job. This is something I hate doing, especially as it was out of my control, but also (kind of) my own doing. When I renewed the rear wheel bearings, I used budget bearings, and when the time came to torque up the hub nut, they hubs locked solid. So I have knocked out the bearings and races to await the new Timken bearings that are on their way. Am not happy. I should have saved for the Timkens in the first place...
I have started to tart a few bits up on the rear hatch, namely the lock surround and hatch handle as well as the roundels that sit on the glass where the gas struts attach. To get the lock and handle off, I first undid the bolt that holds on the lever arm to the lock, then slid out the lock mechanism. Then I undid the 1" nut which holds the lock surround on and took it off. Some wet & dry later, it was ready to be primed. I followed this up with removing the bolts/lugs for the struts from the roundels, and cleaned both the lugs and the roundels. Out came the primer, and once that was dry, I hit it all with some satin black.
Finally, my friend gave me a number plate light he had no use for. This was perfect for the Midas other than it was chrome. So once again it was sanded, primed and given a coat of satin black. I measured carefully and then drilled pilot holes for the screws to hold it in place. I fitted it for posterity - it'll come off when I repaint the car but hey - it looks good!
Rubbish bearings removed. Timkens to follow.

Large nut holding on hatch handle & lock surround.

Primed surround and handle...

- MrBounce
- Posts: 661
- Joined: Mon May 16, 2011 9:16 pm
- Location: Suffolk
Re: Mk 1 Project Zippy (Picture Heavy!)
![]() by MrBounce » Thu May 05, 2016 10:55 pm
by MrBounce » Thu May 05, 2016 10:55 pm
...and also a lick of the grey stuff for the roundels.

A coat of satin black for the hatch handle & lock surround...

...and also the roundels and lugs.


A coat of satin black for the hatch handle & lock surround...

...and also the roundels and lugs.

- MrBounce
- Posts: 661
- Joined: Mon May 16, 2011 9:16 pm
- Location: Suffolk
Re: Mk 1 Project Zippy (Picture Heavy!)
![]() by MrBounce » Thu May 05, 2016 10:56 pm
by MrBounce » Thu May 05, 2016 10:56 pm
And I am super-pleased with the number plate light. Looks great!


- MrBounce
- Posts: 661
- Joined: Mon May 16, 2011 9:16 pm
- Location: Suffolk
Re: Mk 1 Project Zippy (Picture Heavy!)
![]() by Geoff Butcher » Fri May 06, 2016 8:07 pm
by Geoff Butcher » Fri May 06, 2016 8:07 pm
I've always found that if you tighten the rear hub bearings according to the manual they won't turn. I just nip them up to take out the play and they seem quite happy.
Geoff
-

Geoff Butcher - Posts: 752
- Joined: Fri Dec 05, 2008 9:10 pm
- Location: Braintree
Re: Mk 1 Project Zippy (Picture Heavy!)
![]() by ACourtney » Sat May 07, 2016 8:13 am
by ACourtney » Sat May 07, 2016 8:13 am
Geoff Butcher wrote:I've always found that if you tighten the rear hub bearings according to the manual they won't turn. I just nip them up to take out the play and they seem quite happy.
There are two techniques for tightening tapered roller bearings that I know of:
The first one, I was taught long ago, is to tighten them up to the specified torque and then back off completely, before nipping them up again to take out the play, whilst making sure that the bearings turn freely. The idea being that the initial torque will ensure that the races are seated properly, but the torque figure is low enough that the race and roller faces aren't damaged. I've often wondered whether this was meant to be in the manual, but some over-zealous editor cut it down to "tighten the nut to the specified torque" leaving out the important bit!
The second technique is simply to tighten them up whilst turning the hub and to stop tightening the moment you feel any binding in the bearing. Then turn the nut back by at least one flat (1/6 of a turn), taking it back far enough to put the split pin in. It is this technique that Timken recommend: http://www.timken.co.uk/.../Vol2Iss1_Pr ... _English(1).pdf
-

ACourtney - Posts: 488
- Joined: Thu Dec 04, 2008 12:22 pm
- Location: Oxford
Re: Mk 1 Project Zippy (Picture Heavy!)
![]() by kelvink » Sat May 07, 2016 1:39 pm
by kelvink » Sat May 07, 2016 1:39 pm
Can't remember where I got it from but I'm sure it was a manual somewhere or other back in the day when I used to follow them but I also use the second method Alistair's given above.
Think about it as there's a castellated nut with a split pin so it's always going to be non specific torque when fitted as the hole's will only line up at the castellated points and obviously it's not good to have things tightened up so much that the races are distorted to the point that the bearings are jammed.
Think about it as there's a castellated nut with a split pin so it's always going to be non specific torque when fitted as the hole's will only line up at the castellated points and obviously it's not good to have things tightened up so much that the races are distorted to the point that the bearings are jammed.
-

kelvink - Posts: 636
- Joined: Wed Jun 20, 2012 8:12 am
- Location: Dorset
Re: Mk 1 Project Zippy (Picture Heavy!)
![]() by MrBounce » Sat May 07, 2016 7:39 pm
by MrBounce » Sat May 07, 2016 7:39 pm
Muchos gracias Gentlemen 
Today has been a long day. I have spent close to 6 hours in the blazing sunshine. However, I wasn't lazing about - I was sorting the shell, doors and bonnet ready for some more paint. Having left the bodywork for 8 months after my painting mishap (LOTS of runs due to making the paint mixture too runny - all operator error!) it was in dire need of sorting out. All the blemishes have been looked at, filled, sanded, cleaned etc. This car will never have a perfect paint job, but then I don't have a few thousand to fling at it so someone else in a bodyshop can charge me £75+ an hour.
I first of all took out as many of the runs as I could find (which took FOREVER!) then filled all the little nicks that had occurred when brushing past it/dropping things onto it/accidentally pushing it into stuff. I then hit the whole thing with 600-grit so it's smooth-ish but the new paint will have a key to adhere to.
Tomorrow I will clear out the garage, put up plastic sheeting, re-mask the car and use Shaun's compressor that I have just borrowed. Watch this space...
Bodyshell after sanding out the runs.

A few minor imperfections in the doors...

...and the bonnet.

- MrBounce
- Posts: 661
- Joined: Mon May 16, 2011 9:16 pm
- Location: Suffolk
Re: Mk 1 Project Zippy (Picture Heavy!)
![]() by MrBounce » Sat May 07, 2016 7:39 pm
by MrBounce » Sat May 07, 2016 7:39 pm
All sanded and primed ready for more colour.


- MrBounce
- Posts: 661
- Joined: Mon May 16, 2011 9:16 pm
- Location: Suffolk
Return to Complete Midas rebuild
Who is online
Users browsing this forum: No registered users and 47 guests