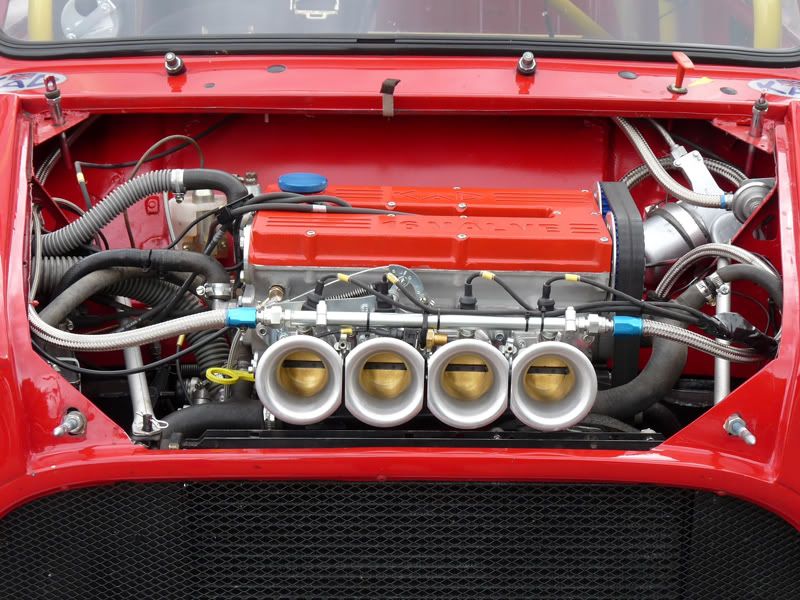
Mk 1 Project Zippy. Looking Like a Car.

If you're taking on the task of rebuilding the whole Midas, please put the project in here.

Moderator: The Midas Forum Staff

Re: Mk 1 Project Zippy (Picture Heavy!)

Postby DavidL » Thu May 02, 2013 1:25 am

Rich wrote:I think by the time you've got a surface you'll have had plenty of practice!

I take it these bumpers were filled with foam to provide a bit more protection? Or is the foam in yours an owner addition?

My 1985 Bronze had foam filled bumpers as standard.
User avatar
DavidL
 
Posts: 865
Joined: Tue Mar 01, 2011 10:15 pm
Location: Tayport, Fife

Re: Mk 1 Project Zippy (Picture Heavy!)

Postby manifold » Fri May 03, 2013 10:50 am

Foam filled bumpers. Great idea let down by water retention problems (think sponge) and poor UV properties. Result is blistered paint (if you respray it) due to osmosis.
Midas Cars Forum Founder & Midas Facebook Group Page Founder (personal facebook account deactivated)

Midas Gold Convertible: 1380

Midas Gold Coupe: 1380
User avatar
manifold
 
Posts: 1787
Joined: Tue Dec 02, 2008 7:34 pm
Location: Lancaster, Lancashire

Re: Mk 1 Project Zippy (Picture Heavy!)

Postby MrBounce » Fri May 03, 2013 3:58 pm

Any suggestions for an alternative? Was goig to re-do them using builders' expanding foam but now not so sure... :?
MrBounce
 
Posts: 661
Joined: Mon May 16, 2011 9:16 pm
Location: Suffolk

Re: Mk 1 Project Zippy (Picture Heavy!)

Postby Hans Efde » Sat May 04, 2013 11:14 am

MrBounce wrote:Any suggestions for an alternative? Was goig to re-do them using builders' expanding foam but now not so sure... :?


I don't think it really matters when you have a big bang in a Midas. The monocoque is strong enough to take the punishment. I would leave them empty (as are my present GTM bumpers). Also easier for repair (mine is full of small cracks because the previous owner slid of the road and hit a pole).
User avatar
Hans Efde
 
Posts: 1732
Joined: Sat Dec 06, 2008 10:11 pm
Location: IJlst, Netherlands

Re: Mk 1 Project Zippy (Picture Heavy!)

Postby Geoff Butcher » Sat May 04, 2013 8:02 pm

Hans Efde wrote:
the previous owner slid of the road and hit a pole).


Easily done, there are no end of them where I live. They even have their own shelves in Tesco... :mrgreen:
Geoff
User avatar
Geoff Butcher
 
Posts: 751
Joined: Fri Dec 05, 2008 9:10 pm
Location: Braintree

Re: Mk 1 Project Zippy (Picture Heavy!)

Postby MrBounce » Sun May 12, 2013 5:22 pm

The bumpers are almost finished. I say that, there's still a bit of sanding left to do prior to paint, but not much. The rear bumper cleaned up quite nicely and only needed the tiniest of skims of filler for the very occasional bit I had missed with the P40. Just 180 grit sanding & it should be ready for the next stage: fitting them to the car. I will need to make up some brackets first. I have taken advice and will not be filling the bumpers with foam.

The front bumper was a little more involved, mainly due to the large amount of sanding I had to do, but now I am just waiting for the final filler skim to dry before finishing it off prior to bracket fitting. I need access to a welder for this and that won't be for 4 weeks thanks to holidays!

I have also run out of fibreglass resin - I took the time to fill in the hole where the old remote style gear linkage sat. I stuffed the hole with various rags around a bottle then used a cardboard template (made from a Jaffa Cake box of course) which I covered with tape as a release agent, then laid the fibrgelass & resin over the top. It's not perfect, but it will do for now until I can finish it off. I made a start on covering the various holes in the bulkhead as well. There are so many of them (some of them terrifyingly bad) that I thought it'd be a good idea to blank off everything and start again from scratch. That will make it a lot tidier!

Rear bumper pretty much done

Image

Front one in progress - final skim done but not sanded

Image

Card in place ready for fibreglassing

Image
MrBounce
 
Posts: 661
Joined: Mon May 16, 2011 9:16 pm
Location: Suffolk

Re: Mk 1 Project Zippy (Picture Heavy!)

Postby MrBounce » Sun May 12, 2013 5:23 pm

Glassed in (still more to do)

Image

Bulkhead coming on before I ran out of resin...

Image
MrBounce
 
Posts: 661
Joined: Mon May 16, 2011 9:16 pm
Location: Suffolk

Re: Mk 1 Project Zippy (Picture Heavy!)

Postby DavidL » Sun May 12, 2013 6:19 pm

I'm intruiged - how will you change gear? Is it an automatic?

Also, I remember my Bronze didn't have any brackets to connect the bumpers to the body; the rear was only attached by one selftapper at each end, and the fronts (mine had the split bumpers) had two more selftappers each - I'd think Midas would probably have used one at each end of the one piece front bumper.
User avatar
DavidL
 
Posts: 865
Joined: Tue Mar 01, 2011 10:15 pm
Location: Tayport, Fife

Re: Mk 1 Project Zippy (Picture Heavy!)

Postby MrBounce » Sun May 12, 2013 6:29 pm

I will be cutting a new hole once I have figured the best place to site the lever. The old powerplant was a Cooper S engine with remote box & a bent gearlever (long gone before I got it!). I will be extending the standard Mini gear linkage rods as per Midas did so the gear lever is in the right place.

As for the bumpers, at the front they were held in place by 2 wood screws through the bumpers and into the bodywork. The rears had two screws through the body from the inside into the foam that was in the rear. It's a rubbish set-up (probabaly not factory - I hope!) so I will be making brackets with captive nuts, attaching them to the bumpers then bolting from the inside of the bodywork so no bolts or screws will show on the outside. :)
MrBounce
 
Posts: 661
Joined: Mon May 16, 2011 9:16 pm
Location: Suffolk

Re: Mk 1 Project Zippy (Picture Heavy!)

Postby DavidL » Sun May 12, 2013 6:58 pm

Ah, thanks. Although my other half might be tempted by an auto Midas, I have no wish to encourage her... :)

The bumpers on my Bronze had selftappers about an inch from each end, but inserted from the outside, through the bumper, into the body. However, there were recesses moulded into the bumper so the screws were actually inset. I suppose if the earlier Mark 1 didn't have the recesses, then the screws would need to go out from the inside, but I wouldn't think they'd try to use the foam as an anchor - there would probably have been a part of the bumper which was thick enough to be "selftapped" to hold it on.
User avatar
DavidL
 
Posts: 865
Joined: Tue Mar 01, 2011 10:15 pm
Location: Tayport, Fife

PreviousNext

Return to Complete Midas rebuild

Who is online

Users browsing this forum: No registered users and 16 guests